Edited for NOT go through. He said on one end of the doubler holes matched, but the other end did not match. Not clear if it is progressively offset along the length. I suggested using a drill bit solid end to roughly quantify the offset. The second spar was just fine. L/R not specified.Would go through…… or wouldn’t go through?
I checked my spars, and I have the same problem. It almost seems to me that the doubler didn't have clecos on one side during riveting. The misalignment on one of my spars is small, and I can pry the holes with some difficulty to be able to put LP4-3 rivets in them. But the misalignment on the second spar is much bigger and I can't pry it into place. The holes seem to be the correct diameter though.I just checked both of my spars. I can't get an LP4-3 rivet through any of the holes where the doubler is installed. On the shorter piece of the spar, it looks like the holes are visibly smaller than a regular size 30 hole. I can get a size #30 drill bit through the longer spar piece, but the shorter piece(the one with the doubler), I have to step down to a #31 drill bit to get through. I'm calling Van's in the morning, but has anyone reamed the spar to get rivets installed on the -15? If nobody else has done this, I don't plan on being the first.
I consider reaming holes to be acceptable when the fastener will be a standard aluminum rivet because it does a fairly good job of entirely filling an irregular shaped hole.To answer questions about whether anyone has reamed the rivet holes on these 15 spars: Yes I have.
This is the 8th RV I have built. There have always been instances on every one when I had to ream a rivet hole to get a rivet to fit. What exactly does anyone think will happen to those rivet holes if you do have to ream them to get a rivet to fit? You should absolutely get advice from Vans on this concern, but I pretty much know what they will say.
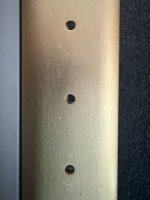
Seems pretty clear in the KAI…I'm not sure exactly where you are describing but the KAI's do call for reaming some holes during the skin riveting process. Step # 2 below.
View attachment 121178

Nothing yet. I've pinged them once already.Any replies back from Vans on this issue?
Sorry, I had been excommunicated from VAF and only recently reinstated. I posted a lot more detail on the RV-15 forum of FB, but I'll summarize here.Any replies back from Vans on this issue?
The good news is we both caught this before assembling a majority of the wing.I'm another -15 builder with the same hole misalign issue who reported the issue last week with detailed videos who is still waiting for a response.
The misalignment on my spar absolutely would.Is the misalignment enough to prevent clecoes from going in?