DeltaRomeo

doug reeves: unfluencer
Staff member
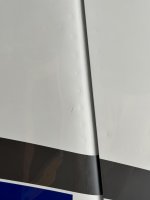
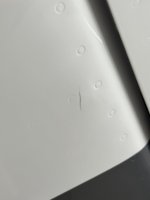
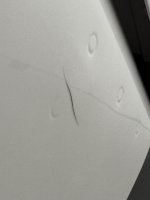
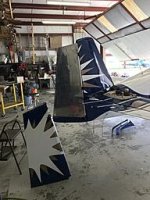
Cracks in the -6 rudder I fly ('96 era skin that is now thicker). Stop-drilled and covered with electrical tape 21 years ago. Monitored every so often. I have a new rudder, but it's been sitting on the shelf for ten years. I keep monitoring and flying.
v/r,dr


Last edited:
Looks list like mine. After 15 years a few months ago I finally completed the new 0.020” skin one I had on the shelf. I had some time and got itchy to drive some rivets so decided to replace. Now I just need to paint.
 

Attachments

  • IMG_3899.jpeg
    IMG_3899.jpeg
    28.2 KB · Views: 568
Last edited:
No pictures, but I stop drilled 2 places on each side of the rudder, at the forward ends of the stiffeners. I did this at around a few hundred hours. No tape, no further progress of the cracks through the holes at 1840 hours. It's become a badge of honor.
 
No pictures. I stop drilled two cracks around 350-hours. No tape used.

About 3,100 hours later, I finally replaced the rudder with one that was given to me by a friend about 20-years earlier.
 
After 23 years of watching the cracks at the forwardmost stiffener rivets on the right side of my RV-6 rudder, I decided to pull the trigger and rebuild it with the newer 0.020" skin. I have no doubt the cracks would never get worse since they have been stable for two decades without stop drilling. But if the plane is ever put on the market the cracked rudder skin would probably be a deal breaker. Time to fix it.

I ordered new skin, spar and tip ribs. I had stock on hand with which to make new stiffeners. This time I made the stiffeners long enough to form a tab on the forward end that could be bent 90* and attached to the spar with a pulled rivet. This eliminated the flexing of the skin at the spar which caused the cracks 23 years ago.

I used the old spar as a template for drilling all the holes needed in the new un-prepunched one and careful drilled out the rivets on the old rudder horn and associated bracing and the fiberglass tips. The only hassle in the rebuild was forming the leading edge.

The parts I ordered are common to the RV-4 rudder and Vans had them in stock for prompt shipment.
 
-8 too...

Unfortunately, I had a crack show up shortly after the aircraft was painted -- it is an -8 rudder (.020" skins) on my -7.

This crack developed at the front of stiffener R-815E. The forward edge of the stiffener has a squared off edge, so it makes contact and puts a bit of stress on the R-801PP skin just aft of the R-802PP spar.

I have no one to blame except myself -- I didn't do a thorough enough job deburring the edges of the stiffeners.

Stop drilled, and bullet-hole sticker applied :)
 

Attachments

  • IMG_4706.jpg
    IMG_4706.jpg
    116.9 KB · Views: 72
  • IMG_4707.jpg
    IMG_4707.jpg
    109.3 KB · Views: 78
  • IMG_4708.jpg
    IMG_4708.jpg
    205.8 KB · Views: 78
I was at a friends hangar awhile back and noticed his RV-6 rudder was cracked at the stiffener/spar junction, both sides, top to bottom. Towards the folded trailing edge it looked sort of expanded and puffy, so I gave the rudder a squeeze. It was squishy and made some odd crunchy noises… another RV bud (A&P, IA) was also there hanging out, so he came over to take a peek; his eyes bugged out with a “holy cr@p!” look. Yeah, a new heavier skin rudder was built.
 
…Time to fix it.

I ordered new skin, spar and tip ribs. I had stock on hand with which to make new stiffeners. This time I made the stiffeners long enough to form a tab on the forward end that could be bent 90* and attached to the spar with a pulled rivet. This eliminated the flexing of the skin at the spar which caused the cracks 23 years ago.

I did a similar fix to my 7 rudder many years ago but instead of a pop rivet, I used a dab of Proseal between the extended bent tab & spar. I also applied a dab to the other end of the stiffeners during assembly.
Similar process done on elevators. NO cracks seen since.
I’ve reskinned 6 other rudders this way & nobody has reported any cracking since.

I once did a 4 rudder differently, removed the lower fairing, drilled some small access holes in the lower rib. Using a long tube extension on a can of (low expansion) foam & sprayed a small dab of foam over each stiffer end. To prevent distorting the skins by the expanding foam, I had securely clamped 2x4 braces over the spar & trailing edge areas. Results were fantastic & we prevented a complicated re-paint job. If you contemplate trying this process, be sure to really think it thru before committing.