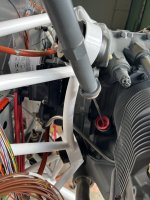
any pictures?My engine (io 360) is mounted. When trying to screw in the oil filling tube won’t go into the engine due to the mount. I need about 5-10 degrees of an offset to get the tube in.
I would imagine others had this issue too.
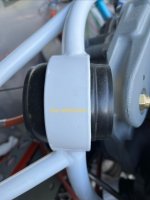
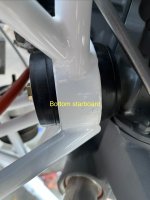
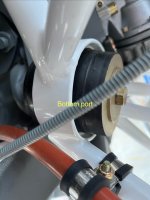
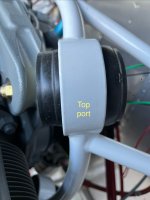
Isolators?Confirm that you installed the isolators in the proper location.
He means ,did you install the engine mount vibration dampers ( isolators ) as per plans ,,, theirs a right and wrong way to install themIsolators?
I thought I had the same issue but the tube just wanted to screw in crooked/cross-threaded. It took a few attempts but once I got it straight it had enough clearance.My engine (io 360) is mounted. When trying to screw in the oil filling tube won’t go into the engine due to the mount. I need about 5-10 degrees of an offset to get the tube in.
I would imagine others had this issue too.

I agreeLooks like you've got all four sets backwards. The isolator, or mount, with the ring in the center is the "hard" one. Take a good look at the diagram you posted last week:
View attachment 119739
The key is in Note 1: "weight of engine puts all hard mounts in compression". You have all the hard mounts in tension.
First, be happy that you posted about your dipstick not going in, as that uncovered the real issue... and, there's a silver lining here. Had you fitted the cowl with the mounts installed like that, you'd have to add fiberglass to one side of the fuselage interface and remove from the other, as right now, the prop flange is either too high or too low, depending on how the installed heights of the mounts in the wrong location affect that.Jeez

LolThe engine goes on much quicker the second time you do it……
And it's darn near perfect the THIRD time you do it. (applies to almost anything on the plane.)The engine goes on much quicker the second time you do it……