N605RV

Active Member
My fuel pump failed on my trusty RV4. Will not come off unless I either remove the engine or cut a hole in the firewall but concerned it’s structural. Anyone else faced this dilemma.
Mike 720 320 4189
 
You should be able to remove the two lower engine to mount bolts and gently lift the engine enough to gain clearance. Do not add any holes to the firewall
 
I have replaced the pump on my RV4. Removing the lower two bolts and gently raising the engine a few inches will work. Keep track of which washers (and how many) go in each location.
 
be very careful about putting too much force on the engine hoist fitting. Cost of a mistake is a new crankcase. Use a good cargo strap looped around the bottom of the sump to share You might even remove the spinner and wrap a second strap around the prop. the load. And yes the upper bolts need to be loosened.
Be very careful to get the pump arm lined up with the pushrod. Improper alignment of the arm caused a RV fatal.
Also a good time to review proper use of electric boost pump. Off after start to verify engine driven pump. On for takeoff and landing. Another RV badly damaged because boost pump was not on for takeoff.
 
I have an RV-4 and have changed the fuel pump several times. It's a bit of a puzzle, but I never had to unbolt the engine. Can you post a picture?
 
I have an RV-4 and have changed the fuel pump several times. It's a bit of a puzzle, but I never had to unbolt the engine. Can you post a picture?
I’ll try but it’s so tight even a photo is hard. There’s only about a half inch v
clearance between the pump and the firewall, right at the point where it folds from the vertical to horizontal to form the rudder well. It’s so tight when I unscrew the two allen head bolts, the the heads hit the pump housing etc
 
The heads do hit the housing which is part of the challenge of replacing the fuel pump. That’s normal. You have to loosen them and then pull the pump back so you can continue the process.
A ball type hex wrench is essential as a straight hex wrench is difficult to make work.
 
In the accident near Sacramento the actuator rod on the pump was bent from being improperly installed. The pilot could not get a restart with the electric pump and went down in very hostile terrain.
 
Is there any way I can damage the pump by installing it with the actuating rod in the wrong position (this is a first for me)
Yes you can do damage.. get someone to help you if you have any doubts.. remove a plug from each cylinder to make turning the engine easier and use a finger to push up on the rod to get it to maximum height. I’ve heard of tricks using a string, rubber band, or even pulling one mag to get access and keep the rod up while installing the pump. If you need to force it in with the bolts, it’s not right and you’ll be buying a second pump.
 
I’ll try but it’s so tight even a photo is hard. There’s only about a half inch v
clearance between the pump and the firewall, right at the point where it folds from the vertical to horizontal to form the rudder well. It’s so tight when I unscrew the two allen head bolts, the the heads hit the pump housing etc
That sounds about right - it's a tight squeeze. But it can be done and it's far better than messing with lifting the entire engine - that's overkill and it's not necessary.
 
My A&P keeps a little can of soft wax in his toolbox. It puts a blob on something in place to hold it up when mounting the pump.
I‘m sure there is someone here that can tell you more.

The wax dissolves in the oil
 
I've changed the pump on a 6A but not a 4; if the left magneto is removed then there is better access to reach the pump and also the plunger can be positively retracted with 100% confidence that it is not jammed against the pump actuator arm.
 
My A&P keeps a little can of soft wax in his toolbox. It puts a blob on something in place to hold it up when mounting the pump.
I‘m sure there is someone here that can tell you more.

The wax dissolves in the oil
Retention of Plunger Rod ...

There are many ways to do this, and almost everyone who has, has a favorite; but, I make a tool that holds the rod out of the way (at the top of its "stroke") to make the pump installation a bit simpler.

I've posted this here before, but didn't get much traction. You may have some interest in trying one. If so, call me 1 (559) 8216-0433 and we can talk about it, or PM (conversation) me.

Thx - HFS
 

Attachments

  • EZ-HOLD - Fuel Pump Rod 1.JPG
    EZ-HOLD - Fuel Pump Rod 1.JPG
    1.2 MB · Views: 43
  • EZ-HOLD - Fuel Pump Rod - 3.JPG
    EZ-HOLD - Fuel Pump Rod - 3.JPG
    1.5 MB · Views: 313
  • EZ-HOLD - FUEL PUMP ROD 2.jpg
    EZ-HOLD - FUEL PUMP ROD 2.jpg
    1.2 MB · Views: 41
As you back out the bolts evenly, you will notice the pressure on the pump from the pushrod location. Rotating the prop can increase or decrease the pressure. Less pressure makes removing the pump easier. Back out the far bolt first. Switching when you can't go any farther.

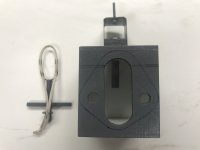
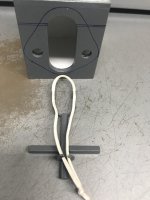
Make a 6 inch dia. loop of string. Regular string has enough drag that it will hold the rod in place better than wire. With the rod in the fully up position, work the string up the rod so it loops around the rod. Not a sling. With the rod in the up position hook the loop of string with a bungie and hook the other end to something near that will place pressure on the string.

Use Permatex #2 on both sides of the gasket AND the threads of the bolts..... The case is drilled and threaded through, so it can leak!

As you install the new pump, start with the far bolt and move the pump in evenly. As you go, you can push on the pump to confirm you are on the rod. It should spring back. When there is still a small gap between the gasket and the case (1/8") disconnect the bungie cut and pull the string out. Tighten the bolts and safety them.

But first.... when you have the two pumps side by side, remove the fittings from the old and clock them the same on the new pump.