marchudson
Well Known Member
I tend to work in the shop solo while building as I'm sure most of you do. When it comes time to buck rivets, it's tough to keep one eye on the rivet gun and the other on the bucking bar. I usually sight the placement and alignment of the tungsten bar then switch to watching the gun as the rivet is driven. The bar is mainly held by feel. This has worked for most of the rivets driven but every once in a while, the bar slips off or is held at an angle and the rivet has to be removed and corrected. In addition to all of this, I usually run a line of blue painters tape on the bucking bar side of the material to protect anything from an accidental touch from the bucking bar.
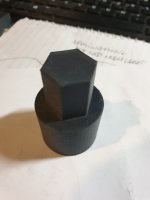
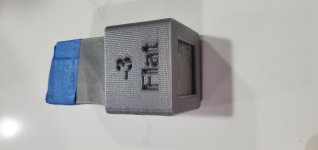
My son talked me into getting a low cost 3d printer, which it did. Well this little tool is really starting to pay for itself. I modeled and printed up a bucking bar guide. If you have done any 3d printing, you know it can take a while for a print to complete so instead of printing to the full 1.5" as planned, I printed a test guide to only 1/2 inch high. Even at this height, it works like magic.
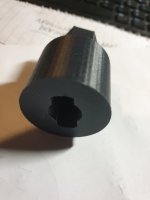
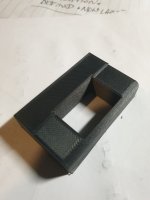
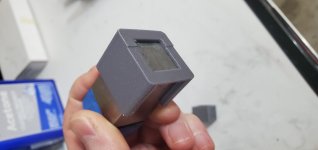
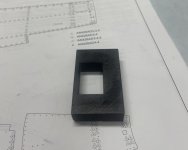
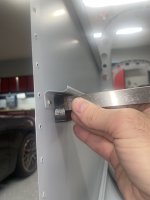
The first photo is an overview shot. In the second picture, you can see I have made a .024 step for the flange to fit into. On other models I printed it has a flat bottom. The 3rd pictures shows a typical application.
I didn't have high expectations initially but was surprised at how well it holds the bar perpendicular to the material. It has the added benefit of providing clamping force to the two pieces being joined. I don't use any protective tape on the shop head side because the bar can't hit anything but the rivet and the bucking bar won't slide off of the rivet.
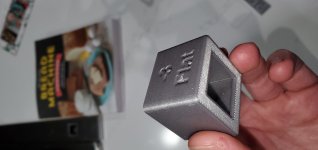
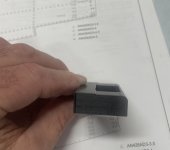
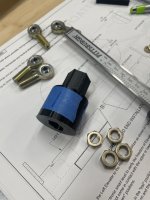
The last picture shows another tool that was printed, a rod end bearing tool.
My son talked me into getting a low cost 3d printer, which it did. Well this little tool is really starting to pay for itself. I modeled and printed up a bucking bar guide. If you have done any 3d printing, you know it can take a while for a print to complete so instead of printing to the full 1.5" as planned, I printed a test guide to only 1/2 inch high. Even at this height, it works like magic.
The first photo is an overview shot. In the second picture, you can see I have made a .024 step for the flange to fit into. On other models I printed it has a flat bottom. The 3rd pictures shows a typical application.
I didn't have high expectations initially but was surprised at how well it holds the bar perpendicular to the material. It has the added benefit of providing clamping force to the two pieces being joined. I don't use any protective tape on the shop head side because the bar can't hit anything but the rivet and the bucking bar won't slide off of the rivet.
The last picture shows another tool that was printed, a rod end bearing tool.
")