What's new
Van's Air Force

Don't miss anything! Register now for full access to the definitive RV support community.

Elevator Leading Edge Roll...Good Enough?

SilverEagle2

Well Known Member
Friend
Keep in mind, I am my worst critic, so take the following with a grain of salt.

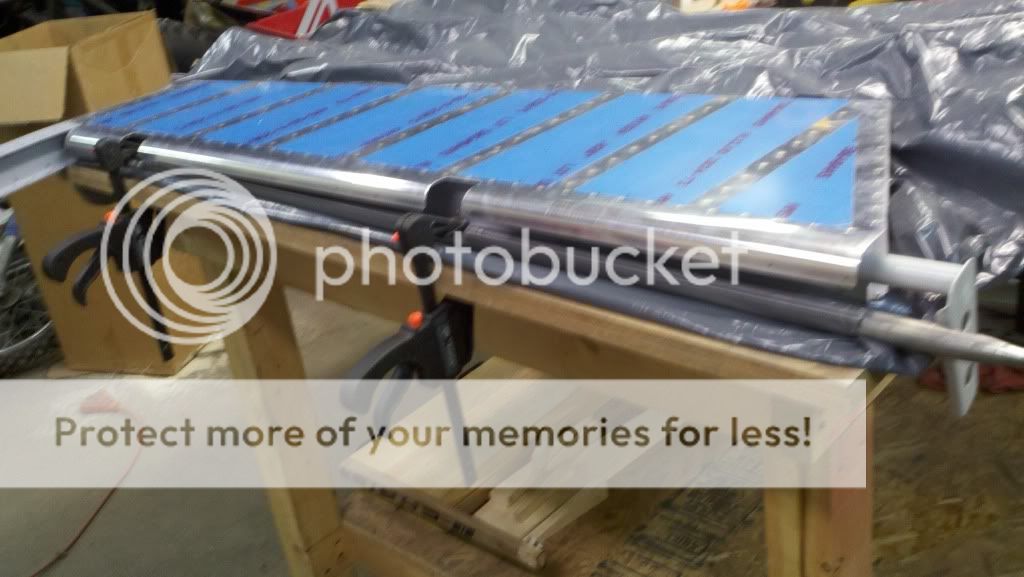
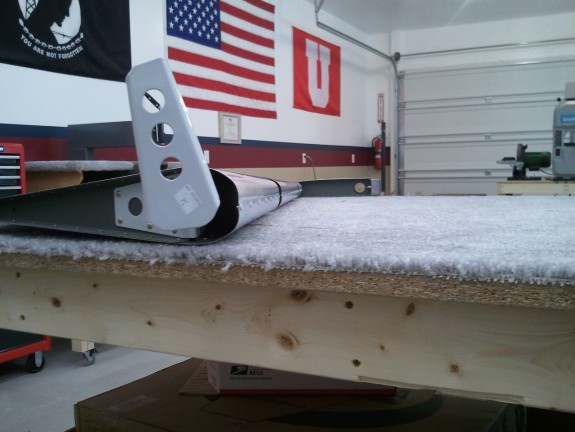
I read up on how to do the roll again since it had been a while since doing the rudder. I remembered that I did not like rolling the rudder but that it was easier due to the thinner skins.

I again decided to use the DanH method and use J/U-Bolts and hold the pipe down while rolling. It worked OK on the rudder so I figured it would work OK on the elevators.

Since it was not fresh on my mind I felt like I was re-learning the roll all over again.

I think this time the pipe put too tight a radius on the skin, and since they are thicker than the rudder, they were less willing to massage out. Rather than really mess a part up, I decided to accept the roll and close them up.

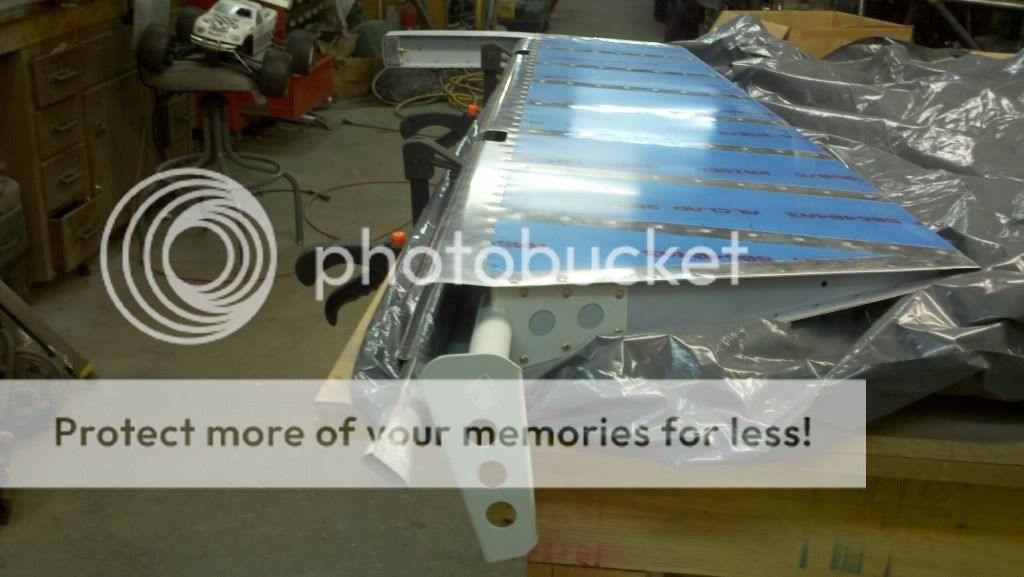
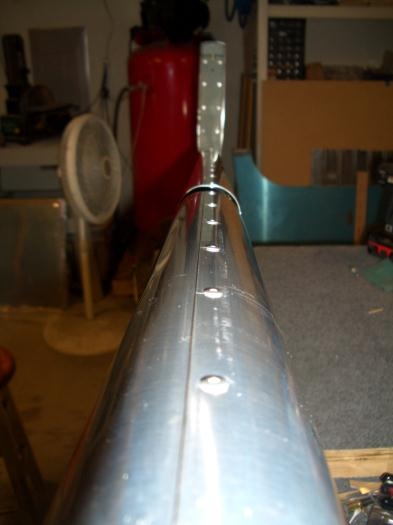
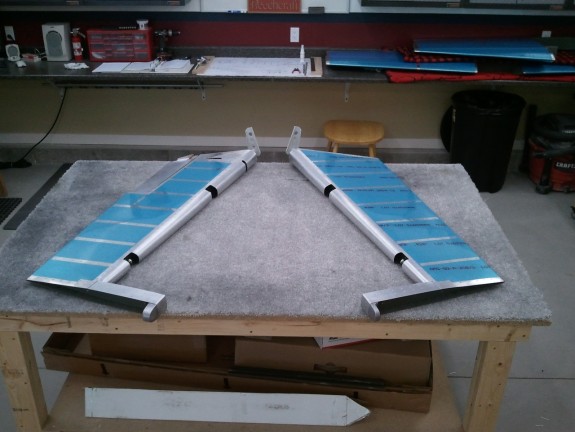
They seemed to go together nicely and I have really nice seams too.

I just do not like the segmented radius look. I know that I nor anyone else will never see them once mounted.

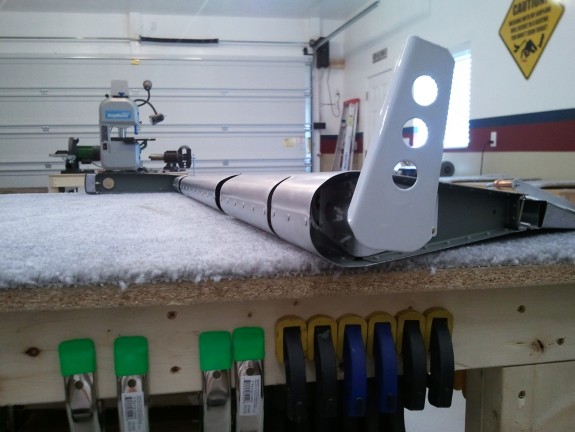
I did a quick test with them in place on the Horizontal Stabilizer and they appear to not have any clearance/rubbing issues.

So I ask the group, are these good enough?

Left
2012-02-26-13.03.59-575x432.jpg


Right
2012-02-26-13.04.10-575x432.jpg


Both
2012-02-26-13.03.15-575x432.jpg
 
I think you will be fine. In any case, you can easily move on to the HS, if you have not already built it, and then test them in place. If they clear through the required range of motion, then you are golden; no one will be able to tell once they are installed.
 
It looks good to me. Like Patrick said, if they don't rub on anything, you're good to go. I'm here to tell you that my standards slipped a bit over the 11 years it took to build my -6a, but the proof is in the pudding...it flies great.

Jim Bower
RV-6A N143DJ
Flying since August 2011
 
This is how I did the roll. Notice that the rubbers have been removed from the clamps and the large plastic trash bag under the part. Clamps are just tight enough to hold the part to the table. The trash bag slides easily on itself allowing the part to slide on the table as the metal tube(conduit) is turned with vise grips. I used several layers of duct tape to attach the edge to the tube but did not have tape in the areas where the clamps contacted the tube. If I remember correctly, approximately 60 degrees works well and it is easy to put in too much bend. :)


2011-10-27_17-56-59_527.jpg


2011-10-27_17-57-24_169.jpg
 
I'll trade you...

So I ask the group, are these good enough?

Yours for mine, even trade, I'll deliver...:D

I rolled my rudder leading edge last Friday, and it was hard enough, but came out pretty good. Sunday, I started the right elevator. I'm rolling one section at a time, using a broomstick. I rolled it well over 180 degrees and got about 90 degrees of roll after springback, but was left with about 1/2" to 3/4" gap down the middle between the two sides. I tried just squeezing and clecong, but the pillowing between rivets was 1/16" or more. I've probably got an hour just hand massaging the middle section to get the holes to line up and MOST of the pillowing to lay down. I did use an edge forming tool on the edge before rolling, but I'm thinking I need to put about 15 degrees of roll on the first half inch or so of the top skin around a tighter radius (I have some 1/2" round bar) to make it lay down completely.

One thing I found on the rudder is that if you roll starting at the very edge along the whole length of the overhang like the instruction manual says, you end up with a widening gap as the spar widens toward the root, and it was a bear to massage into place. For the elevator I taped the broom stick to the very edge at the tip end, then maintained a constant distance from the spar down the length of the surface, leaving a fairly consistent gap after rolling.

This is where my right elevator stands now:
DSCN3229.JPG
 
This is how I did the roll. Notice that the rubbers have been removed from the clamps and the large plastic trash bag under the part. Clamps are just tight enough to hold the part to the table. The trash bag slides easily on itself allowing the part to slide on the table as the metal tube(conduit) is turned with vise grips. I used several layers of duct tape to attach the edge to the tube but did not have tape in the areas where the clamps contacted the tube. If I remember correctly, approximately 60 degrees works well and it is easy to put in too much bend. :)

I did the same proces using the clamps and I adjusted the clamps to change the radius of the bend. Worked very well.
FP20022012A000GA.jpg
 
Yours look alot like mine I think

Just finished mine for the eight - they look very similar. I agree with the others - time to build the next part..... nicely done.

1zc35s5.jpg


4j02kw.jpg
 
I have similar question about the leading edge on my right elevator. I'm not comfortable with the way the inside leading edge ended up. The inner roll looks to be pulling away from the top roll. I think I may have over rolled it. Any ideas on how to fix? The middle and outboard LE look great. Appreciate any advice.
20140329_125531_zps6c07a57a.jpg

A few of mine looked like the above photo when viewed with a mirror on the inside. Looking at it from the outside they all look great. Is there any issue with a few rivets along the span where the two skins are slightly separated (as viewed from the inside)?
 
Yup. Looks familiar

Mine looked the same, too small a radius on the roller and despite the clecoes holding things together, when the rivets were pulled there was the same gap on the inside you have. The outside looked fine, but I was worried about repeated stress or vibration on those two separated skins on the inside that I re-did them.
I'd already ground down a wire cutter to have a flush (to the working surface) face, so I used it to snip off the rivet head, then it was relatively easy to drill out the remainder of the rivet. I used a regular battery powered drill, not the air drill, and went easy and they all came out in time. Add clecos as you go, so a drilled out rivet doesn't suddenly "pop" open the seam in the midst of drilling.
I used an Avery hand seamer to slowly (SLOWLY!) flatten out the over rolled skins and re-clecoed several times until the skins met the way it was intended with no room for future wiggles.

Be patient, no rocket science here, just easy relaxing of an over-rolled skin.

I wonder what the ideal diameter pipe would be best here so I don't duplicate this on the right elevator (I used 3/4" conduit on the left side)?
 
Diameters

I think if I were to set up an assembly line to do this, I'd use a 1" diameter for the overall rolling with a smaller diameter 1/2" to put a bit of an extra tight radius for the first 1/2 inch or so from the edge of the skin, but that's probably being overly picky. 1" is probably fine.
 
Rolling leading edge

I think if I were to set up an assembly line to do this, I'd use a 1" diameter for the overall rolling with a smaller diameter 1/2" to put a bit of an extra tight radius for the first 1/2 inch or so from the edge of the skin, but that's probably being overly picky. 1" is probably fine.

I used 1/2" and 3/4" for that very reason. I also used the roller on the edge of the outer skin.
 
Back
Top