What's new
Van's Air Force

Don't miss anything! Register now for full access to the definitive RV support community.

RV-9A, SoCal

Finally I got to assemble something that looks like it might belong on an airplane (even if i have to immediately take it apart to deburr…grrr!).

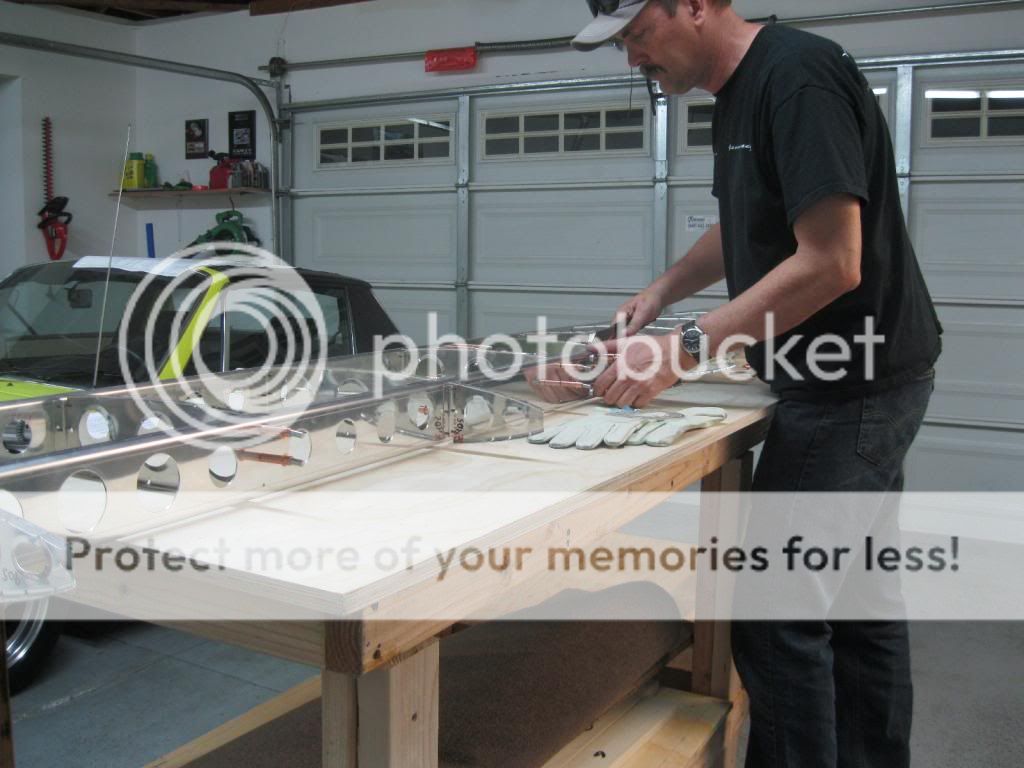
Match-drilled the skeleton. Next, more deburring, build the HS plywood cradle, and build the raised platform for the C-frame dimpler (I bought the kit from Cleaveland tools).

I still have to anchor the workbench's work surface, but I wanted to work on plane parts for a while! :)


Last edited:
Made some good progress today, and so far I haven't destroyed any parts (I'm sure that day will come, though :)). I built the plywood jigs, and clecoed on the skin to the skeleton, match-drilled and started to deburr.

Question: On machine-countersinking the spars, I just wanted to double check?.0.007" deeper than flush to accept the skin dimple, right? Did you make a fixture to hold the spar in the drill press, and what about countersinking the holes on the end? There's so much unsupported spar that some sort of stand will be needed, I'm thinking.
 
Clean looking 914--------early bumper, 71 or so??

Thanks! Yes, a '74, last year of the better-looking bumpers, IMO. For the greater good of the RV-9A project, it's been sold, both to raise funds and to create garage space. I'll miss her, but a lot of fun that I had was in the process of restoration. One toy at a time. :D
 
Things were going so well…

Until…

In a frenzy of pneumatic dimpling, I knocked out ALL the rib flanges, not just the right-side pieces. Of course this means that I hadn't match-drilled the left ribs before dimpling, so I have eight pieces of nicely deburred, airfoil-shaped scrap aluminum. :( Likely the first of many small disappointments, but hey, I'm building a fluggin' airplane in my garage!!!!! :D

Oh well, I need to order some stuff from Van's other than the new ribs, and I can continue working on the right elevator half.

On the plus side, I put fingerprints all over the right elevator skin and deburred all the holes. The machine countersinking of the spars is going well too.

 
Last edited:
New ribs ordered, and some FlameMaster for the trailing edges. Do you guys prefer to use FlameMaster/Proseal under the stiffeners for the elevator, in addition to the rivets? I've seen this in a build thread somewhere.
 
The stiffeners get riveted on without any proseal. Some people place a little glob of proseal right on top of each stiffener's aftmost rivet shop head before gluing things together so the stiffeners dont vibrate against each other. i don't think I did this on my elevators but I did do it on the rudder.

When I did my HS last year I found the most challenging part was riveting the HS 905-907-902-909-904 intersections. That's where the innermost nose and main ribs connect with the front spar and associated doubler and shim. The angles made it impossible for me to reach with a squeezer so I did it with an offset rivet set and bucking bar. Clamping your work, practice, and possibly a helper is the key. The rest of the HS was pretty easy.
 
Thanks, Mike. I really appreciate the advice! :) I'm getting a tungsten bucking bar (maybe in today's UPS shipment) that I'll use at that intersection. The manual rivet squeezer should show up soon too. So far, I've been practicing with the pneumatic squeezer and gun/bucking bar, but it'll be nice to have a third option.
 
Last edited:
Quick question: Instructions for HS say to dimple all rib flange holes except the ones that fit under front spar. But the skin, IIRC, has a few holes that are not dimpled where the empennage fairing attaches.

So should the rib holes that correspond to the fairing attach holes be left undimpled? And suppose they are dimpled and shouldn't be :)o), can they safely be pounded flat?
 
Geez, 37 hours in, and I haven't set a rivet on the airframe yet. Getting closer…maybe this weekend.

Machine-countersinkig the spars took longer than expected, but I'm pleased with the depth and uniformity of the countersinks.

Primed and prepped. Used Dupli-Color self-etching primer, which is an attractive GI Joe Green. :) Got new ribs from Van's to replace the ones I messed up, and deburred a few. And I dimpled an entire skin without mis-punching anything. There are a couple of puckers/minor dents, but most are on the underside where they won't be too visible.

A package came with my first instrument too….altimeter. Only a wall clock but it sets the right tone in the garage!


Last edited:
Hi Doug,

Wow, you're haulin'! At this rate I think you will be done with your 9A long before my 7A!:(

Sorry I haven't gotten back to you with that cool stuff I saw at SnF. Started getting busy/traveling for work (NY Show, 2015 press kits, upcoming PHEV event, etc.).

Take care,
Jim
 
Hi Jim,

Yes, making some headway! I'm really looking forward to hoisting the finished stab over my head for the "victory shot," but it can't be rushed.

When we're both finished, we'll have to fly to a spot between L.A. and Charlotte for the $1000 burger lunch. :)

I'll catch up with you later. I'm going to the Chino Planes of Fame/RV Fly-In next weekend to meet some fellow RVers, absorb knowledge and generally idea-upload. It'll really help me visualize how I want my plane to turn out.
 
Well, I'm tired and to make matters worse, I appear to have a small model airplane growing out of my head, but I got the left half clecoed up! :) So good to be past the point of redoing my screw-up and actually making forward progress.

 
I put in about 13 hours over the weekend, set my first airframe rivet and then some!

The riveting process is really satisfying, getting the knack of how long to squeeze the trigger and trying to get the perfect press fit of the rivet gauge over the shop head. I over-squished maybe four or five doing the spars, but I managed to drill them out without doing any damage to the original holes.

Right-hand skin is in the jig for final assembly. Now that I'm working with the smaller skin rivets, I really need to practice on some scrap to dial in the gun pressure to get really nice results. I've been taping up the head of the flush set to protect the primer, and this seems to be working well.

I'm thinking about working on the trim tab next, to get a break from so much dimpling.
 
Last edited:
I've started riveting the skin on the HS, and the most frustrating part is getting the bucking bar down to the center nose rib, especially the rivets closest to the leading edge. :mad: So I've drilled and reset a couple, and I'm happy with the result. I took a little time to wipe down the rivet heads with solvent, to get the flecks of painter's tape off.

I'm learning a ton about technique, so the other half of the HS will be far easier!
 
I'm learning a ton about technique, so the other half of the HS will be far easier!

This same phenomenon applies to the entire project. The second half of the HS, the second (or third, or fourth) trim tab, the second fuel tank, the second bottom wing skin....

Soon you'll find yourself saying the second plane will be much easier!
 
Got one half riveted up, with the exception of rear spar and the end rib. The skin riveting has been a real education…you really have to concentrate and keep the set very square to the skin. I've got a few more "beauty marks" in the aluminum than I'd like, the result of the gun getting away from me. But at least I had the foresight to start on the underside, so the top surface, while not blemish-free, is a lot nicer after some experience. I'm glad I'm painting it white and not polishing it!

Structurally, it's real solid. I drilled out my fair share of rivets. The ones on the inboard rib were hardest for me, and I clenched a few here.


Last edited:
I'm nearly ready to button the whole HS assembly up. Riveting is going MUCH better thanks to help from everyone here. The nose rib skin rivets nearest the leading edge are a royal pain! Maybe it requires a bucking bar shape I don't have, but I finally got them set with good results.

Don't the neighbors seem to come by at the most inopportune times? I was all worked up with drilling out a hard-to-reach rivet, sweating like Fabio at a spelling bee, and he pops in with his daughter. He's a super nice guy, and I tried my best to be cordial and talk to them for a while, but all I wanted to do was to get back at that pesky rivet!!!
 
I buttoned up the HS over the weekend. :):) So nice to have a significant chunk done. It's tucked safely away in the spare bedroom.

Working on the VS skeleton now, and it's good to give my hands a rest from riveting. I've got a little numbness in my fingertips, and some left forearm pain from holding the bucking bar at strange angles, but I suppose this is par for the course.
 
Everything is going so much faster now that the workbench, dimpling table, etc. are built and I'm up to about 30 cpm (clecoes per minute :)). Got the rest of the VS parts deburred, skeleton assembled, skin on and match-drilled the whole shebang.

Quick question: the gauge of the front VS spar is a little thin…did you guys use dimple dies here, or machine countersinking? It seems to be that in-between thickness.

 
Last edited:
Progress! Got the vertical stab buttoned up, and I'm breaking in the new bandsaw cutting the stiffeners for the rudder skins. Feels good to clean up the work area and get reorganized after finishing another chunk.

My riveting is getting a lot better. I only had to drill out two skin rivets on the VS, and I'm fully up to speed using the pneumatic squeezer for all the edge rivets. Got the "RV rash" in the crook of my elbow from reaching over the skin with bucking bar to get to the forward spar rivets. I'm fortunate to have long arms?this would be VERY difficult to do with a few inches less reach.
 
My strobes from Ztron Labs came in, so I finished up the stiffeners for the rudder and switched gears to mounting the tail strobe. I cut down some blind nuts and epoxied 'em in place…hardest part was getting them into position in the tight confines.

The wingtip strobes are really low profile, so I'll have plenty of width in the wingtip cutout for a landing light. I want to avoid cutting into the wings' leading edges if possible.


Last edited:
The rudder is nearing completion?Day 2 of waiting for FlameMaster to set up on the trailing edge. In the meantime, I prepped all 26 stiffeners for the elevators. I'm glad that's over!! And I received some epoxy, cloth and SuperFil from Aircraft Spruce, as I really want to complete the empennage fiberglass work before the fuselage and wings show up.
 
Some more progress. Very exciting to hang the finished rudder on the vertical stab! The trailing edge turned out nice and straight, and I didn't have to drill out a single rivet. I had a lot of apprehension about this step, but I re-read instructions about 14 times and followed them to the letter, and it worked perfectly.

Rolling the leading edges wasn't too difficult, but it was a bear to bring the rolled surfaces together to cleco & rivet. Took a lot of grip strength and yards of Gorilla tape.

On to the next step!

 
RV progress

Hi Doug,

Wow, you made the VAF front page! :D

Rudder looking good. FYI - I may shoot a question or two to you when I re-skin my RV-7A projects rudder.

Keep up the great work. At this rate, I think you'll meet your completion date target with time to spare.
 
Thanks, Jim! Woohoo, front page. :D

Most weekdays I'm putting in 3 to 3.5 hours a night. Funny how you never sense any real progress on any single night, but toil along faithfully and one day--BAM!--the rudder is done. Let's hope that happens with the rest of the plane. :)
 
Thanks, Jim! Woohoo, front page. :D

Most weekdays I'm putting in 3 to 3.5 hours a night. Funny how you never sense any real progress on any single night, but toil along faithfully and one day--BAM!--the rudder is done. Let's hope that happens with the rest of the plane. :)

It feels good Doug. The empennage is probably the most memorable kit in all airplane. There will be the wings and fuse and a lot of fiberglass parts but this picture would be remembered forever. Keep pressure on!
 
I appreciate the pep talk, Vlad! So much of the build seems to be making fixtures and prepping parts. Dremel'd up a nutplate holder last night for countersinking, and set up the work table with a 90-degree piece of plywood to hold the elevator skins open for dimpling. Finished the stiffener plate/cover that holds the elevator trim servo.

I need to make a Lowes run to buy a bunch more clamps. :)

Maybe most important, I organized my tools and cleaned the workspace. Being able to quickly find the right tool eases the frustration, and increases the fun of the build. I've got to take a "time out" and do this more often!
 
Right elevator coming along, nearing final assembly. Holes in skin for spar are really tough to access with C-frame for dimpling, so I'm using the Avery pop-rivet dimpler, which works fantastic on this thin aluminum sheet. I'm going to go with a combination of solid and pull rivets along the bottom, as my squeezer yoke will reach maybe 5-6 rivets through each hinge point.

In other exciting news, my QB fuselage has arrived in Aurora! They're a little behind on the crating, so I should have it within a month---which I'm hoping is the perfect window to finish the elevators. Time to take a deep breath and write a big check. :)
 
Aargh! The blind riveting of the top elevator skin to spar is a challenge, to put it mildly. Just when you think you've got a handle on this riveting thing, Van's throws you a new challenge. Got 'er done, with a crazy spider web of Gorilla tape holding the skin open for access. I was able to squeeze more rivets than I thought with my 3" yoke, but with the mushroom set I put a few more beauty marks in the skin, but nothing to lose sleep over.

I also experimented with some two-part SuperFill epoxy filler that I'll use in just a few places for the most noticeable dings. I practiced on a scrap piece of sheet aluminum…whacked it with a hammer to make a proper ding, sanded, applied the filler (which is an interesting Smurf Blue color). Adhesion is fantastic, and after it set up I could flex the aluminum quite a bit without cracking. I found that I need to go with a couple thin applications rather than one thick one, to keep the sanding to a minimum.

Onward!! [cue Apocalypse Now theme] :D
 
Some more progress…getting close to finishing the empennage. Trailing edges are all turning out nice and straight, and I'm really getting the hang of "rolling" the rivet gun on the double-flush rivets from the initial set to finishing perpendicular to the skin.

Trim tab bends turned out well. Even though I used maple bending blocks and carpet tape, the whole assembly still moves around somewhat while clamped, so there were lots of small readjustments in the process.

I'm of the "remove the blue film early" camp, so finished elevators show lots of tiny scratches. Primer and paint will fix that!

Trim tab is currently in the clothespin clamp blocks to make sure the gray glop sets up fully on the foam ribs. Almost time to tackle the fiberglass tips.


Last edited:
Those are some nice looking trailing edge rivets and the trim tab bends look great! Sure wish my first two trim tabs had come out that nicely!
 
Thanks! I am profiting greatly from those who have done it before. I think I've read about eight different builder's logs to decide on the proper technique.
 
Thanks for the words of encouragement. I called Van's today?my check cleared, and it looks like I will have two very large crates (QB fuse and wings) in about two weeks!
 
Got the trim tab hinged & mounted, and I'm pleased with the gap…4/32" To bend the second 90-degree bend in the hinge rod, I had to get creative….drilled a hole through the workbench to accept the rod so I could get the right orientation in the jaws of the vise. I used the propane torch/hammer method for the bends, and they turned out crisp!

Question…the last two photos show the inboard lead counterweight (right elevator) in relation to the edge of horizontal stab. Does the counterweight need to be absolutely flush with the counterweight arm? It protrudes by about 1.5 mm, but still has about 3 mm clearance to edge of stab. I figure I could either machine it down to be flush, or bevel the ends a bit.


Last edited:
that was quick

Thanks for the words of encouragement. I called Van's today?my check cleared, and it looks like I will have two very large crates (QB fuse and wings) in about two weeks!

at your pace you better start looking into instrument panels!
 
Hey Derek,

Oh, I've been looking..and looking? :) The plan is a 2-year build, which I think is doable with the QB fuse and wings. I ordered Van's wiring harness, and finished the elevator trim servo install tonight. Works great! I've got the manual aileron trim ordered for the fuse, but I may have to change that.

 
Ghost hole on DWG6

I am really amazed with the speed that you are building! As you may remember from an earlier post I started a few weeks before you, but now I notice that you are already ahead... keep up the good work!

I have a question that you may be able to answer from your recent experience. On DWG 6 of the plans there is no drill hole above the second and third lightening hole from the bottom, but there is one in the profile. On the plan there is a note for two holes on the sides "drill in assembly", but this third hole in the middle is not mentioned anywhere. Should there be a rivet in that hole? And should it be flushed or not? I guess this hole need to be left open, but I also can not find direct confirmation on DWG27 and DWG27A.

Thanks,

Wim
 
Thanks, Wim! I have the luxury of building in my garage (and being single with no kids!), so most weeknights I'll put in 3 to 3.5 hours. I keep to the schedule pretty well….sometimes I'll play tennis on Thursdays with some buddies though. :) Sometimes it really helps to take a night off to clear your head.

That is an excellent question on that open hole on the vertical stab. I've left it open for now, as access to rivet is completely unobstructed. Does anyone else know?

Fuselage and wings come tomorrow!!! I'll be sure to post some pics. I expect a late night at work (where they're being delivered) sawing up those enormous crates. I'm going to take the fuselage home almost immediately, and my boss will let me keep the crated wings at the shop for a while. I don't want to overstay my welcome, so the wings will probably end up in the living room at some point!! (can't maneuver giant wing halves through tight hallway to access spare bedroom/RV parts warehouse).
 
Last edited:
Here's a few shots of the fiberglass work. I figured I'd tackle this now so I'd have some experience before doing the windscreen/canopy and gear fairings/wheel pants. I had to fix the rudder horn cutout in the bottom cap…I cut it too deeply on one side so I fiberglassed a chunk back in. That's the great thing about fiberglass…screw up and you can cut, splice and re-glass! Messy, though.

Last shot is garage awaiting fuselage…yeah! Reinforced furniture dolly with a big piece of plywood on top will serve to support fuse until I decide what sort of cradle/support to build to get it up to a comfortable working height.


Last edited:
They're here! It took two forklifts to unload the fuselage crate….one to drag it out of the trailer and the other to lift it from the center. That's a big box! Wing crate was smaller than I expected.

Van's does a superb job of packing, and hats off to ABF Freight, as the crates were in perfect condition. It took a couple of long, sweaty hours to pry it apart and free the fuselage.

I'm totally pleased with the workmanship of the parts. A hangnail rivet every once in a while, and a few slanted shop heads, but pretty durn good overall. I had one scare that I'm sure I share with other QB fuse recipients: all four powder-coated firewall corner brackets appeared to be cracked, but it turns out that it's by design, where the angle is split into two "ears" that rivet to the longerons. If I had read the documentation first, I could have avoided that awful feeling in the pit of my stomach... it spells it out on the first page. Phew, that's a relief!!!

Also, the degree of prefab is more than I expected…baggage bulkhead installed with nutplates, seat hinges already riveted to seat pan, "armrests" already in place, etc.

I think I have two days' worth of inventory ahead of me!

[more pics to come…iPhone to iMac image transfer is sloooooooowww. :( ]

 
Last edited:
Sure, the wing stand would be great! Derek, are both you and Bruce near Ramona, and are you willing to bring it out on Monday? I'll gladly pay a reasonable amount/buy you lunch or a combination of the two. I'll send you both PMs.

Here's a few shots. All interior aluminum is nicely scuffed and the wash primer gives it a pewter color. Wings are very well oiled, while the fuselage has minimal lube but no noticeable corrosion.

I just finished the inventory, and everything is accounted for. Now the challenge is to find out exactly where to start… where the QB ends and my part begins.


Last edited:
Those quick build fuselages look great. Have fun putting it together. If your interested in another pair of eyes taking a look at the build, I would love to stop by and take a look. It's great fun looking over a project in production. Brings me back to those days in my garage....
 
That would be great, Pete. I totally appreciate any advice/wisdom…I've give you a call later. Maybe you can give me some insight on the sequence of things.

The fuselage will be making the journey from the shop to my garage this evening. I rented a bunch of U-Haul furniture pads, and I'll stick it in the back of our shop truck, and duct-tape a bright red Alfa Romeo shirt on the end as a safety flag (never wear it anyways). There are lots of interested neighbors willing to help unload, including Eddie….a guy one block over who I met just yesterday who's building his third kit plane now! He's got an RV-8 based out of Chino, and he's heavy into formation flying. No doubt he's on the forum here…forgot to ask his "handle."
 
Last edited:
Here she is in the garage, at last! Next order of business is to build a cradle for the tail, to get the fuse more or less level. I may try working on it at this height, and get a rolling stool to work from a seated position. Maybe a bunch of thick blankets too, so I can kneel in comfort. I'm sure I'll need to climb inside to do a lot of things, right?

A few other pics here to show how she sat in the crate.

Got some color samples on the way for Jetflex WR interior paint, and some cloth swatches en route from Classic Aero…gonna go with their Sportsman seats. And I finally decided on exterior colors: silver primary, a bright red as secondary, and black as accent trim.


Last edited:
Back
Top