What's new
Van's Air Force

Don't miss anything! Register now for full access to the definitive RV support community.

Decal Pro Pirep

William Slaughter

Well Known Member
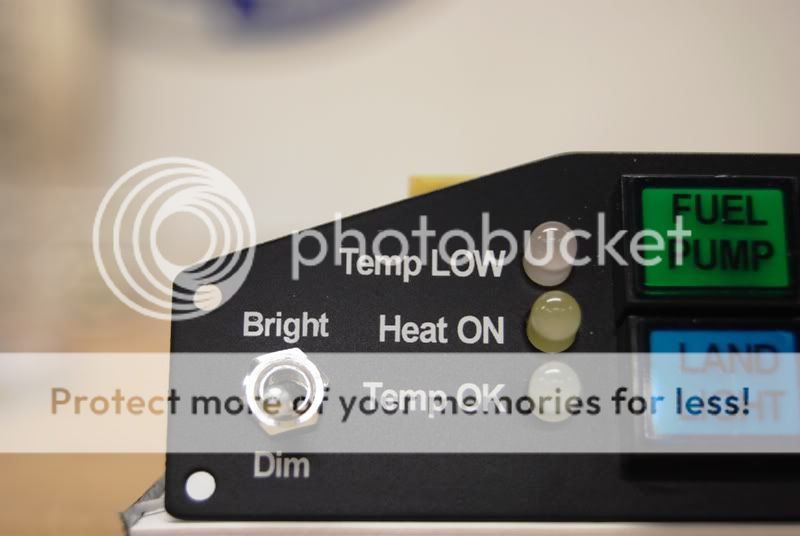
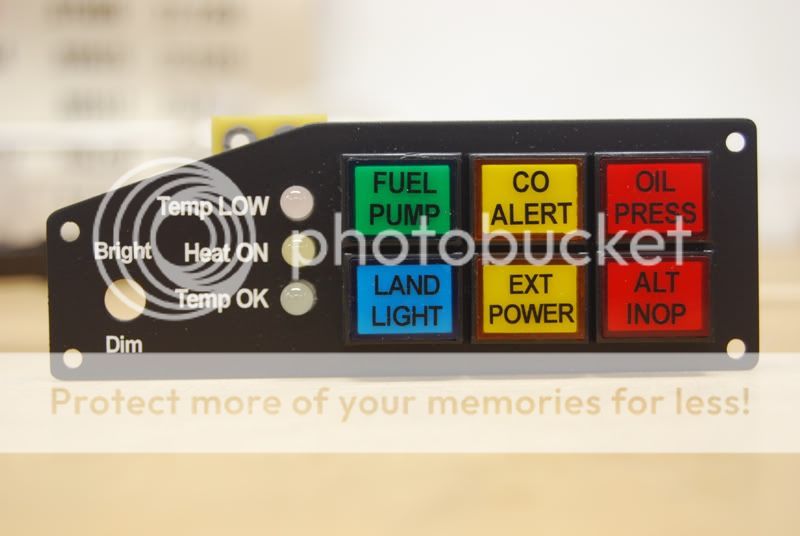
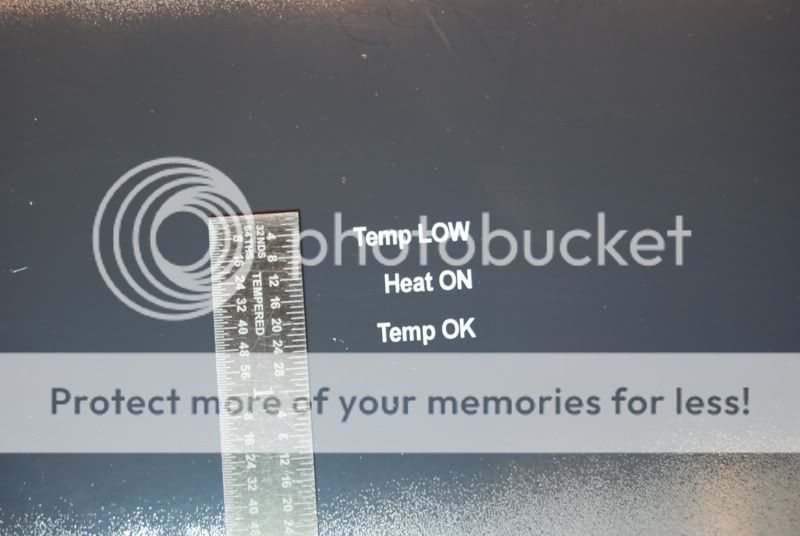
The DecalPro system has been discussed here in the past, with mixed reviews, but I'd decided that it was worth a try and purchased the setup some few months ago. The ability to produce white text labels for the dark instrument panel was the goal. Today I finally sat down to give it a test run, and can report excellent results. First I did one of the supplied test images in a nice red metallic foil, and it came out perfectly. I then printed out the text for the annunciator lights for the Gretz heated pitot in white, and ran it through the process with no problems. Two for two, right off the bat! Here is the annunciator image applied to a dummy test piece:

DecalPro.jpg


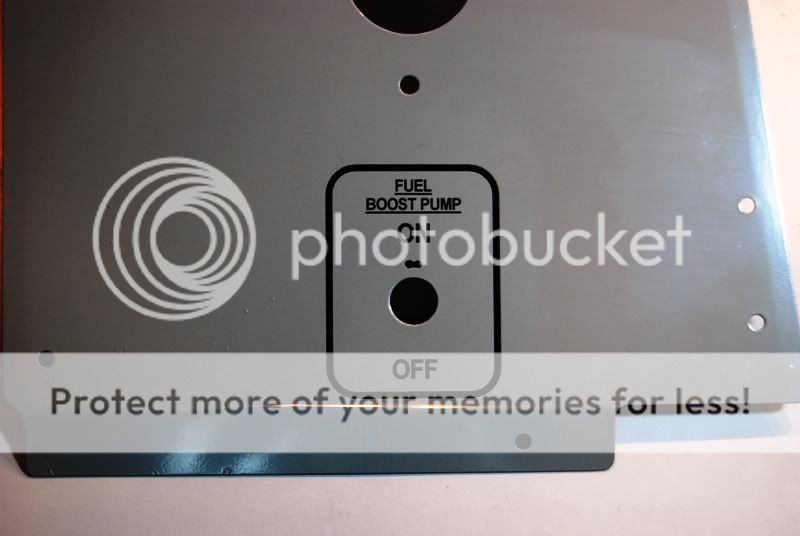
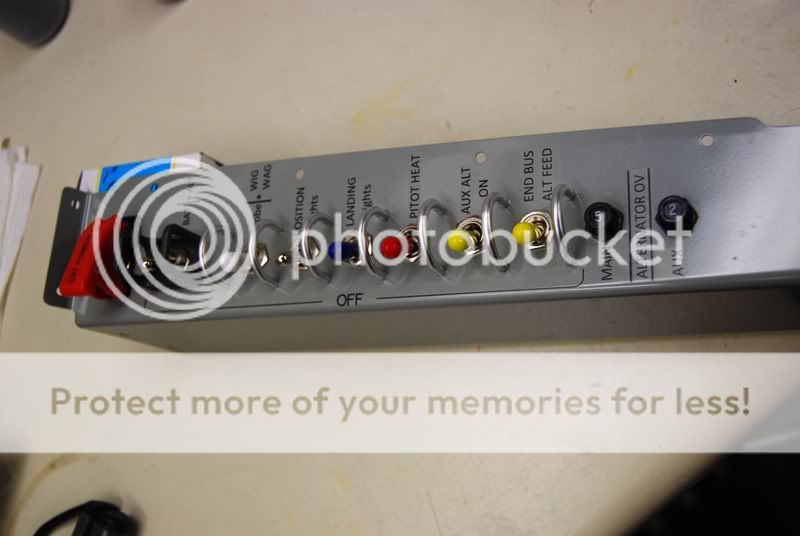
Since the text was black, I did the switch console with DIY water-slide decals with good results, but I'm sticking to the DecalPro system from here on out.

SwitchConsole.jpg
 
Clear Coat?

I have been considering the Decal Pro system for my panel. How durable are the images? Are you planning on shooting a clear coat over top? Keep us posted on your results. There has been a lot of mixed reviews on this system, however I'm still favoring it.
 
I may yet give the Decal Pro system a try. I bought it, laid it all out intending to see if I could master the learning curve ... and never even tried it. I printed out some sticky labels and thought they looked OK and never looked back. Maybe that will be next weekend's project.

If not, I should just sell it. It's a shame to have it just sitting around collecting dust ...
 
Smokey if you do look to sell it let me know, I am interested.

It may take awhile to perfect it but the results look great.

-david
 
Clear Coat

At this time I'm not planning to clearcoat over the DecalPro lettering. Despite the "Decal" in the name, it is actually a form of dry transfer, and is supposed to be quite tough when fully set-up. If it does somehow get too beaten up, it can be removed (91% isopropyl alcohol) and re-applied. I'll be top coating the waterslide decals, however. As to the learning curve, it wasn't bad. I read the instructions, watched the tutorial videos on the website, then followed along with the instructions as I went. Admitedly, this is rather more "fiddly" than a Dymo label maker, but as a lifelong modeler, I found it straight forward. I followed the instructions precisely, and got a perfect result on my first (and second) try. Allow yourself plenty of time first time out and don't rush it - a methodical approach should serve you well.
 
I used the Decal Pro system. I will say the results are great BUT I'm not sure I have ever cussed or drank as much trying to get it to work.

Take your time and walk away because you will fail the first 10 tries. You have to start over if you do fail so you will be good at the first 4 steps fairly quickly.

When applying I had to hinge the graphic to make sure it was straight. There is no repositioning of this stuff.

I will have to redo my panel soon as I used rattle can clear-coat and it has failed already. I don't look forward to learning it again but the results are exactly what I want so I will do it again.
 
I started with DecalPro, and while I found it doable, it was a lot of brain damage per label. I switched to the Brother PT 2430 PC and found that I could make perfect white or black on clear labels in seconds. I will never make another DecalPro label.

Jim Berry
RV-10(coming home from the paint shop next week)
 
This had to be the most frustrating product I have ever tried to use. Followed the instructions to the letter and could not get it to work. Talk to the owner several times only to hear that the instructions were for decals, not really meant for lettering. Tried all of his tips and tricks, even sent him a PDF with all my labels to confirm that the lettering was big enough and that I had sufficient borders. Still no joy.

I was successful at creating decals, but labels are a different animal. They are way more fragile. I suggested to him that he create a instruction set for doing labels and maybe even a video demo like he does for logos/graphics. He didn't really seem to be interested in that. It's been several months, maybe he's done that.

Good luck with it, but be prepared to sink $200+ and not get it to work.
 
Wow!

Hard to believe that we're all talking about the same product! As you can see in the picture above, the white label came out perfectly, and that was my second attempt ever. Just for the record, I have no financial interest in the company, and no axe to grind with those who like their stick-on clear labels; just wanted to share my results. As always, YMMV. :)
 
Hard to believe that we're all talking about the same product! As you can see in the picture above, the white label came out perfectly, and that was my second attempt ever. Just for the record, I have no financial interest in the company, and no axe to grind with those who like their stick-on clear labels; just wanted to share my results. As always, YMMV. :)

That's bizarre, IMO. Of all of the reviews of Decal Pro on VAF, the majority by far have posted the same comments -- that the learning curve is steep and frustrating, but once you get the hang of it, it's great.

When I took the easy way out and used the Brother P-Touch label maker and saw that it looked OK, I lost the incentive to put in the effort to use the Decal Pro system. I really only need a few decals, so probably not worth the effort. We'll see ...

I have a lot of experience making and working with water-slide decals. Perhaps there was more of skill transference than I'd imagined. For me learning to successfully set universal head rivets entailed the frustrating learning curve.:eek:
Once again, I'm not trying to sell this, only to share my positive experience that it can be done. If you want to do something else, I'm okay with that, whatever your reason might be.
 
I have a P-touch label maker, sees to make some tough labels, how has it kworked out fo your plane?

[QUOTE=N8RV;When I took the easy way out and used the Brother P-Touch label maker and saw that it looked OK, I lost the incentive to put in the effort to use the Decal Pro system. .
 
I was one of the early adopters of this system and it did take a long time to master the thing, which was very frustrating. However, the results look outstanding and after 360+ hours, they are holding up well.

Some of the labels are coming off but the majority looks as good as the day I put them on.

Like some of the others on this thread, I looked at using a label maker but in my installation, they wouldn?t work. The reason being is that I used a textured paint on my panel to cut down on the glare and stick on labels would never look good.

I am very happy with the finish of my panel and the DecalPro labels.
 
I used the decal pro system and ended up with great looking labels.

The problem was they scratched away with the slightest touch. I tried to spray mine with clear coat, but that didn't work either. The clear coat peeled away from my powder coated panel. I ended up scraping everything off and starting over. I had a name plate engraving shop laser etch the same lettering that I used on my LaserWriter with the decal pro system onto a thin black matte plastic label. I am very happy with the results they look great.
 
How's the Decal Pro going?

William, just checking to see how the Decal Pro is going. Are you still pleased with the process. I'm about to order a system.

If anyone out there is wanting to unload their Decal Pro system, I'm interested.
 
Yes, still pleased with the system. I'll be applying the annunciator decals this evening and will post pics as soon as practical. I was already well equipped to make water-slide decals, but of course you cannot produce white text to apply to darker surfaces. That was the impetus for trying the DecalPro system. Make no mistake, you'll spend a lot more time and money than you would if you go with black-on-clear labels, but there is definitely an improvement in appearance of the finished product. Is it enough of an improvement to be worth it? For me, yes, but I believe that it's a lot like the fixed pitch vs. constant speed prop debate. Either choice will get a good result. Some people are willing to pay extra to get the improvement, others are not. I'm finding that applying the adhesive is the part that requires the most "art", as you can't really see what is happening. I watched the online videos and am trying to emulate their technique, but you just have to develop a feel for it. This step also has a strong influence on how durable the result will be. All of the other steps are just a matter of dexterity and following the directions. Those interested, stay tuned.
 
Some finished product

Here are the results of the annunciator panel labeling:

2012_2_6b.jpg


2012_2_6a.jpg


I'm very happy with how this came out. I let the white lettering setup for a couple of days before coating it with a clear semi-gloss acrylic to kill the shine. The lights were done with black DecalPro, which was easier to work with than the white. I had one white image breakup on me during the fabrication process, but that's the only problem so far, and once you're all setup and running, the redo took very little extra time. I think I now have a pretty good handle on correctly applying the adhesive - the clear carrier around the image should have a frosted appearance, while still allowing you to see through it pretty clearly. I've already drawn up the rest of the panel labeling on the CAD program, so I'll be ready to go when I paint the panel itself. Now it have to wire this contraption up! :eek:
 
WOW!!

William, that looks great!! I guess I'm about ready to pull the trigger and order Decal Pro system. Did you buy the laminator from Decal Pro?
 
William, that looks great!! I guess I'm about ready to pull the trigger and order Decal Pro system. Did you buy the laminator from Decal Pro?

Yes, I bought everything from DecalProFX, except the heat gun, which I already had. I've just re-ordered a full sheet of white and of black, having pretty much used up the sample pieces included in the kit. The other side of the equation, of course, is how to generate the images. MS Excel works reasonably well, but I get better results with my CAD package. In the case of the fuel pump label, I included a "bullseye" circle on the image that I used to line up over the hole. A drawing package would be ideal for even fancier and/or multi-color stuff, but I do not have one. Initially I spent pretty much an entire weekend getting up to speed, but feel reasonably comfortable with the process now. I spent about an hour all up on the fuel pump label, but that includes drawing the basic image, several iterative adjustments to the drawing, then the creation and application of the transfer image. After the application of the image, I set the workpiece aside for a couple of days to let the transfer fully setup, and of course you want to target area to be clean, clean, clean.
 
That fuel pump label also illustrates another feature - size. You can make labels or markings or groups thereof up to anything that will fit on an 8-1/2 x 11 sheet. I'm still trying to think up a use for all of the beautiful metallic colors and iridescent finishes available. :rolleyes: If anyone knows of a reasonably priced drawing/illustration software, please let me know - then I could make multi-colored transfers.
 
Back
Top