What's new
Van's Air Force

Don't miss anything! Register now for full access to the definitive RV support community.

Manual to electric flaps on an RV-4

RFazio

Well Known Member
My buddy wants to change his 4 over to electric flaps. I see vans sells two kits for this. One uses the original weldment, and the second uses a new weldment. The second is more expensive of course. Has anyone done this with these kits. They don't show very good pictures of the kits. I can't really tell how they are different. I can't see how using the original weldment would work. Any info on this would be appreciated.

Richard
 
I have done it with the retrofit weldment. Keeps from having to cut and weld on original if I recall. It was straightforward and is a great improvement. I put the switch on the bulkhead just in front of the throttle for easy reach. The worst part was doing all the work between your feet. Doing it again I would make sure to have a helper to run for tools, and set up a scaffold even with the longeron and perpendicular to the fuse. to lay on. I seem to remember breaking a lot of angle drill bits for some reason.
 
RV8 style

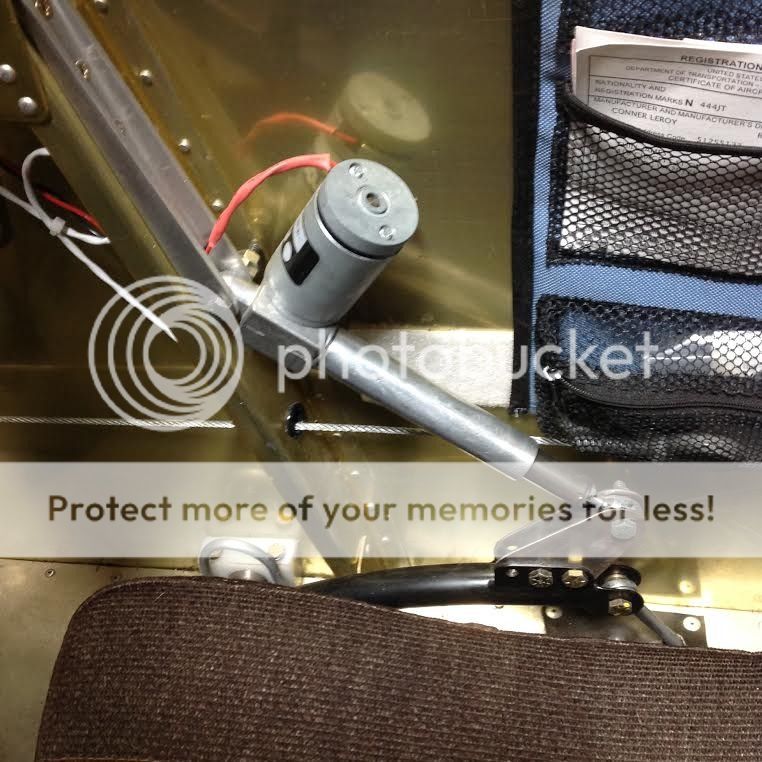
Or you can do it the easy way. It is still necessary to weld the two brackets on the original lever. I had intended to connect the motor to the black bracket, but the geometry didn't work. (mainly because I didn't use the Van's motor assembly). So the additional bracket was added to insure the motor would free wheel at both full extend and full retract.


Jim
 

This is a much improved design (more like the RV-8 implementation) that the RV-4 design, IMO.

If I was doing this I would go this route. I did the RV-4 retrofit using the factory modified weldment and it is a it of a pain but doable. This would be easier to install as the access is much easier.
 
Or you can do it the easy way. It is still necessary to weld the two brackets on the original lever. I had intended to connect the motor to the black bracket, but the geometry didn't work. (mainly because I didn't use the Van's motor assembly). So the additional bracket was added to insure the motor would free wheel at both full extend and full retract.


Jim

Jim can you comment on what motor actuator assembly you found to work for this application? Nice easy setup. Thanks for sharing.
 
Back
Top