rapid_ascent
Well Known Member
After working on one of my tanks I decided to complete the ailerons and the flaps. Now I've run out of other things to do so I have to go back to the tanks. Fun.
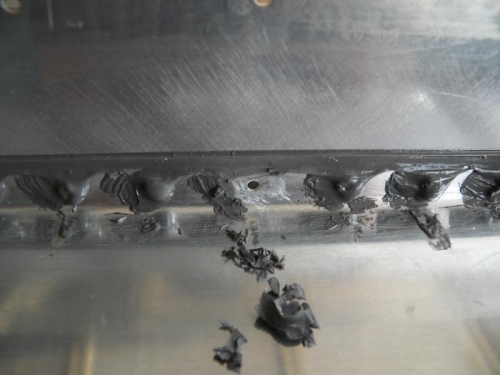
I finished one of my tanks following the procedure that I thought was correct for sealing the rear baffle. I layed down a bead of sealant in the location described in the instructions, below the rivet line. However I now have a small leak along the joint between the baffle and the skin. I may have been a little too neat with the sealant and I'll try adding some more along the outside of that seam to correct the problem. I could also drill out a couple of rivets and put sealant in the hole then re-set them.
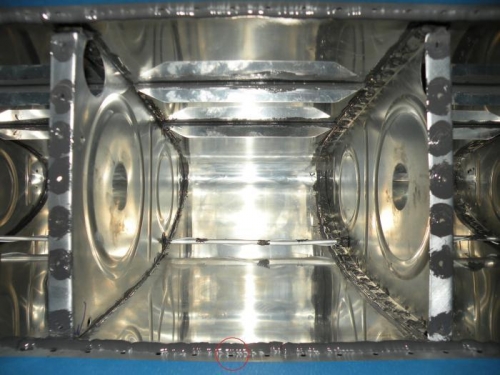
As I move on to the second tank I wanted to make sure that I was using the "correct" procedure. I assumed that the seal of the rear baffle was made below the rows of rivets so that those holes did not need sealant applied and the rivets dipped in sealant. Is this correct or should I have been extra safe and used the same riveting process that I used for the ribs and etc? This part isn't very clear in the instructions so I'm just wondering what others have done.
I finished one of my tanks following the procedure that I thought was correct for sealing the rear baffle. I layed down a bead of sealant in the location described in the instructions, below the rivet line. However I now have a small leak along the joint between the baffle and the skin. I may have been a little too neat with the sealant and I'll try adding some more along the outside of that seam to correct the problem. I could also drill out a couple of rivets and put sealant in the hole then re-set them.
As I move on to the second tank I wanted to make sure that I was using the "correct" procedure. I assumed that the seal of the rear baffle was made below the rows of rivets so that those holes did not need sealant applied and the rivets dipped in sealant. Is this correct or should I have been extra safe and used the same riveting process that I used for the ribs and etc? This part isn't very clear in the instructions so I'm just wondering what others have done.
")