
Van's Air Force
You are using an out of date browser. It may not display this or other websites correctly.
You should upgrade or use an alternative browser.
You should upgrade or use an alternative browser.
Rear Baffle ProSeal Batch Size
- Thread starter Stalldog
- Start date

180 grams white and 18 grams black
That was for one of my -6 tank baffles plus covering all the rivet heads. I also taped a line to keep the proseal off the area that overlaps the main spar flange. The -7 tank is a little different, but I hope this helps..
See links below.
http://www.mykitlog.com/users/displ...g&project=665&category=4480&log=106426&row=35
http://www.mykitlog.com/users/displ...g&project=665&category=4480&log=106481&row=34
I just did one baffle this past saturday and used a total of about 250 grams but I'm also on my third quart of PPG 890 proseal  . More is better right?!?!?!? If you have a proseal gun, It makes it much easier!!! I mixed two 100 gram cartridges & then mixed a 50 gram cup thinned 5% with toluene for "painting" all the contact surfaces of the baffle, back sides of the ribs & "twirling" the pop rivets in... It's not too bad if you lay it all out & have a game plan. I'm actually taking off work friday to close up my second tank. Good luck!!
. More is better right?!?!?!? If you have a proseal gun, It makes it much easier!!! I mixed two 100 gram cartridges & then mixed a 50 gram cup thinned 5% with toluene for "painting" all the contact surfaces of the baffle, back sides of the ribs & "twirling" the pop rivets in... It's not too bad if you lay it all out & have a game plan. I'm actually taking off work friday to close up my second tank. Good luck!!


longranger
Well Known Member
An excerpt from my build log when closing my first tank:
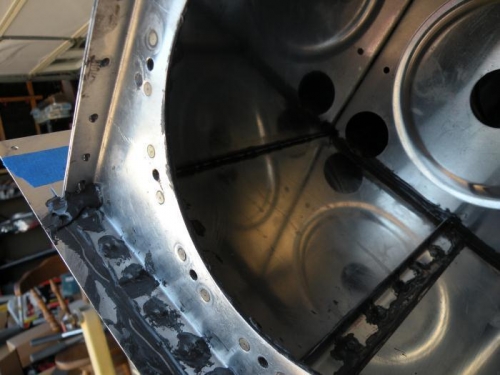
Starting with about 115 grams of mixed sealant, I laid down 3/16 beads just forward of the skin rivet holes, and just inside the end rib rivet holes. I laid the beads down with a 60 cc syringe from drugstore.com that comes with about a 5/32 nozzle. It took a couple of fillings of the syringe to get the beads down. Then, per instructons, I applied a thin layer of sealant around each rib hole before dropping the baffle in place.
Ready for the baffle:
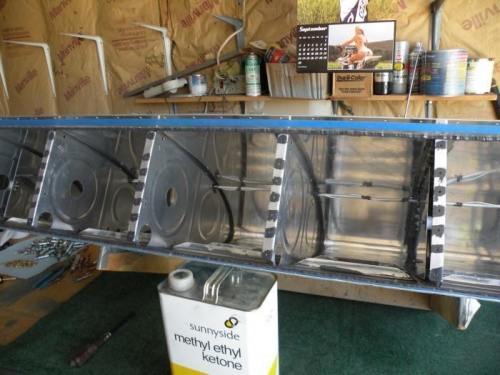
Good beads along the baffle:
Starting with about 115 grams of mixed sealant, I laid down 3/16 beads just forward of the skin rivet holes, and just inside the end rib rivet holes. I laid the beads down with a 60 cc syringe from drugstore.com that comes with about a 5/32 nozzle. It took a couple of fillings of the syringe to get the beads down. Then, per instructons, I applied a thin layer of sealant around each rib hole before dropping the baffle in place.
Ready for the baffle:
Good beads along the baffle:
Thanks, fellas, pretty good variation on quantities, so guess I'll start out around 150 g mixed and see where that takes me. It's supposed to get cold again so it will help slow down the cure time in case I need to make more. Will be using a drugstore syringe which has worked well for me on the rest of the build.
Update
Well, I mixed 140 g white, 14 g black, and 2 g toluene. Ran out and had to mix another 70 g white, 7 g black, 1 g toluene to finish. I buttered the ends of the ribs and put a smear down along the rivet line before putting down the 3/16 bead, plus I thinly buttered the sides of the baffle and the flanges on the z brackets, so I did more than per the plans. To do the pop rivets and end rib 470 rivets, including shop heads, it took another 20 g white and 2 g black. The baffle rivets, including shop heads, took another 30 g white, 3 g black. All in all, I spent 10 hours assembling the baffle on the right tank. The wedge pop rivet tool posted elsewhere in VAF worked great. I cleco'd every hole -- no pillowing problem. I shot all the rivets, just seemed quicker for me and I wanted to drive the rivets into the c/sinks in the baffles. Even though I had deepened the c/sinks to get a good ring around the rivets before the ProSeal, I could have still gone another click or two. About 2/3 turned out flush, and the other 1/3 are a hair proud, but not very much. I've got a feeling dimpling would have provided a better place for ProSeal to seal, but it might have made pushing the baffle down more difficult.
I test fit the tank on the wing last night and everything seems to line up just fine. Tank does not appear to sit proud on the spar even though I thinly buttered every rib and z bracket flange.

