What's new
Van's Air Force

Don't miss anything! Register now for full access to the definitive RV support community.

Removable switch bar

digidocs

Well Known Member
Hi there,

I remember seeing a post here on VAF from someone who had modified their panel lower switch bar to be removable. Does anyone else remember this too? (Can't seem to find it with the search so far.)

David
 
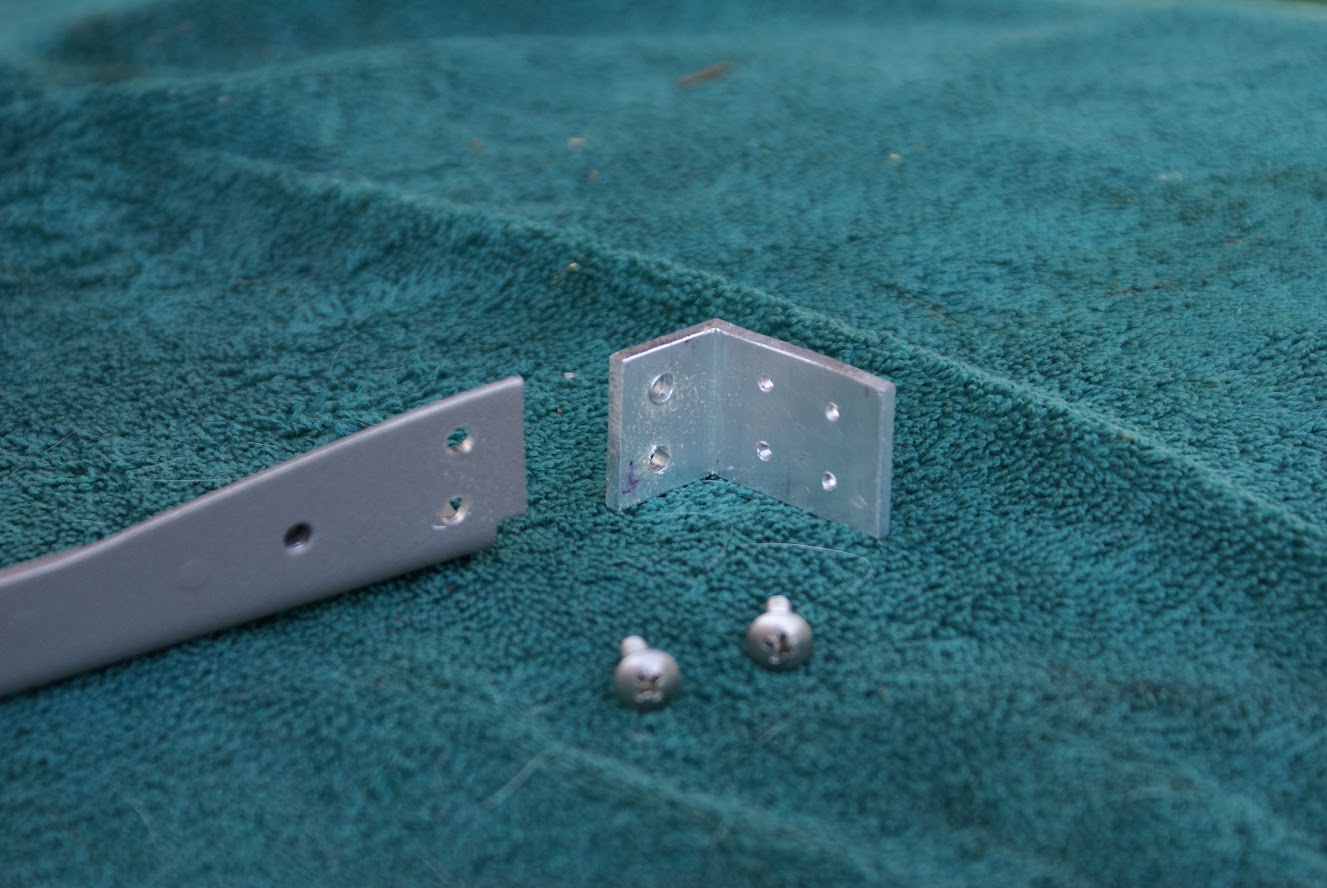
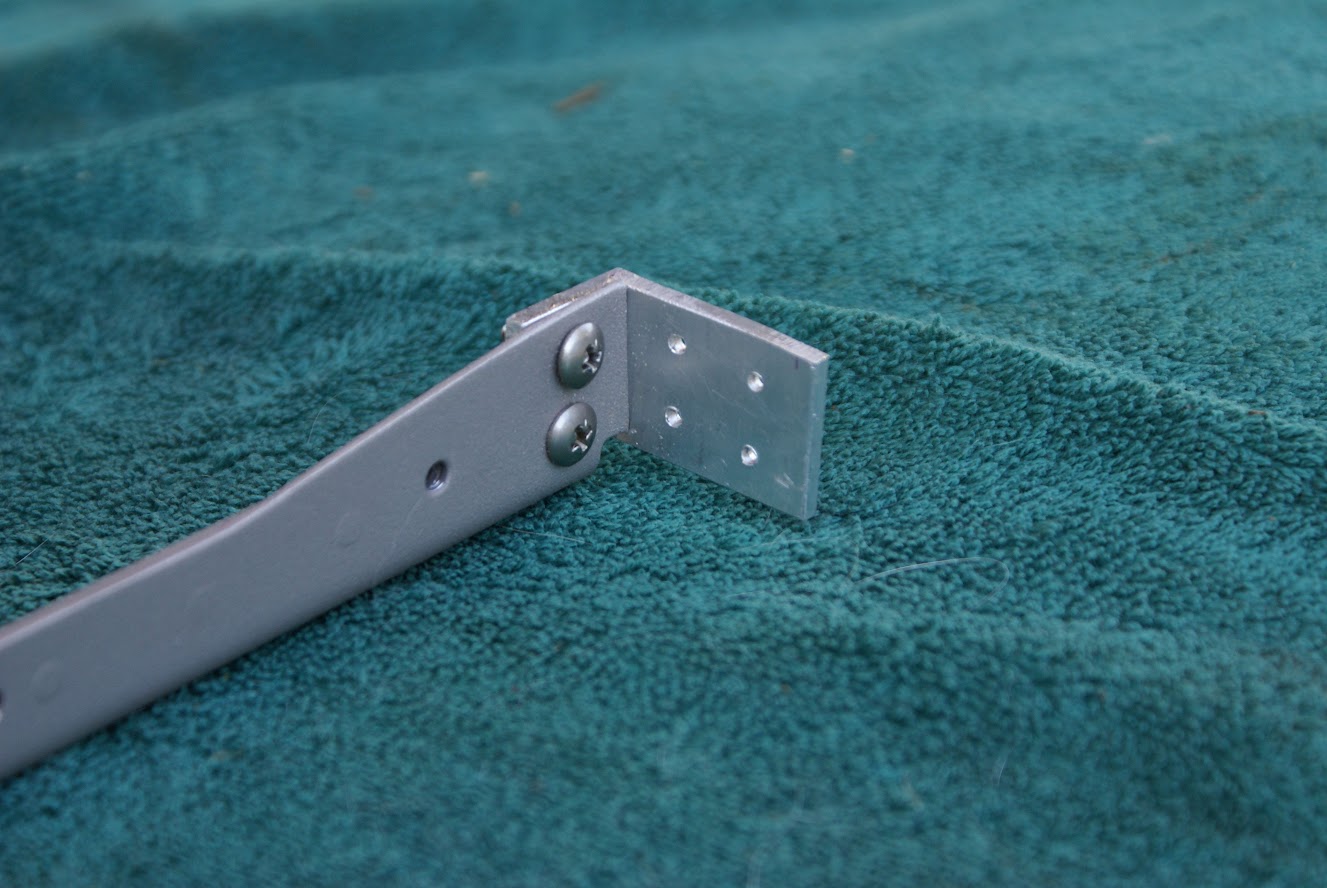
I have seen it done by placing all the switches (and throttle/mixture/prop/carb heat) on a piece of appropriately sized C-channel that is mounted below the stock panel. Nut plates are installed in the bottom of the panel, and screws are inserted through the top flange of the C-channel from below to hold it in place. Holes are required in the bottom flange of the C-channel to allow a screwdriver in to drive the mounting screws.

[edit] Just noticed this was in the RV-10 forum... What I saw was done on a few side-by-side models, 6's and 7's... Not sure what the arrangement is on the -10.
 
That was probably something I had posted.

I cut off the bend at the end of the cross bar, and used some 1/8" alum angle to make replacements. they bolt to the cross bar with two # 8 screws, and are riveted to the fuse sides with 4 rivets per side----wanted to make them a bit more stable due to the fact this was now a three piece assembly, instead of a single unit.

FNBhiNZhPvKam3U2YjKVpYL_-erP7lHdNKwjIU6xMT5MDleMX5hOjvVifFClSmIWaojupEBgS7K8BcJRUuXk_tLAdyCOVjUj5WlUL6k8apSt8sfDoXGP2o9HVjjxBct3233unvgqrOqRAiiDEzIhoGwGW6tDHAfo9L4CFSXM-H-mIgST1xwK43eljoEE1XhU4bLdj96ZLLSVX7VSkqZIOHUaEGoefCk1MoufYKkpuuEJOrYcrAUVFIFxSfwvUmN0XheVOEedmuRQfEuwo8Iz_yLADuSo2QkaT-Kchol-lX0LJBMP0O4Pz-kwk00-SpLDYNrYfhf9CiY9N1bZ0d5COACh1BiQLFWwanq8_uvE4yemxNGwNnlVA7o7vSCTWfrXMvUtWDUwbcDuSiWeniKSE1xsWvmtEzSyIfOrTaSVFR54BXMagK8jvp5tZuzB14qB5oZHq7SQXFE1pae-mqx0Rgie3uGaYKtJzCtWkdVa4rMQzaMZf8PxMJLckrlKMoA-_jG2kQpRHPYVrocebvyLlkdMrglmYpRTI5olJVVNAyxVwdU1j41dkQnxNx6PY4Ep52jA9n44j8khFEbkj9evhXHzwy3okVlYO62XCzK733lweQMILg=w1327-h888-no


oC4AhSk_tjIcNo6IhnKKQchHNkOF5VkpsFaBPl15YceIlE8R-JSdOt7ZwEbDqIukreid_yCiPIqW541TqaXZ_w1iCE_nls-JEgKDFjvOk7ocLmWztogdDt-0fpvtkdi9dj1MSmeCALbtHZ7eP9nutXAzlyAZBkshbjDXlZlAGbJwKkiwS2dS7oi0-rXkyoouP9lAZrg-LLzVx7TvcHUrftqnOGa_Oqjw8ynf6BWj4nLZmM0qwti8XJLcHg-dIKioxPJIAIYl5fpr05Lm57TxAuHaUcalIA5qheFMZnHB1QC7GmmZofYhuKTY2Tyt5SgaeVXmXf0Bu3KI2I8--ZV6w8VE7Ygfo50uu6Fgvh0qzycSCUj8seS4Xih3kGXh9KEvMrdYG9eyJdfVJuWu4dQytGHwaOHUTO7eSmWn_Q_zncMa5G3PzKGdL73HAvQ8wFfmnNqbuesHiNgjVlO_fdvdBzWizie2uYvlBijW1DuMd9tpOvG_tU8tsQfJM_Hdafsw2hyequBRq9dPPrE-iQ-dCfiSMgU3hln2YQrEJy1L-6uRE5Cc2ErfJ2tP2BISV2KQZPISEPZng9zvnqSerDb66aJuehYFHmMMgZnFgJ5pfbzLi437QA=w1327-h888-no
 
Last edited:
picture of how I did it

This was my solution to the problem I had with my C-150 with all the switches where I could not even see them. The breaker/switches are on one piece of removable .063 aluminum and easy to get to from the top because it's a tip-up.

They are two rows of five so that I can easily get the right one even in the dark. The switch panel is to the right of the EFIS that is directly in front of the pilot.

The flap switch is positioned so that I can operate it with a finger while operating the throttle at the same time.

http://www.n17hh.net/IMG_3754.jpg

Other pics available by request - I would have to go find them in my archive of the build.
 
Back
Top