

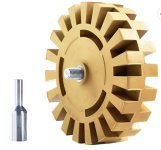
The tape on the flaps between the wing and flaps is old and yellow. Got some new tape from Van's. After lowering the flaps to get full access to the tape I found it very difficult to get the old tape off.
Any tips on how to remove the old tape? I want to be very careful not to do any paint or sheet metal damage.
Thanks
Pat
N931CB KHAF RV7
Any tips on how to remove the old tape? I want to be very careful not to do any paint or sheet metal damage.
Thanks
Pat
N931CB KHAF RV7

")

