

Hi hi! I got my vans tool kit in the mail about a month ago. I've never built a kit plane or anything more advanced than ikea furniture so I figured it would be a good idea to practice a bit before working on real airplane pieces.
So I thought I'd share my experience as a way to say "hi" as I've been lurking of a bit.
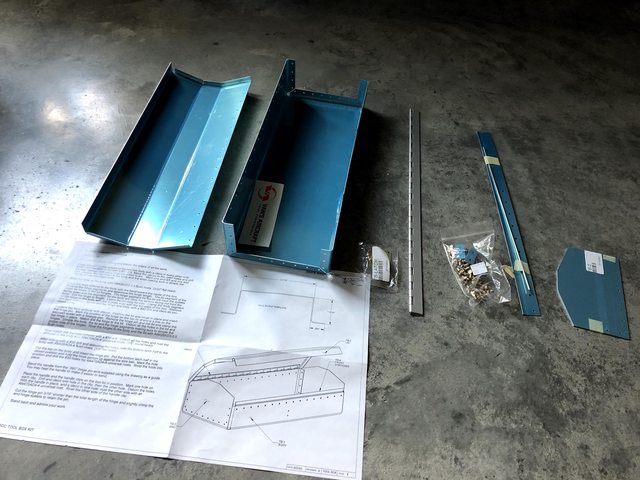
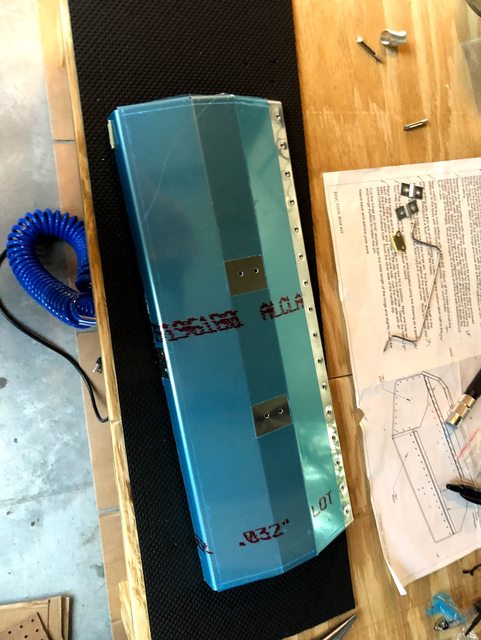
Here's how the pieces arrived. I really like the look of the blue film but I've heard it can be difficult to take off.
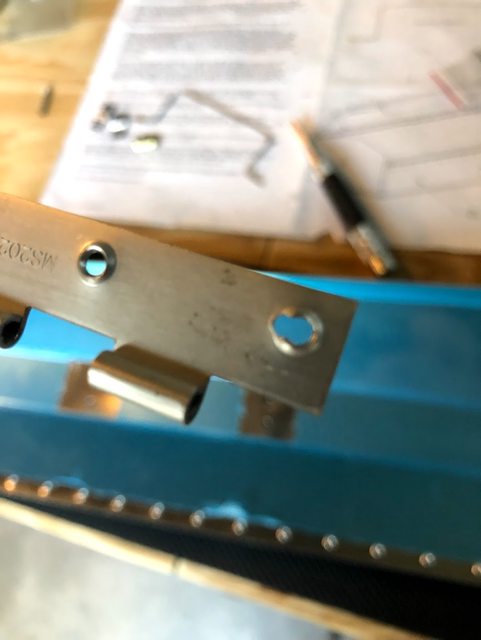
I inventoried the kit like I've seen on here and in youtube videos. It was a bit harder than I expected since not everything was labeled. So I had to do some of it by process of elimination, or context clues. Also, at this point, I didn't know how rivets were named so I had no idea what a 426 vs 470 was so I had to go do some research before I could inventory that part.
I already had some clecos and a tool i'd ordered from amazon but they were the wrong size. I don't do a lot of drilling so when the instructions mentioned #30 and #40 drills, I had to look all that up. Anyways. Now I know! And have my clecos organized by size.
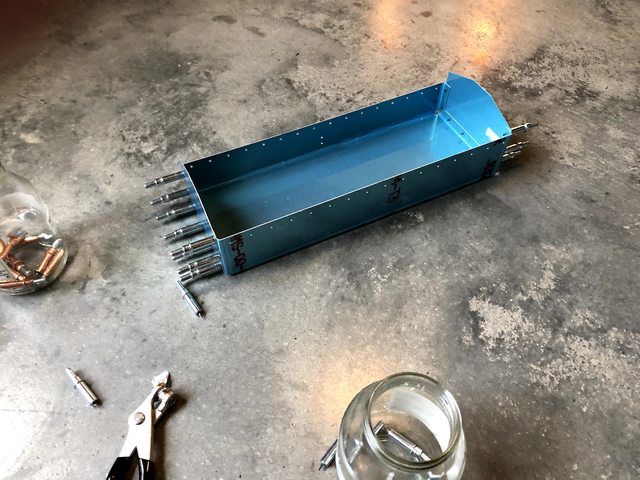
Next I built a wooden tool bench with plans from online so I could get everything off the floor. I had a squeezer and I was using that to squeeze the first few rivetts but eventually I hit the limit of the yoke so I had to go to home depot and buy a compressor and actually use the rivet gun I'd got from Wicks.
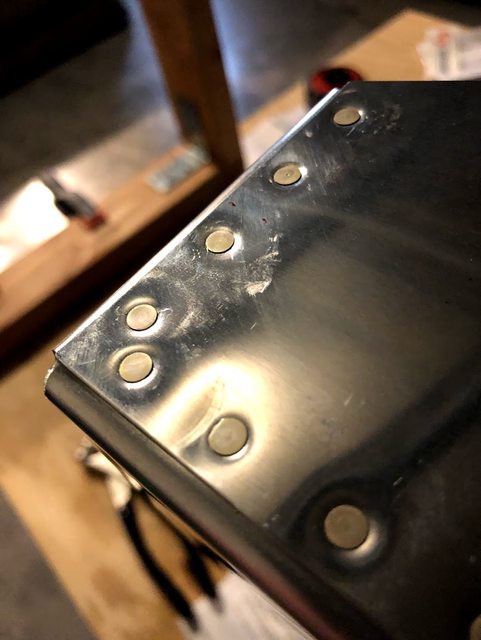
Here's a detail on some of the flush rivets on the left side. They didn't sit quite flush. so I drilled them out and started over. at this point I also messed up the body while trying to drill out a rivet so I ordered a new one.
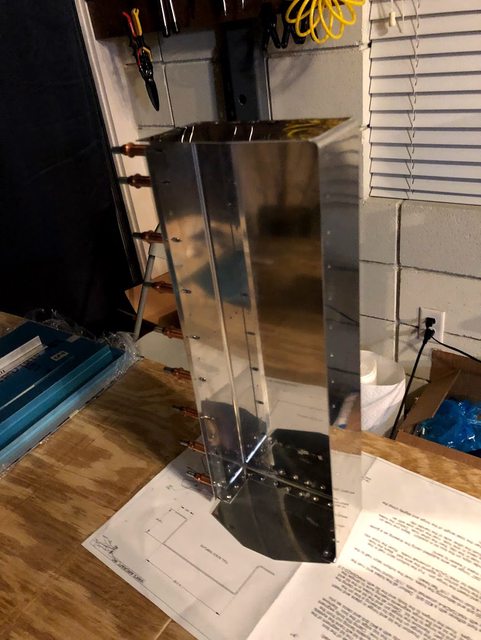
Here's a detail on a flush rivet where I slipped with the gun. Does anyone have tips on how to tell if something is just a cosmetic dent, or if you need a new piece?
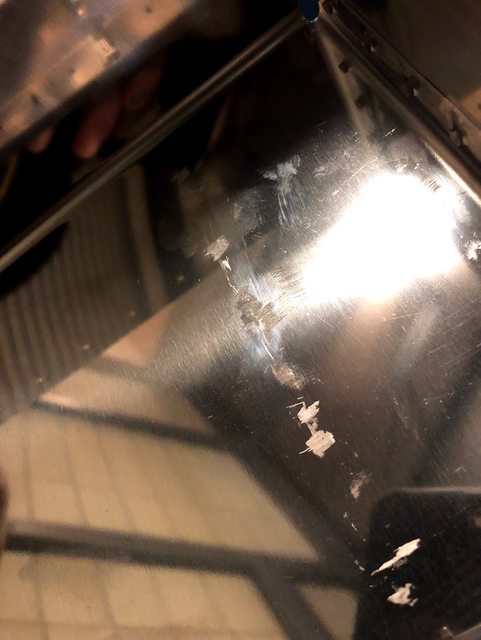
Also, I made these scuffs while using the rivet gun. This is from having the bucking bar on the inside. Are these repairable? Cosmetic?
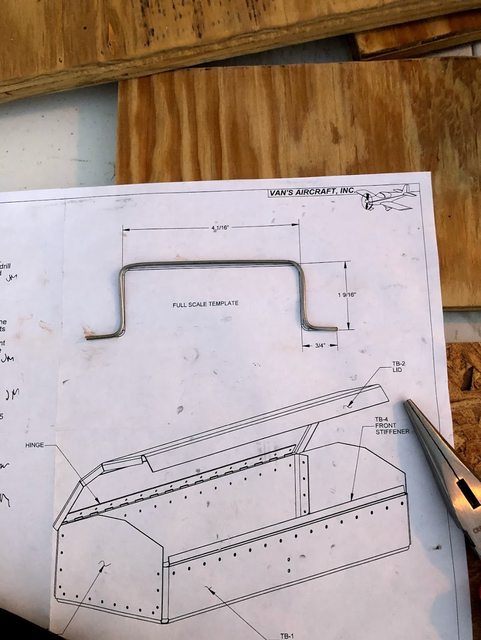
Next up I bent this wire to make a handle for the top. But it was really difficult to the the angle of bend that they had in the plans. I tried doing it with a vice and needlenose pliers but, as you can see, the bend isn't as sharp as it could be. Any tips would be appreciated!
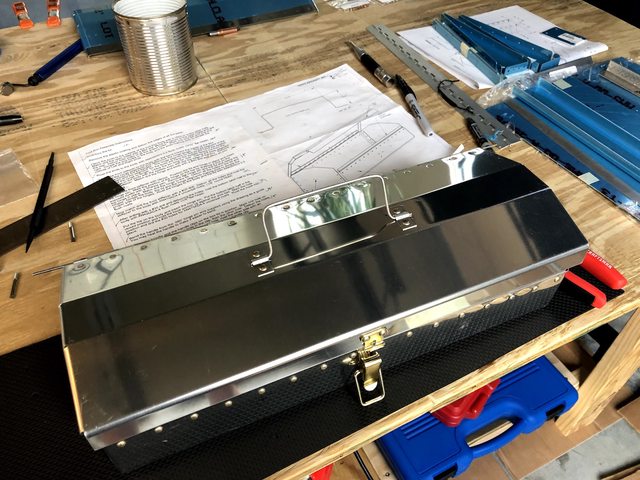
Here's the "finished" box. However, the latch on the top was a little too tight when fully clasped. There wasn't enough room to redril the top part of the lid so I figured it would be good practice drilling out rivets to get the lid of the hinge and replace it with a spare.
For the spare, I decided to buy a soldering iron and cut just expose the holes like the technique i've seen some of y'all use.
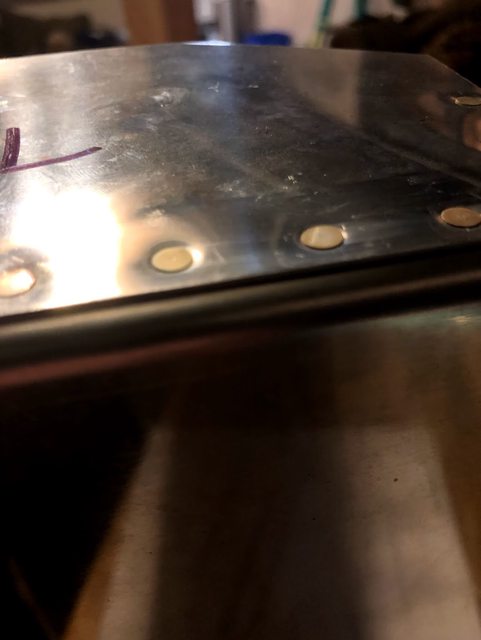
I got some practice drilling out rivets but I made a mistake here on the hinge and kinda ruined this hole. Any tips on what to do here?
I ran out of images but maybe I can reply with the finished piece
So I thought I'd share my experience as a way to say "hi" as I've been lurking of a bit.
Here's how the pieces arrived. I really like the look of the blue film but I've heard it can be difficult to take off.
I inventoried the kit like I've seen on here and in youtube videos. It was a bit harder than I expected since not everything was labeled. So I had to do some of it by process of elimination, or context clues. Also, at this point, I didn't know how rivets were named so I had no idea what a 426 vs 470 was so I had to go do some research before I could inventory that part.
I already had some clecos and a tool i'd ordered from amazon but they were the wrong size. I don't do a lot of drilling so when the instructions mentioned #30 and #40 drills, I had to look all that up. Anyways. Now I know! And have my clecos organized by size.
Next I built a wooden tool bench with plans from online so I could get everything off the floor. I had a squeezer and I was using that to squeeze the first few rivetts but eventually I hit the limit of the yoke so I had to go to home depot and buy a compressor and actually use the rivet gun I'd got from Wicks.
Here's a detail on some of the flush rivets on the left side. They didn't sit quite flush. so I drilled them out and started over. at this point I also messed up the body while trying to drill out a rivet so I ordered a new one.
Here's a detail on a flush rivet where I slipped with the gun. Does anyone have tips on how to tell if something is just a cosmetic dent, or if you need a new piece?
Also, I made these scuffs while using the rivet gun. This is from having the bucking bar on the inside. Are these repairable? Cosmetic?
Next up I bent this wire to make a handle for the top. But it was really difficult to the the angle of bend that they had in the plans. I tried doing it with a vice and needlenose pliers but, as you can see, the bend isn't as sharp as it could be. Any tips would be appreciated!
Here's the "finished" box. However, the latch on the top was a little too tight when fully clasped. There wasn't enough room to redril the top part of the lid so I figured it would be good practice drilling out rivets to get the lid of the hinge and replace it with a spare.
For the spare, I decided to buy a soldering iron and cut just expose the holes like the technique i've seen some of y'all use.
I got some practice drilling out rivets but I made a mistake here on the hinge and kinda ruined this hole. Any tips on what to do here?
I ran out of images but maybe I can reply with the finished piece
Last edited:

")

