What's new
Van's Air Force

Don't miss anything! Register now for full access to the definitive RV support community.

Prime before or after match drilling

FL-flyer

Member
Hi Everyone,

Quick question. Jason Ellis posted a great video on YouTube (thanks Jason!) and had mentioned if you prime your parts after match drilling / debrrring then you no longer can get the rivets into the holes and they have to be lightly re drilled.

Has anyone ever encountered this problem at all? Or is the consensus that parts should only be primed before match drilling?

Is there any detriment to having primer trapped under the rivet head or other riveted parts?

Thanks!
 
Last edited:
Everywhere I've primed I have done so after all prep steps are done. After the primer dries I am banging rivets. I've never had an issue with primer causing issues with rivets fitting, and no there is no issue with having a coat of primer under a rivet.
 
After

You must be using the wrong primer. Try SEM.
Dries fast. Holds up well. Match drill, debur, dimple, prime, rivet.
When you match drill, allclad protection is being removed around the hole.
 
No problem here

yea I heard him say that too and was curious if it would affect me. Short answer- it has not at all.

I am priming with akzo. One important piece of info with my data point is that I dimple everything AFTER priming. I think that dimpling enlarges the holes slightly, so that may be why I don't see any issues. Dimpling after priming is easier because scrubbing all those dimples out then making sure they got primer coverage seems like a real pain to me.
 
I am priming after match drilling, but before dimpling. What I found is that the dimple backsides would eat a scotchbrite pad quickly, so now I just matchdrill, then prime. This keeps me from burning through scotchbrite pads.

I am almost done with my empennage, and been doing it this way for about 90% of this kit. I have only had to ream out less than a dozen holes due to the primer causing an issue with the rivet. So, out of the hundreds (thousands?) of holes in the empennage I have drilled, primed and THEN riveted, I have had an incredibly small percentage that I had to ream the primer out of the hole to get a rivet to fit.

I am also using AKZO...love the stuff.
 
I have encountered this occasionally using Stewart Systems EkoPoxy. Some rivets fit just fine in their holes, some I have to use some force to get them into the hole, and others I have to ream to get the primer out. This isn't a problem with dimpled holes since the dimpling process enlarges the hole slightly.

Since it isn't every hole that has this issue, it probably has more to do with how thick I sprayed the primer, and therefore how much seeped into the rivet holes, than it is the simple fact that I used primer.
 
I am priming after match drilling, but before dimpling. What I found is that the dimple backsides would eat a scotchbrite pad quickly, so now I just matchdrill, then prime. This keeps me from burning through scotchbrite pads.

I am almost done with my empennage, and been doing it this way for about 90% of this kit. I have only had to ream out less than a dozen holes due to the primer causing an issue with the rivet. So, out of the hundreds (thousands?) of holes in the empennage I have drilled, primed and THEN riveted, I have had an incredibly small percentage that I had to ream the primer out of the hole to get a rivet to fit.

I am also using AKZO...love the stuff.

Thanks for the info Lynn!
BTW, when prepping your parts for priming with scotchbrite pads do you also use a cleaner or solvent? If so, may I ask what do you use?
 
Thank you!

Thanks so much everyone for your replies. I really appreciate all the good ideas!

I think from the consensus it looks like it should be done in this order:

1. Match drilling (and counter sink drilling if required)
2. Deburring both sides of all skins
3. Prep and clean all surfaces to be primed
4. Prime with AKZO
5. Dimple
6. Final assemble and rivet
 
Thanks for the info Lynn!
BTW, when prepping your parts for priming with scotchbrite pads do you also use a cleaner or solvent? If so, may I ask what do you use?

I do use acetone as my cleaner. My process goes like this:

1. Assemble parts and match drill or back drill.
2. Deburr all holes and dress all edges with a scotchbrite wheel and/or pad
3. Scuff all my parts for priming using a maroon scotchbrite pad. My goal is to keep as much alclad on the metal as possible (its a good corrosion inhibitor itself), but also clean off any surface corrosion and finish away light scratches from the assembly process. One the parts have nice "satin" finish, thats usually when I call them good to go for the next step.
4. Give the parts a quick wipe down with a dry micro-fiber towel. This takes a few seconds per part, but it gets all the bulky dust off the part and makes the acetone cleaning go quicker.
5. Clean with acetone. I use white, un-dyed paper towels for this. It usually takes a good 3 passes, each time using a clean side of the paper towel (I like to fold in quarters for using the most of the towel). I will wipe the parts with acetone until the paper towel comes up clean, then its good to go! Again, 3 passes is about all it takes.

6. Spray them with primer! AKZO is pretty fool proof and covers very very well with little effort using a cheap Harbor Freight HVLP spray gun. I like to give the parts a day or two to cure. Even though AKZO dries really fast, and can be worked within an hour or so of painting, it does harden very much over a day. So I will let the parts cure at least a day to be safe.

7. Dimple the parts that need it, and then do final assembly and rivet.

The process has worked out pretty good so far for me. I like to dimple AFTER priming because if you try to scuff parts using a scotchbrite pad that has been dimpled, the back side of the dimples will chew up a scotchbrite pad :)

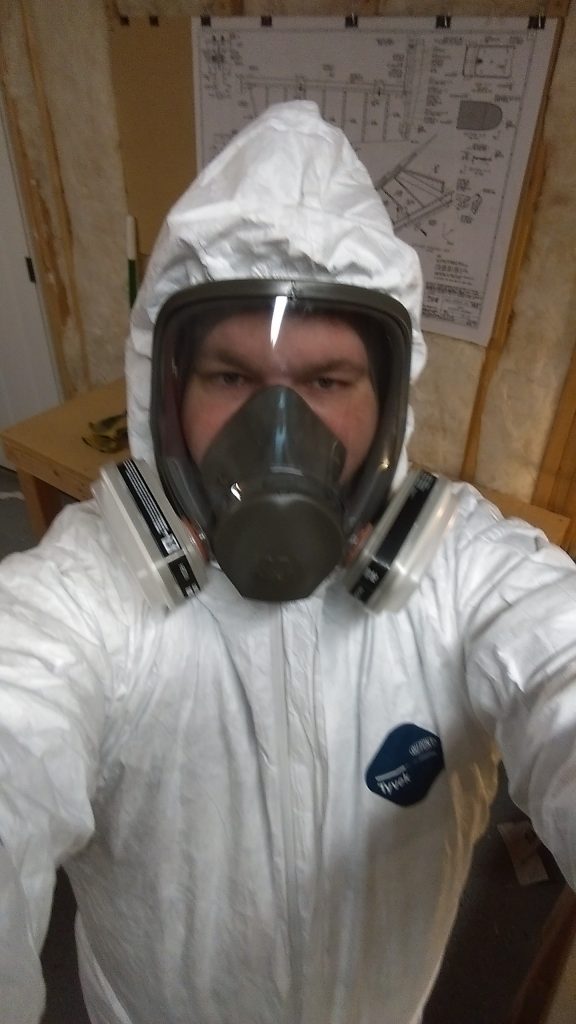
Also, I will try to "batch" all my priming as much as possible. This is pretty easy to do on the tail kit, you just have to keep up with where you are in the plans. Batching up the priming makes it easier for me personally because I have to wait for good weather since I am spraying outside. AKZO is very nasty, please use a respirator (full face preferable) and a cheap tyvek suit (about $8 on amazon) to protect you. Really, any primer that uses chromates you want to do this, not just AKZO. I think I have around 100 bucks all together in my full face respirator, organic chemical filter cartridges (the pink ones), and a tyvek suit, and its the best money you'll spend if you are spraying chromates.

Hope that helps and happy building!
 
Last edited:
THANKS a lot for sharing your detailed process Lynn!! I think I am going to follow your process exactly.

And you brought up another great point, chromates. I was told it is very important that the primer had chromates. And yes I know of safety hazzard with this.

The confusing thing is that the spec sheet for AKZO CA-116 does not mention anything about chromates, only that it is a two-component epoxy primer designed to provide maximum protection from various chemicals, hydraulic fluids, aviation fuels, phosphate ester (Skydrol®) fluids and corrosion causing media.

Does it mention anything about containing chromates on the can?
 
Last edited:
If you cant get the rivets in after priming maybe the primer is too thick?

Why too much primer. When the hole is dimpled, the hole gets a lot larger. In A&P school, I learned that a piece of 0.032 aluminum primed on both sides increases weight by 1%. Any more than that and you used too much primer. 20+ years ago in A&P school we learned that any more than a translucent coating of primer was too much primer.
 
The cans themselves have very little info on them. However, I read over the MSDS sheet and seen it had strontium chromates which is why I took the PPE precautions.

http://site.skygeek.com/MSDS/akzono...fluid-resistant-epoxy-primer-2-gallon-kit.pdf

I am not 100% sure if its a truly chromate based primer, as its main selling point is being an epoxy primer. If memory serves correct, there were a few other older posts on here that mentioned AKZO having chromates in it as well.
 
BTW, when prepping your parts for priming with scotchbrite pads do you also use a cleaner or solvent?

I use PreKote. You spray some PreKote and scrub it down with maroon scotchbrite. This accomplishes the degreasing and mechanical scouring all in one shot. Then rinse with water, use the air hose to dry it off and its ready to prime.

Been working great for me and the akzo is on there for good
 
Thanks Lynn and Josh! Great info!

I am also learning that "wash" primers are generally the ones that contain chromates and are designed to be top coated. Call me lazy but I don't want to prime twice, so if the AZKO primer has chromates (which it sounds like) this would be awesome. I am going to reach out to the company just to make sure.

One thing I am very sad about is Vans does not give us any priming options for quick-build kits. They supposedly are using Sherwin Williams P60G2. I would actually be okay with them using P60G2 because it would add a good measure of corrosion resistance since its got chromates but I am told that the P60G2 that they get in the Philippians is crystal clear (as opposed to green in the US/Canada). This makes NO sense to me that they would use a "clear" version of the product or that Sherwin Williams would even make this. Since the primer is clear, its probably also nearly invisible, so you can't see where you are spraying it and who knows if they are even priming all the parts in the QB kits. I'm sure this speeds up production on their end because if they forget to spray a section or two no one would ever know. Kinda reminds me of the magic invisible undercoats that the car dealers would try to sell you in the 1980s.
 
Last edited:
I'm using P60G2....it's cheaper, light, and very durable. I figure if it's good enough for Van's, it's good enough for me.

There is a post on the van's builders FB page that show the test coupons that have been hanging outside in the elements for years! The one with P60G2 looks as good as the day it was primed.
 
Thanks for that info Steve. BTW, did you have any issues spraying P60G2 with an HVLP spray gun? What ratio did you use?

Thanks
 
P60G2

I'm using P60G2....it's cheaper, light, and very durable. I figure if it's good enough for Van's, it's good enough for me.

There is a post on the van's builders FB page that show the test coupons that have been hanging outside in the elements for years! The one with P60G2 looks as good as the day it was primed.

Same here. They uncovered another section this year and the aluminum was perfect.
Light is good.
I use Bon Ami cleanser and scotchbrite. Cheap. Available at any grocery. No chemicals and safe for the environment. Clean and scuff in one process.
Mix rate is 1 part primer: 2 parts catalyst
Gun is DeVilbiss FLG. HVLP gun at 23 psi.
Spray till you barely see a color change. Very light.
 
+1 to what Larry said. But i went cheap and I'm using the harbor freight special hvlp gun. 2:1 mix and 50 psi is what works good for me with the purple gun
 
Thank you very much Larry, Lynn and Steve!
I really appreciate you sharing all of your ideas. I'm excited to start priming now :)
 
For those interested in subject of chemistry I wanted to share what I found in the Material Safety Data Sheets regarding if these primers contain chromates.

Akzo Nobel 463-12-8
Strontium Chromate 5-10% by weight

Sherwin-Williams P60G2
Chromium Zinc Oxide / Chromium VI (as Cr) 7% by weight

I have no idea what the difference is b/t Strontium Chromate and Chromium Zinc Oxide but I would imagine they are similar and have similar chemical reactions to protect non-ferrous metals like aluminum. Interesting...
 
Thank you very much Larry, Lynn and Steve!
I really appreciate you sharing all of your ideas. I'm excited to start priming now :)

Thats what makes this forum so great! Sharing of knowledge is key to a good community. I am still very very new at all this, but I have around 150 hours at this point. There are a bunch of great folks on here that are willing to help out and answer questions about anything. I am just glad I am able to start contributing back in some small way!

Good luck on the build! And have fun!
 
Akzo Nobel 463-12-8
Strontium Chromate 5-10% by weight

Yea akzo is pretty nasty stuff. I have a full mask I wear just opening the cans and the smell still makes it thru that. For spraying, I bought one of the forced air setups on ebay and wear a full hazmat suit. Works great, with the added bonus I look like a martian when the kids happen to see me.
 
Yea akzo is pretty nasty stuff. I have a full mask I wear just opening the cans and the smell still makes it thru that. For spraying, I bought one of the forced air setups on ebay and wear a full hazmat suit. Works great, with the added bonus I look like a martian when the kids happen to see me.

The type of filter cartridge you use make a HUGE difference. I am using the organic chemical filters from 3M that are designed for paint work. They specifically filter out all the nasty chemicals. I can put my face right over the cans and not get any hint of fumes, they work great. They also work great at filtering out acetone, which is a hard chemical to filter out.

Here's my priming PPE setup:
IMAG0030-576x1024.jpg


The respirator and fitlers were about $100 from Amazon. And the Tyvek suit was a whopping $8-12 (depending on size) from Amazon. For less than $150, you can have full body coverage, including face/eyes with filters that will eliminate all the nastiness. Its well worth the money.

Just be aware, your neighbors will think you are cooking methamphetamines if they catch a glimpse through your windows. Plus, it makes for a really awesome halloween costume!
 
I wanted to ask if anyone knows what product is recommended for cleaning the spray gun after using the Akzo Nobel primer. Thanks!
 
Last edited:
From a guy who deals with hazmat stuff at work: if you can smell something through your respirator than you are using the wrong filter or it fits improperly.
 
From a guy who deals with hazmat stuff at work: if you can smell something through your respirator than you are using the wrong filter or it fits improperly.

Thats a very important point. AKZO spray is carcinogenic so don't mess around with this stuff. Proper PPE is really cheap. A good face mask like in my photo a few posts above was about $120 bucks, and comes with two organic vapor cartridges with 2 snap-on covers that trap the overspray to prolong the life of the vapor cartridges. Its a full face mask so your eyes are protected too, and it seals up great and doesn't fog up. It also comes with a few "tear-offs" for the visor. so you dont have to worry about getting overspray on the mask.

I got mine from Amazon: http://amzn.to/2p6beXL Its WELL worth the money.

I did end up switching out the cartridges to these guys: http://amzn.to/2pnYxI6
Those 3M 60926 are the big daddys when it comes to filtration. They are a little more pricey, but they are the only ones I have found that will completely filter out acetone. I can stick the cartridge right over the acetone bucket and not get a single hint of smell. They are not hard at all to breathe through and I have managed to use them several times over. I really recommend them.

The Tyvek suit is about the best $10 bucks you'll spend on PPE. Its a full body suit, so it covers your shoes and your entire head as well. If you use it in combination with the face mask, the hoodie will seal totally around the face mask, and you can zip it all the way up your neck, leaving your hands as the only exposed part of your body. A pair of latex gloves and you don't have to worry about any overspray at all. These suits are disposable, but I have managed to get quite a few uses out of one suit with no problems. Also available at the Amazon Aviation Supply:
http://amzn.to/2qgW1Rp
 
Hey Lynn,
Would you rather use a supplied air mask or the cartridge filtered mask? I have the Hobby Air system but my mask used up so I either buy a new supplied air mask or a filter mask. Just looking for another opinion.
 
Hey Lynn,
Would you rather use a supplied air mask or the cartridge filtered mask? I have the Hobby Air system but my mask used up so I either buy a new supplied air mask or a filter mask. Just looking for another opinion.

Man, thats a tough one. Those Hobby Air systems are supposedly really nice. I haven't used one, but read lots of good things about them. So long as you keep the pump unit in a good clean air environment, it'll supply plenty of fresh cool air. If you can find a replacement full face mask, that might be the way to go.

I would not recommend a half face mask for AKZO however. I have a cheapo 3M half face mask that I use when I am grinding and cleaning my parts with Acetone (it also uses the 3M pink filters, the same ones as my full face mask). I originally thought I'd just use it to spray the primer, but after having some of the overspray blow back in my face from shifting winds, and get under my safety glasses I decided that was a bad idea. I don't think I got much in my eyes, but it aggravated the daylights out of my right eye for about 2 days....almost to the point of going to an optometrist. I decided then and there that I would never spray AKZO without using a full face.

If you can't find a replacement full face mask for your Hobby Air, then I'd probably take a look at the 3M cartridge full face masks. The one I mentioned is comfortable, seals up really well (even with my long beard), and is easy to breathe in with no fogging.

For what its worth, I came REALLY, REALLY close to buying a HobbyAir.
 
In addition to MEK and Acetone do you guys happen to know if Lacquer thinner can be used to clean AKZO from the spray gun?
 
Back
Top