What's new
Van's Air Force

Don't miss anything! Register now for full access to the definitive RV support community.

WD-409 questions

s10sakota

Well Known Member
Hello all,

Regarding the WD-409 tail spring bracket: I have the forward holes match drilled to the F-711 bulkhead. What is the best way now to open the holes to final size?


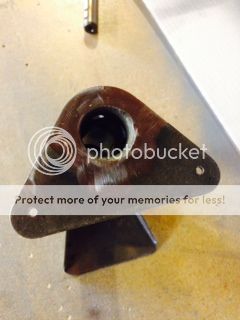
Should I drill the WD-409 separate from the F-711, or put them together and drill through all at once.

Also regarding drilling, I've read about people using reamers to drill these holes. When I use drill bits, I get triangle shaped holes which of course, I don't want here. I am not familiar with drilling with reamers. I imagine I drill it slightly small (what size bit?) and then turn a reamer in the holes for final size?

Thanks for the replies!
 
Sneak up on the correct size

1st, get the holes to a size you can secure with clecoes. And, drill in assembly with the fwd bulkhead. Use a good clamp setup so nothing slips around. If I recall, the final size is AN4? If so, I would drill the final hole size at "D" (as is done for the final assy of the fin to the fuse at the aft attach of the spring weldment) - not 1/4".

Once you get the weldment into the fuse and onto the jig, I recommend drilling a #10 hole in the center of the three holes that attach the bottom of the fin aft spar. C/S this hole into the aft bulkhead assy, and attach the aft bracket of the spring weldment to the aft bulkhead using a std c/s #10 screw and nylock nut. This will stabilize the aft bulkhead setup. It will also insure you do not bend the aft bulkhead if you put weight on the tailwheel assy (this is somewhat down the road for you) before you get the fin attached.

Tri-angular holes? You might not be using aircraft grade drill bits?

Carry on!
Mark
 
Just completed this task myself

I drilled the bulkhead and weldment when it was clamped together. Obviously the aluminum drills quickly and the steel takes a bit more time. I drilled thru the bulkhead(s) and then started the steel drilling. Stopped the drilling, disassembled and then drilled the steel weldment by itself using the started hole as a guide. Then reassembled and drilled the second hole using the same method.

Used a 'D' size drill then a .250 reamer as Mark described above. You don't really "drill" a hole with reamers. A reamer has straight flutes and is used to 'final size' holes. Much cleaner hole than a drill. I would buy the common size of reamers and the drills next size down for future work.

Two comments;
Plans say to drill two keeper rivets on the most aft bulkhead and the WD-409. I would suggest that you drill these two holes after the aft fuse is drilled and before final riveting. Read about a lot of fit issues after the aft fuse was assembled.

Also, plans say to use a AN4-7A bolt with one -416 washer. I found the grip length for this bolt is to long, I had to use two washers to get the right fit as I don't have a -6A length bolt.

Prime the bulkheads and weldment for dissimilar metal protection.

Cheers
 
Last edited:
Thanks for the replies. After I get these holes drilled, I will have the steel parts powder coated. THe bulkheads are primed so corrosion issues should be minimized.

As for the keeper holes. I've already drilled them according to the manual, but I think I will leave the rivets out until much later. If for some reason, there is a twist with them installed, I can always move the holes over and drill new ones.

Thanks for the replies!
 
That is exactly what I'm doing also; will not install the keepers until much later in the aft assy build.

In regards to twist, I read that installing the top skin with cleco's will help remove any twist.
 
Yup just like Ernst said. Enco is another source I have used for drills and reamers. Aircraft Spruce, Cleveland, ATS, ....., there are a bunch of tool suppliers, any of the aircraft tool suppliers will work.

BTW, I installed the aft top skin and it removed the twist! Completed all of the drilling today except for the F-779 skin, that's a real bear to fit.
 
Back
Top