

?Perfection is a standard set so that you will never finish anything??
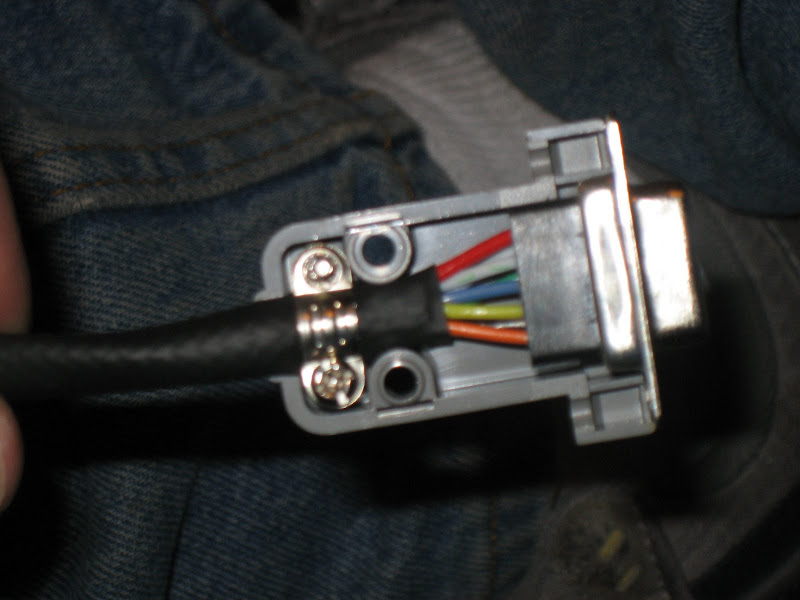
Nevertheless, it sure is fun when you achieve something that is almost indistinguishable from that goal, isn?t it? Such is the case of a D-Sub connector I was building the other day. I have been dabbling in airplanes for over three decades, and avionics for almost as long. I have assembled more D-Subs than I can count, and believe me, I know how many ways they can be screwed up. ?Functional? is not that hard, but ?Perfect? is rare. This little project was part of a much larger Autopilot/EFIS upgrade, and involved running a new cable for the pitch servo to the back of the RV-8. The interior is all stripped out, but it still took a couple hours of careful teasing to run a brand new multi-strand servo cable from front to back. Once the run was finished, the overall job was (mostly) in the bag ? just routine installation from then on (a couple days work). The first thing was a new nine-pin female D-Sub to join the cable to the servo. Sitting backwards in the empty passenger space, I had nice lighting, all my tools neatly arranged, new pins, bodies, and back shells ? everything I needed.
I left the cable a little long so I didn?t have to stretch and do the job laying down on my side. The cable had EXACTLY the right size snake skin cut to perfect length. I slipped on a couple inches of the correct size heat shrink to terminate the snake skin, then pushed both of those back to give me good access to the wires. Those were cut perfectly to the same length ? I love a new cable where everything is still parallel! I stripped and crimped on 8 perfect D-Sub sockets ? all met aerospace standards. It looked so good, I took a picture!
I took a little break to go check on the drawings, and when I came back I installed a brand new connector body ? all 8 sockets clicked satisfyingly in place. I pushed the heat shrink up tight and gave it a blast from the heat gun ? just right! Next came the strain relief clamp for the back shell, and it fit perfectly over the end of the snakeskin to make a really fine joint. The back shell went together without dropping any of those little screws ? even assembled it with knurled knobs so I won?t need to use a jeweler?s screwdriver backwards and upside down to connect to the servo.
I sat back and marveled at my perfect connector . Years ? nay, DECADES ? of practice had brought me to this point. And then I paused. And looked. Yes, I had a perfect connector. But wasn?t I going to run the cable through the grommet in the aft baggage compartment bulkhead before I put the sockets in the body? A perfect connector? on the wrong side of the wall! That?s what you get for taking a break at JUST the wrong time in a process?
Paul

