What's new
Van's Air Force

Don't miss anything! Register now for full access to the definitive RV support community.

Removable floors / baggage sides

sbalmos

Well Known Member
I'm going to have all my seat floors removable as a lot do. Been reading up in the archives, and I think I've got things down. Just a lot of #8 screws. :D I was also thinking that the baggage area sides would be removable also, just making the rivet holes in the F-722 / F-724 bulkheads into platenuts also. I just wanted to double check a few things:

* Would the pop rivets that also go through the seat hinges into the ribs also be replaced with screws? So that'd be a normal countersunk flush-riveted nutplate on the floor, then the hinge attached with a screw there.

* What about the rivets that attach the rear seat floor and the baggage floor to the seatback bulkhead and baggage ribs? Are those replaced by one of those one-wing platenuts, riveted to the baggage rib?

* Am I missing any other rivet hole to platenut conversions I need to do now while assembling the center / forward fuselage?

Thanks for the double-check.
 
I hate those #8 screws. Here's a tip, don't use a dewalt cordless to drive em home. Those darn things strip out so easy when trying to remove. major PITA; need a source for good Torx.... Gonna start converting:rolleyes:
 
Aww darn Derek, my Dewalt has served me awesomely for the past 3 years of my build! :D Guess I'll have to grab my dad's Makita or Craftsman (like that'll be any better). :eek:
 
My Hangar neighbor, Pete Hunt, actually used a similar simple cordless screwdriver and opened my eyes to that approach. I got one of the newer and simpler dewalt LiIon 12 V cordless and turn the torque setting down to "5" or "7" and it works much better. I use a 12" extension to get the screws inside the cowl plugs behind the spinner. Once your flying, that top cowl comes off and on a thousand times. Nice to have a quick way to do it.

Back to the baggage floor question; why? Build it per plan, no need to go below those floor panels. ;)
 
If you should happen to need more aft CG in a 7 or 9, a PC680 battery will fit very nicely between the structural members under the baggage floor. I made mine removable for this reason. I kept two PC680 batteries and my strobe power supply under that baggage floor.

Now my battery is up on the firewall, aft CG was needed with Subaru installs.

Yea, alot of screws but teh space can be put to use. Will make it easier to get to your steps when they crack also:)

Randall in Sedona.
 
My Hangar neighbor, Pete Hunt, actually used a similar simple cordless screwdriver and opened my eyes to that approach. I got one of the newer and simpler dewalt LiIon 12 V cordless and turn the torque setting down to "5" or "7" and it works much better. I use a 12" extension to get the screws inside the cowl plugs behind the spinner. Once your flying, that top cowl comes off and on a thousand times. Nice to have a quick way to do it.

Back to the baggage floor question; why? Build it per plan, no need to go below those floor panels. ;)

Smuggling! Didn't you see Star Wars! Ha!

Actually, I made the floor panels over the steps removable since I modified my TD fuselage to an A model. I had to drill out all the rivets anyway, so now when they crack, I will have an easy fix.
 
Before you go any further, I suggest you take 10 platenuts, 10 screws, and 20 AN3 rivets and compare their weight to 10 pull rivets.

You are added weight and build time for not much gain.

In 650 hours only once have I have had the need to pull up the right floorboards and that was to run the pitot and AoA lines into the tail to install the ADHRS for my SkyView upgrade.

Drilling out and replacing the pull rivets was very easy to do.
 
After about 18 years of flying, I drilled out the rivets in my baggage floor to install steps. When I completed the step installation, I re-installed the floor with rivets. Actually faster, lighter, and cheaper than removing and replacing screws.
 
That's a whole lot of work for what purpose?

The 7 (I've built five) and 9 share the fuselage. I put the ELT under the baggage floor to shift c.g. forward (7's need that) and for the stiff structure of a floor rib for mounting. One instance, I made one complete rear pan removable for access. Lots of extra work. I've settled on making a screw-on hatch over the bay holding the ELT; everything else is riveted. Comes off once a year. Anything beyond that is good for smuggling, but then there are dogs.

A really good thing to do is change the floor and side rivets to flat head. That's little more work, but you get a smooth floor and won't be bearing hard on a few proud heads with flat, clunky, heavy loads, nor gouging then up.

John Siebold
Boise, ID
 
I built my baggage floors with dimpled nut plates for flat head #8 screws, so I'll have smooth and easily removable floor panels. Given the amount of work involved -- no way I'm doing it to the side panels. If I were doing it over, I don't know that I would bother. Once I was about halfway through the seemingly endless drilling and dimpling and squeezing I kept thinking that drilling out blind rivets once in a while couldn't be that much hassle.

I'm sure that at some point down the road I'll be thinking it sure is nice to be able to get those floors out so easily, but it cost a lot of build time.
 
Okay okay I'm reconsidering. By the frequency of it being talked about in the archives and other build logs,it seemed a lot more common than it apparently is. I'm just staring at the blueprints now, especially DWG 25, trying to think through wiring runs or anything that might possibly end up outside the center tunnel. My ELT is going on one of the ELT mounts on the side of the tailcone right behind the bulkhead. I'm most concerned at this point at antenna placement and possibly any remote-mount transceivers. Those I might put under the baggage floors.

I guess I'll probably just leave off the floors for as absolutely long as possible, like most everything at this point in the build it seems. :D
 
How about half pop rivets and half screws?


Every other one? ;-)

Good thread ... I'm at this point, too, and considered adding nut plates for the seat and baggage floors. I'm leaning to pop rivets, but I will be sure I've put in a provisional conduit run to service any future wires going fore/aft.
 
Floors

Yes. It seemed like a good compromise. Less labor up front, less drilling at removing.
 
Don't waste your time by adding complexity and weight. You'll rarely if never have to pull the riveted floor panels up and as others mentioned it is dirt simple should you need to pull them up to drill out the pulled rivets then re-rivet for intallation. Removable floors was something a good idea fairy came up on with on VAF many years ago and serves no purpose.
 
...I guess I'll probably just leave off the floors for as absolutely long as possible, like most everything at this point in the build it seems. :D
Now you are talking!

I didn't pop mine down until just before I moved to the airport.

My ELT is mounted under the baggage compartment, with a door and four thumb screws. That way, should I get in an accident, I can remove it and take it with me, if needed.

The ELT antenna is captured in an Adel clap on the right side flap cover.


(Click to enlarge)

The ELT tray is bolted to the side of one of the baggage compartment ribs and is under this door. I thought those thumb screws sticking up would be a major problem with baggage but they haven't been and I like that I can get to the ELT without using tools, should I need to.

(Click to enlarge)

I have a tip-up and the antenna is mounted on the right side, just behind the rollbar, and the antenna spring is clamped in place with an adel clamp to keep it from moving around inside the plane.
 
Reconsider

Really no need to build removable floors. Of the 2 or 3 I know that did that, none have opened them up and wished they would have not wasted the time, money and weight to do this.

Regarding the wire runs. There is plenty of room in the center tunnel for the wires. All you are looking at is the autopilot servo, tail lighting and elevator trim servo wires. Possibly and antenna coax. Some wires can be run under the upper longeron deck. I ran two bundles, one on each side in the tunnel. Not a big deal.

Trust me, the seat pans are enough of a pita each condition inspection to R & R. I definitely wouldn't want to have to remove more screws from other panels. Unless you are jockey sized, this is not fun:eek:
 
About Nutplates

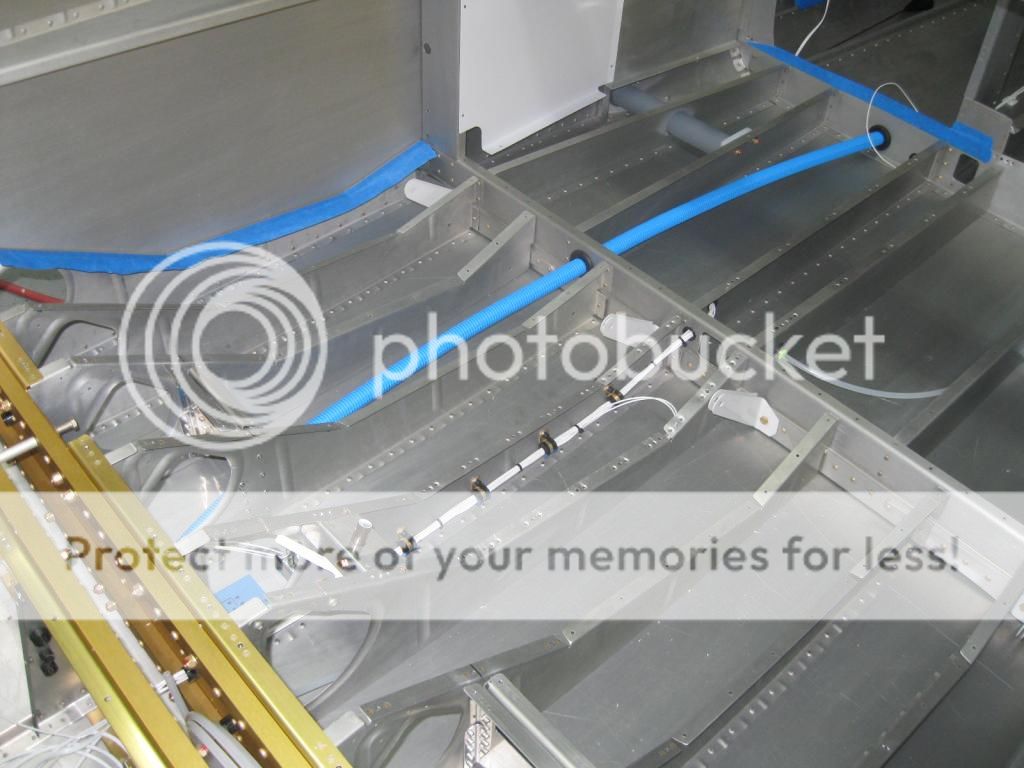
I'm going to rivet my baggage area floor pans. Last step when wiring and plumbing is complete.

On a related note: One idea is to run a tap through the nut plates for the floor pans so that the screws go in and come out without stripping the heads. I know, that defeats the self-locking feature, but I believe the screws will stay snug, and if I lose one I don't believe it is a serious issue.
 
Conduit

Scott, remote mount transponders fit well under the panel too. As for the baggage floors, for wiring you can always run a couple conduits, river them floors down for good and move on. This was more than adequate for me.

2i78s9d.jpg
 
I took the time to install a removable floor (I've got stuff mounted under the floor and I wanted to have access).

Having done it, I'm happy to have that feature albeit I haven't had to get in there in six years of flying and I do recall being surprised that it took longer than I thought it would. My overall weight was pretty good, so I don't think I paid too much a penalty in weight.

In the end, I'd probably do it the same way if I were building another RV7 today.

Dan
 
I made mine removable.

I'm putting a G3X touch in my panel and found that space behind the panel was very tight. By making the floors removable I was able to mount my transponder and my comm radio under the floor. Freed up quite a bit of space behind the panel.

-Dan
 
I ran a couple of conduits with string through them under the floor before riveting it in and found that having the conduits made easy work of running wires. :)
The sides in the baggage compartment I would use screws again if I had to do over. I ran my rudder cables backwards from the plans, didn't know I did until much later and decided to leave them backwards as very hard to change them partially due to the effort to try to snake the cable through the baggage area.:(
Or just do it right the first time.
Dave 7A
 
I'm in the "run extra conduit, rivet 'em in" camp too. I reinforced my steps with a gusset, so I'm hoping the floor can stay put for a long time.

 
I realize that I'm going upstream here, and have an -8 not a -9, but I screwed all my floors and side panels using allen head capscrews. I used pan head on the floors and seat bottoms, and regular head along the edges.

My reasoning is to provide easy access for wiring, cleaning out the **** one manages to track in, or finding that pen or wrench someone managed to drop under there.

I had an incident when I was training on Fleet 80s many years ago where I found the gas stick wedged securely under the elevator bellcrank. I want to be able to have the occasional look, and dung out when necessary.

Yup, probably cost me a pound and a couple of days of effort... Bottom line is to do what is important to you....

Would I do it again? Absolutely...
 
My 2 cents, I like Bill's inspection door. I used all plate nuts, and then installed an inspection door for the Whalen's and wiring. Get all them items in as soon as possible and close it up. Good luck.

Jim
RV9A N492RV
 
Last edited:
Back
Top