What's new
Van's Air Force

Don't miss anything! Register now for full access to the definitive RV support community.

New Guy!

SilverEagle2

Well Known Member
Friend
Not so New Guy!

So...after several years of building and flying RC, getting my license, buying a spam can...I have arrived here. I WANT to build.

Started looking at doing an HRII, then was talked out of it for doing a more practical project like a RV-8. Then wife got wind that she'd be sitting behind me, so now I am at the RV-7.

I am still in the dream phase as I need to get my addition built on my house (part of the deal with the wife, shop below, more room for shoes above) before I can get an tail kit ordered.

Glad to be here, looking forward to the adventure.

Hello!

Jason
 
Last edited:
I've just started on the Wings of my RV-7A and could not be more excited and enthusiastic about building! GO for it. It will be the most fun you've ever had with your clothes on.
 
Welcome to the world's best hobby!

RV-8, RV-7; doesn't really matter as they are both RV's.
 
...but be sure you get your wife to read this thread that Scott Schmidt put here this morning. A great read!:)

http://www.myrv10.com/N104CD/why/wifesperspective.html

Best,

Good read, I will pass it along. Since he and I are in the same valley, we'll have to get the two together sometime.

Hopefully I can get started soon. Need to find the magic money tree I planted a while ago. Seems a neighbor may have taken it. :eek:
 
Welcome! I'm in that dream stage too. I still need to get a basement finishing project out of the way and get my garage workshop set up. There's still lots to read on the forum to keep you occupied in the meantime.

Cheers. :)
 
Sounds like you are already "in"

The idea of giving something of real benefit up front and the idea of benefit of the airplane for travel, learning, repairman certificate value, and a challenge worthy of a lot of pride (status?) are important selling points to get into this incredibly difficult and expensive activity.

When I was making about $33,000 a year I set some mutually acceptable salary milestone when I could start working toward a place in the private pilot world and all that that entails - including owning an airplane. It satisfied my wife and even though I loved my job and it seemed like an extreme long shot, it gave me another personal goal to to work for. We were both happy and that goal was reached. Good luck with your pursuit of the RV-7. My first homebuilt objective was a Lancair 320 but as I studied and observed for several years I changed my selection to the RV-6A for the replacement of our beloved Archer II of 22 years and we are both happy with that decision too. 8 years of building and 5 years of flying so far.

Bob Axsom
 
Sold a cargo trailer I never used that was intended to carry my big RC and rockets. Now I have tool cash.

Isham is leading the pack. pneumatic or hand squeezer, DRDT-2 or not...

So many debates...what ever will I do once I get to the panel! :)

I have read all the tool threads here. Still leaves questions. The fun begins.
 
Tool Kit

I love my Isham Tools! I did latter buy a few additions from Avery (also great folks!) but I have no regrets about my Isham buy and neither will you.
Enjoy the ride
 
First off, welcome! As for tools, you cant go wrong with any of the big three. However, I bought Isham and would absolutely do it again! Its all personal preference as to if you get a pneumatic squeezer or the DRDT-2...both of which are no brainers and worth it to me. If money is the sticking point, my philosophy is, buy the tools you want to make the 3+ yrs of building more enjoyable and easier...then sell them when the project is over and recoup most of your money. If you take care of them, they will hold their value very nicely. Enjoy the ride!
 
Welcome! new guy here also, 2 weeks into to epm kit, note: buy all the tools at once and save on shipping, you will need what vans requires, i am starting out with a hand squezer, we will see how long that last or how strong i get
 
RV Factory is now in progress

So I am starting a 20 X 36 RV Factory in the backyard. Footers were poured today. Hope to be framed and dried in by end of Nov.

I can't wait! Once far enough along, the emp and wings will be ordered.

Merry Christmas to me! Stay tuned.
 
Hey Jason! You just made one of the best decisions of your life. I ordered a complete RV4 kit back in 1987 the very next day after getting a ride in one. That's the plane in my avatar.

I had to take a signature loan out at nearly 20% interest because I didn't have any assets to back the loan (my 1974 Ford Pinto station wagon wasn't pretty enough)

Tools are expensive but worth every penny. I found many good deals at aviation surplus outlets.

VAF is a resource that simply cannot be matched anywhere else on the planet. Welcome to the forum!
 
RV Factory in progress

So...I have started the RV Factory I will be building in. It is coming along despite the weather that UT is getting hit with.

Gallery Here

Taking suggestions on what I "Need" to have before I drywall.

2010-11-28%2008.05.26.jpg


I cannot wait

I hope these links to Picasa work...never used it before!

Happy Holidays
 
Last edited:
Windows all around and two or three circuits for electric outlets on the walls. If the window bottom is at four feet from the floor and the outlets are within 6 or 8 inches of that, they will be handy and not interfere with your workbenches.

Then insulate well. Cotton batting in the walls, plenty of foam sealing the joints, and several inches ( suggest 6 inches) of foam for the roof.

You'll like radiant heat better than forced hot air heaters.
 
Windows are too late at this point. I have plans for many light fixtures but the windows are a liability where the garage is (I have 3 very active kids that throw many things and this is on the end of their play area).

I have outlets a plenty planned. Insulation is a must. Working with a neighbor HVAC guy to get it heated.
 
A few ideas

Nice work there! Here are a couple things to think about:

Lighting: For your general shop lighting, .75 watt per sq foot seems to be the magic number (fluorescent source).

In my last shop, I put a 60 gal 5hp upright compressor inside a fully insulated closet. That was a good decision. The closet door should have been a solid core though.

Along one wall, I built-in a full length (30') work bench with drawers. It had about 50 drawers in it! Again, lots of work but a good decision.

The table you see in the foreground is handy. I modified a standard office table with the extra shelf underneath (and its reinforced), put double sided peg board on the back and the whole thing is on wheels. I use it every day.

newallashop0003.jpg


another shot:
newallashop0005.jpg


Then I have the "power table" which is another modified office table where I've mounted many table-top power tools:

newallashop0001.jpg


This table is raised up to put the tools at a good height for the eye, and is reinforced with 2x2" steel angle on the underside due to the weight of all the tools. It too is on wheels. Note the swing arm lamps mounted on this table as well. Everything plugs into a power strip mounted underneath the table. This table also has a reinforced 4x8 platform below it to help stabilize the legs and acts as a wheel platform. Its a great shop asset that saves space and makes working with the power tools easier!
 
If it were mine, I'd put in a 100 amp service. Put several 110 outlets along the walls, don't forget about a couple outside as well as some in the ceiling. These work great for a retractable drop light for working under the panel. I have a drop light plugged into one of mine and a retractable extension cord plugged into the other one. Wouldn't hurt to put a 220v 30a recep under that window for an a/c. As far as lighting goes. I have 15-8' 2 bulb high output fluorscent light fixtures in my hanger (60' X 72), in my building room inside the hanger I've 3 of them. The room is 16 X 30. I don't want to have to look up to see if the lights are on.:) You can't get too much light. You'll learn the meaning of this as you grow older.:D Also, paint the whole interior white. I'd also run gas and air (3/4" steel pipe) overhead in the attic with drops down the walls. Why? Well, I'm a plumber and electrician and I can.:D Seriously, though don't use PVC for air. Schedule 40 pipe may withstand the pressure, but I wouldn't trust the glue and fittings.
Anyway, Your shop looks good.

Marshall Alexander

Dittos!! My next shop will not have air run inside the walls either. At some point, no matter what, you will need to get to the air lines. A rat can chew through nearly anything.
 
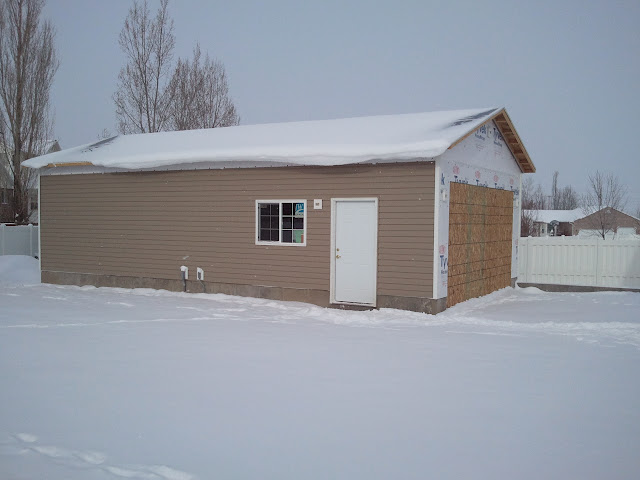
Finishing the Airplane Factory...er...Workshop

Jason, my impression from your previous posts is that you have already planned ahead and probably already know more about finishing a workshop than I do. I think there are already some posts in these VAF forums somewhere about what to include in an "RV factory," so you might do well to search them for some of the previous suggestions.

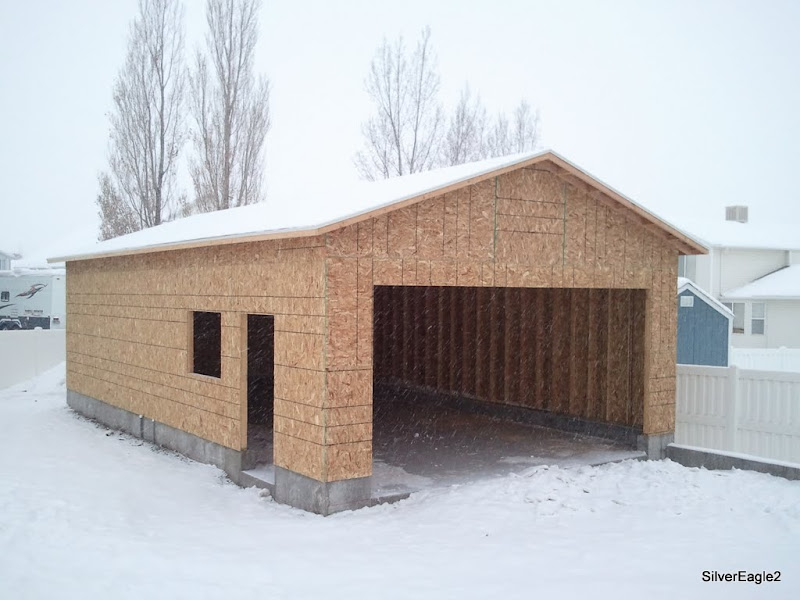
I built my workshop about three years ago ( sorry, I don't have any photos handy) and here are a few things I would recommend:

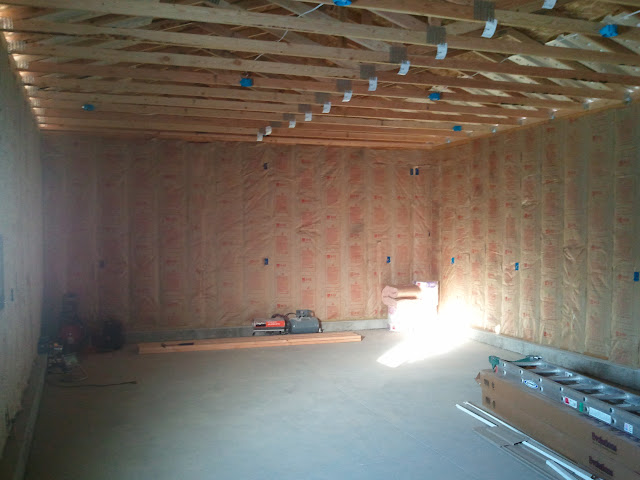
1) Plenty of wall and ceiling insulation. Since you're in the Salt Lake area, I probably don't have to tell you that.

2) Plenty of 110volt outlets in the ceiling...prevents cords on the floor.

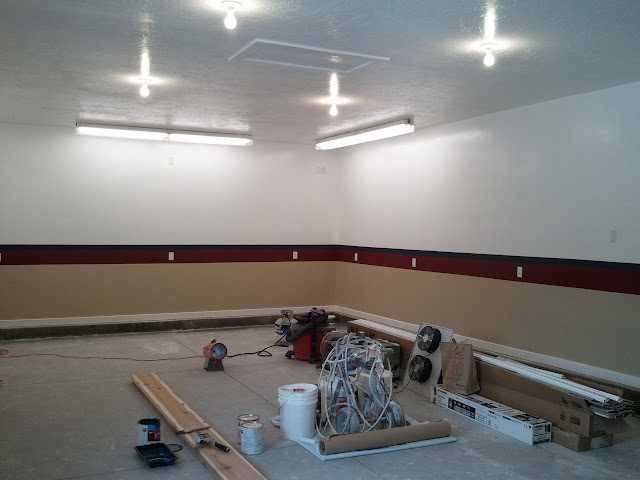
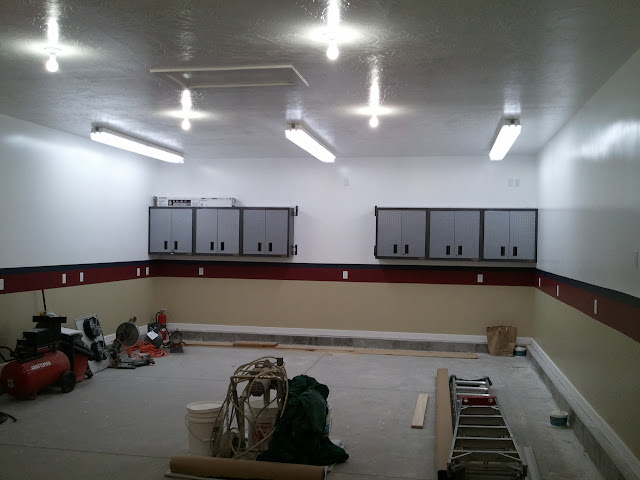
3) Plenty of light. Your choice, but I used several fluorescent workshop lights on dedicated outlets in the ceiling controlled by wall light switches. Works great and is flexible if I ever need to change the lighting pattern.

4) Plenty of 110 volt outlets in the walls. You can never have too many in a workshop.

5) At least one 220 volt outlet for a 220 volt air compressor.

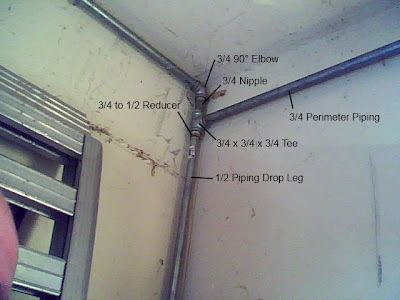
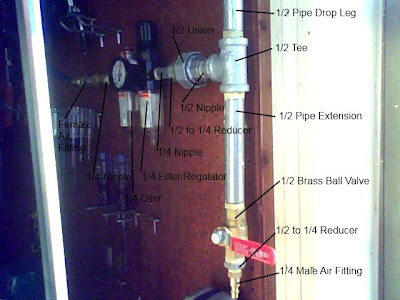
6) Air piping routed across the ceiling so you can have compressed air to your work areas. Some recommend copper, some use carbon steel piping and some use the compression fit tubing which really saves time for installation. I used 1/2 inch threaded carbon steel piping and would do so again. I have four drops but use two of them all the time. I also put a drop of about 1 inch per 10 feet for condensate and also elbowed up and over and down for each of my piping drops. I drain each drop every time I work in the shop. [P.S. We've had lots of discussion on using PVC for compressed air piping. I had it in my garage myself; but when I built my shop, I did a lot of homework and all I can say is that, as a licensed Professional Engineer, I can not conscientiously recommend PVC for compressed air because there's not one Engineering Code in this country that allows PVC piping for compressed gasses except in places where it's buried at least 14 inches below ground. I know people have used it for years, but I wouldn't do it. Sorta like I know people who have run scud, but I wouldn't do it...again!!!]

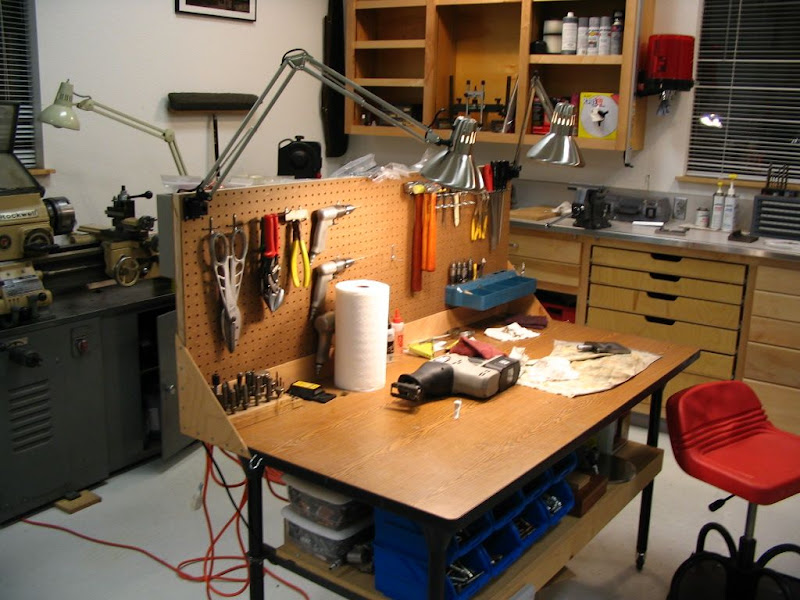
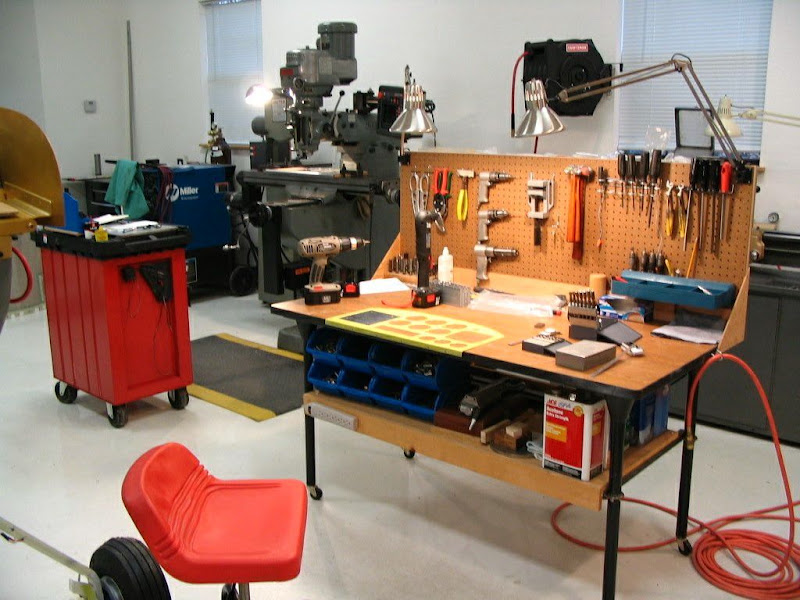
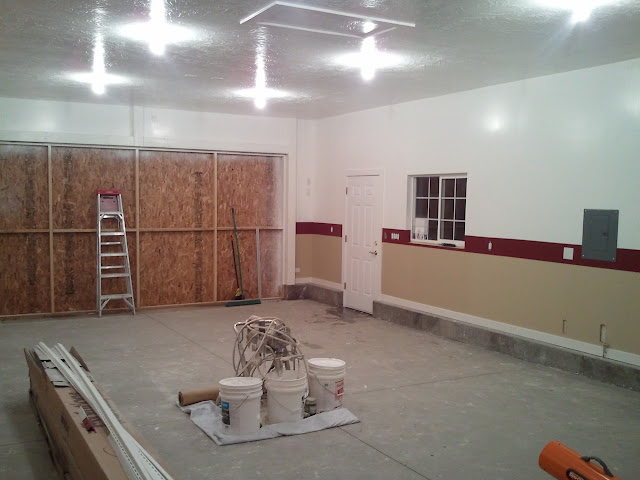
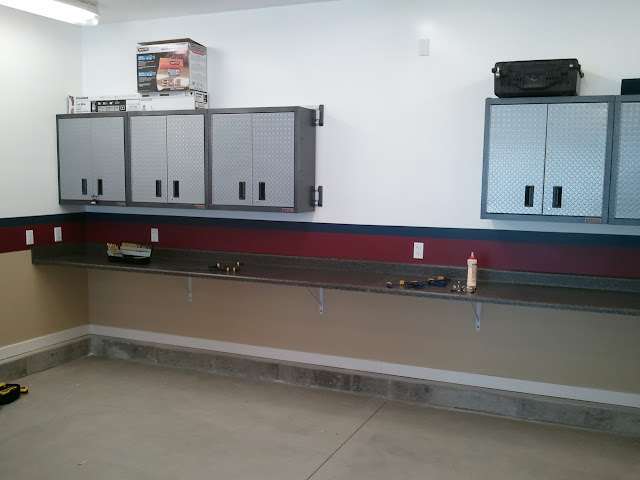
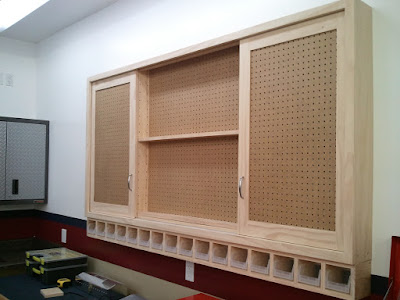
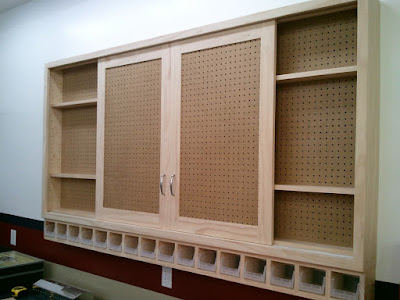
7) I used OSB plywood on the bottom four feet of wall area then four feet of peg board from four feet to eight feet all the way around the interior of the shop to give me lots of peg board at arms length. I also have 9 foot walls with shelving around the room at the 7-1/2 foot level. I paid extra for a well insulated garage door. I've forgotten the R rating but I'm sure you are familiar with that in Utah.

8) I, like you, minimized windows because I wanted lots of wall space (see #7) and I wanted to minimize the temptations of burglars.

9) Security system. I won't go into detail here, but there are several levels of security systems that are worth the money. Choose one (or more) that makes you comfortable when you're away. In addition to the interior security system, I also installed motion detector lights including flood lights on the exterior.

10) I also used OSB plywood on the ceiling so I could either screw into the ceiling joists or for lesser loads directly into the OSB.

11) All the OSB plywood (walls and ceiling) is painted white to help with the lighting.

12) I found a very efficient LG air conditioner and mounted it in the back wall. For humid Alabama summers, it does a good job of making the work shop comfortable.

13) For heat, I use a couple of oil filled radiator type space heaters to take the chill off, but on really cold days, I fire up the propane radiant heater, which only takes about an hour to raise the temp up to a comfortable 70 degrees. Actually, I usually aim for 65 degrees and then turn off the propane heater.

14) Plan on having some kind of refrigerator for keeping adhesives and sealants chilled for extended shelf life. Also, you can keep some beverages and snacks there too. :)

15) My wife calls my shop the "man cave" so it's strictly optional to include such items as a scanner radio, an AM-FM radio, an XM radio, a TV with satellite channels and VHS and DVD players, and a laptop computer with wireless connection to the internet.

16) I didn't include a toilet in my shop, but if I ever build another shop, I would have a sink and a toilet if space permitted. Of course, if I did that I might as well include a bed out there too. :eek: Talking about being in the "dog house."


I'm sure there are other items I could mention, but you get the idea. Don't let the project of finishing the workshop get in the way of building the airplane. However, with some planning you can have a place to work on both your airplane, and when it's finished, some other projects, too. Plus, it makes a nice addition to the value of your real estate. I really like having a place to work on the RV where I can leave it and come right back to it without having to re-find everything.

Also, I'm guessing you have already made contact with Scott Schmidt and some of the other RV-ators in your area. You should get a ride in an RV if you haven't already done so. I believe there are several RV's completed or nearing completion near you.

Good luck! I have a feeling we'll be observing your progress.

P.S. For some reason, I did not see the previous 3 or 4 posts when I wrote the above.
 
Last edited:
... I have four drops but use two of them all the time. I also put a drop of about 1 inch per 10 feet for condensate and also elbowed up and over and down for each of my piping drops. ...

I'm trying to visualize your piping set up. Any chance you could post a few photos of the piping/drops/etc ? Thanks
 
One option for air

Here's one option for air. It's the first and only one I've done but I've used it for about a year without the need to change a thing.

Snapshot_20100325_2.jpg


Snapshot_20100325_1.jpg


1. I used 3/4" galvanized steel piping for the perimeter and 1/2" for each drop leg. I tried to slope the pipe toward every drop to help control moisture. Water goes down, air goes up.

2. I used several unions in the perimeter piping. Unions allow you to disconnect the two pipes on either side of the union without turning either pipe to unscrew it. I was able to build the system in sections and put them up one section at a time. It really made it easier to trouble shoot leaks since I could just remove one section and work on it while leaving the rest in place.

3. The basic set-up of each drop is shown above. I used 1/2" unions on each branch-off from the drop to allow me to remove it without having to twist pipe. I used brass ball valves on the bottom of each drop as that's where the water will collect. On some of the drops, I added a male air fitting after the ball valve which allows me to add another compressor to the system. If you have a different size filter (3/8" is common), just change the reducer bushing and nipple coming out of the union to that size. On the branch above, I have an oiler in addition to the filter/regulator because this is the place I run most of my air tools. That saves me from having to remember to add oil drops to every tool before use. The other drops don't have an oiler.

4. I used Rector Seal #5 pipe thread sealant from Home Depot and teflon tape for every joint. I first wrapped the threads with teflon tape and then "painted" the Rector Seal over the teflon tape. I tried several variations and this way works best for me. I used a spray bottle with slightly soapy water to test all the joints and I don't get any leaks.

5. For my compressor hook-up, I just have a drop like shown above but instead of a filter, I have a short length of air hose that attaches to the reducer bushing on the union. By keeping all the drops standard, I can move the compressor or any fitting like the one with the oiler to any location in the garage I want by just disconnecting the union.

6. I have 5 drops in my system. I put the drop I plan on painting from on the last leg. My tool drop is the next to the last. When I bleed each drop, I get very little moisture after the first drop from the compressor which is the way it's supposed to work. There are fancier ways to do this but it works well for me. Some folks have a loop type arrangement at each drop where the pipe first goes up and then back around and down but I didn't have enough room against the wall plus it would add several additional joints for each drop.
 
Wow...thanks guys for the info. I passed the shear wall inspection this morning so I can now get the doors and windows in and start wrapping the outside.

Once enclosed, I will be ready to order some kits. All this info is great. I have searched all over these threads. What a great community. Can't wait to be a full fledged member.
 
Welcome

...Can't wait to be a full fledged member.

Who says you aren't one now? Consider it DONE!!! Welcome aboard.

Don

P.S. I took a quick peek at your web page today. With your experience as an RC modeler plus your experience as a certified aircraft owner and pilot, you shouldn't have any problems fitting in with this crowd. ;)
 
No piping pix

...Any chance you could post a few photos of the piping/drops/etc ? Thanks

Diamond, I don't have any photos of my air piping, and right now due to our family business, I'm not in the RV building season. :eek: But the description and photos provided by "larrynew" captures a lot of what I did. I didn't install a lot of unions like he did. My point about the "up and over" is to prevent water from draining down toward the regulator and valve, I simply placed the tee with the branch up, then with "all thread" (aka "close" ) couplings and elbows, ran the piping up and over and down to another tee mounted with the branch running horizontally to the regulator and valve AND with main run of the tee running vertically down to a ball valve for drainage.

I know this is wordy. Kinda makes the point that a picture is worth a thousand words.

Hope this helps.
 
Last edited:
Updates

In between weather spells, I have got a few more items complete.

Weather Barrier
Rough Electrical
All inspections passed with one to go...the final.
1 wall of siding

Then all the holiday sickness hit and slowed me down.

2010-12-31%2011.17.29.jpg


Gallery Here

Hope to get insulation in soon.

Happy New Year!
 
Last edited:
Welcome

Jason, welcome, I was in the same boat, I had to finish my house remodel and finish my masters degree (both requirements from my wife).

I also wanted to build an 8 but she wants to sit side by side. I figured if she is going to let me build an airplane she will get her way. I just started building this week, you can follow along on my web site. I will say that after a few frustrating days, it is starting to be a heck of a lot of fun. Good luck
 
Just this morning....

...my wife asked if we could fly to the coast again.

Be especially sure to include her and respect her wishes.

Even better if she'll help build and buck rivets.

Best,
 
No worries here

She and I sat down and looked at all the models together. This was a mutual decision.

She said I could decide on a 7 or 7a myself though.

Can't wait to get the shop far along enough to get some kits in there.
 
Last edited:
Insulation Done, Ceiling Drywall this weekend

2011-01-09%2009.02.50.jpg


Insulating is not nearly fun enough. It will make a difference in our 20 degree WX during the build though.

Stay tuned!
 
Well...it's official.

I placed my order for the Tail and Wings today.

Now to finish the shop so they have a home when they arrive.

It's real, I am starting this journey. :D:D
 
Very nice, Jason..

...and there's still a lot of cold weather yet, 'til Spring and all that insulation is gonna do wonders!

Regards,
 
Kits ordered...interior needs to be finished.

So now that the kit(s) order is in, time to get the factory buttoned up on the inside.

2011-02-08%2002.45.11.jpg


One more stripe, device covers, base trim painted, and we'll be ready to build.

The floor will get epoxy, I just have to wait for warmer weather and the concrete to fully cure.

So very excited to get this dream started.
 
Jason,

Your shop looks great! I started with an unfinished garage (bare studs inside). I insulated it like yours, put up the drywall and plenty of electrical outlets, and painted it all white. I have epoxy here for the floor, but once I started on the plane I never got around to putting it down. I'll get to it some day. I'm SO glad I insulated it as heavily as I could. Not only is it warmer in winter, but much cooler in summer as well. Here's a page I put together about my shop improvements:

My Shop Improvements

I was going to mention what I learned about heaters. I used a couple of little electric oil-filled heaters for a while, but they take a long time to warm the place up. I put up a page about my new heater here:

Heating Your Shop

And here it is. This thing ROCKS! I can get my shop comfortable enough for work in about 15 minutes.

100_7609%20(Medium).JPG


This thing puts out 23,000 BTU's and warms my shop up in a hurry. I have to shut it off after a short time or it will run me out of here!

Can't wait to see some pictures showing you pounding some rivets.
 
I am actually considering dropping a 150 LP tank behind the shop and running a 75000 BTU forced air heater hung from the ceiling.

I already have the thermostat wire and power run. I just need the gas line and stub the vent.

I figure I will maintain 50 degrees and then turn it up for working. LP supplier says he'll only have to visit 1 or 2 times a year on that plan given how well I insulated.

The kits are looking to be 8 weeks out...so I have time to get it all buttoned up prior to starting. I cannot wait though.

I may have a conflict with getting the floor done too. The hope is that I can keep things clean and organized that I can move it out for a week and get it done and back in with little to no issues.

My wife laughs at how giddy I get sometimes.
 
Last edited:
Jason,
That's one great shop you are erecting! You will enjoy your RV building there. It means a lot to have right shop and looks like you will have one soon. Please keep us updated and good luck to you!
 
Shop almost painted complete

I was able to get the last color on the walls. Need to get the base and the floor done, but the floor needs a few more months to cure.

I had to travel to Ft Hood to help a sister through a divorce...otherwise the base would have been completed by now.

Was given my ship date on my kits of early April so...time to get moving on all the remaining odds and ends.

Can't wait for the time I am posting RV pictures.

2011-02-12%2012.08.59.jpg
 
I am actually considering dropping a 150 LP tank behind the shop and running a 75000 BTU forced air heater hung from the ceiling.

Just an FYI, but I think a 75,000 BTU forced air heating unit might be a bit much for your space.

My 24x34 3-car garage is not quite as well insulated as your shop, and a 75,000 BTU unit will heat it from 50 to 65 in very short order.

I think you could save some money and go with a 45 or 60,000 unit and be totally fine.

Just my 2 cents,
Jason
 
Somewhat true...however, I am high altitude so all the heaters are de-rated. I would never see a true 75000 BTU.

It is warming up so I have time to shop around. Good to know your experience. Helps make a better choice.
 
Shop construction is COMPLETE!!!

Well folks, the shop construction is complete. Now to get the benches in, tools in, and fill the cabinets I installed today.

Fortunately, I have a few weeks until kits arrive to recover from all the bruises and smashed fingers.

Totally excited.

2011-03-04%2018.26.05.jpg


2011-03-05%2019.20.52.jpg
 
Looks like you'll be able to....

....perform surgery in there.....appendectomies maybe....broken bones set:D

Beautiful setup!
 
Getting Close.

So...I am told my Tail and Wing Kits are to ship next week. :D

I have been so stir crazy since I was going full steam with my shop, I have actually found myself a little bored.

So I added a full length counter along the back wall using a few stock counters at Lowe's Aviation Department and some Heavy Duty 20" Shelf brackets. It is VERY sturdy.

2011-04-02%2016.13.50.jpg


It will be a good counter to hold my question and answer/VAF Access machine (computer), my media warehouse (computer), and the entertainment center (computer) for my occasional shop visitors (kids). Additionally, it will be a good spot for my shop visitors (kids) to color, do homework, and color/sketch my plane color schemes.

I was originally going to put a 4' x 4' piece of Peg board in the space between my cabinets, however, I may put a poster size print of a tribute collage I made years ago to my inspiration and hero...my Grandfather.

So instead and also in my boredom, my woodworking neighbor and I have been building one of these for another part of the shop.

2011-04-09%2020.01.12.jpg
2011-04-09%2020.01.48.jpg


It has two sliding doors with pegboard in the panel covering a full back of pegboard. I liked the storage bins below for parts. Should help keep tools organized.

Getting excited to build finally.

Stay tuned for the floor coating and the heater. They are out of season now that the temps are rising. This fall, it will get purchased and installed.

Thanks to all for the help and advice thus far.
 
Last edited:
Back
Top