What's new
Van's Air Force

Don't miss anything! Register now for full access to the definitive RV support community.

Elevator Trim cover question

Mark Jackson

Active Member
Patron
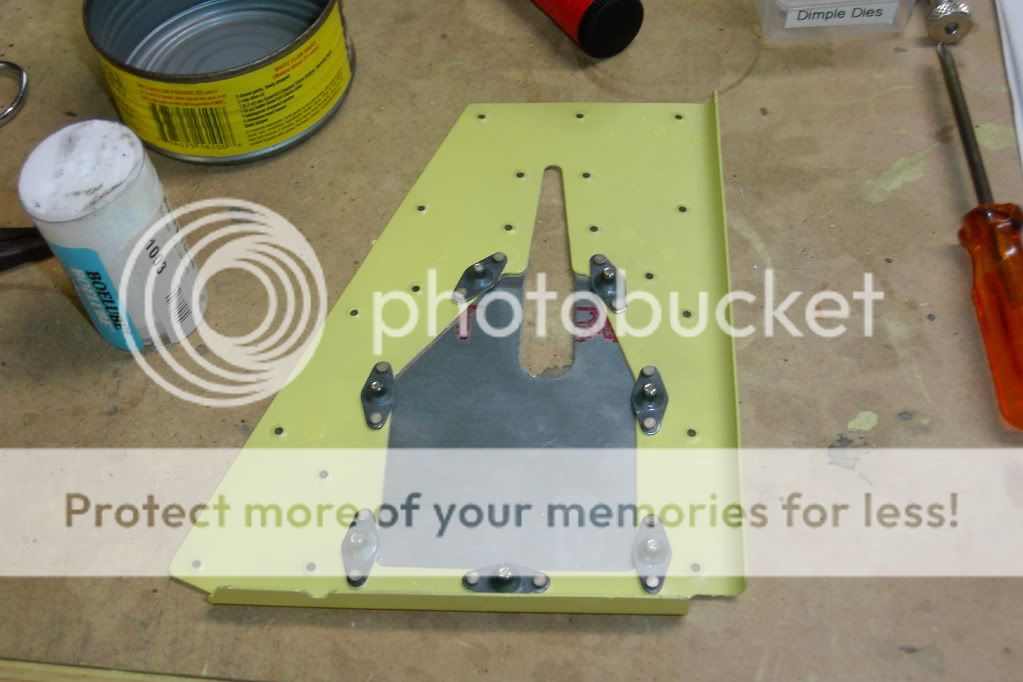
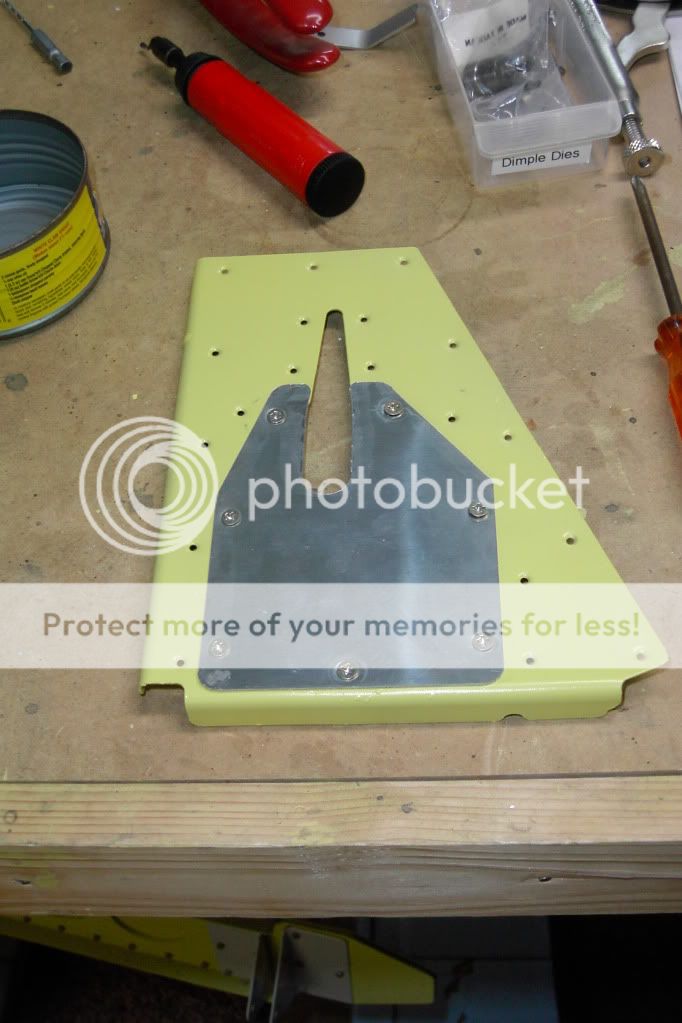
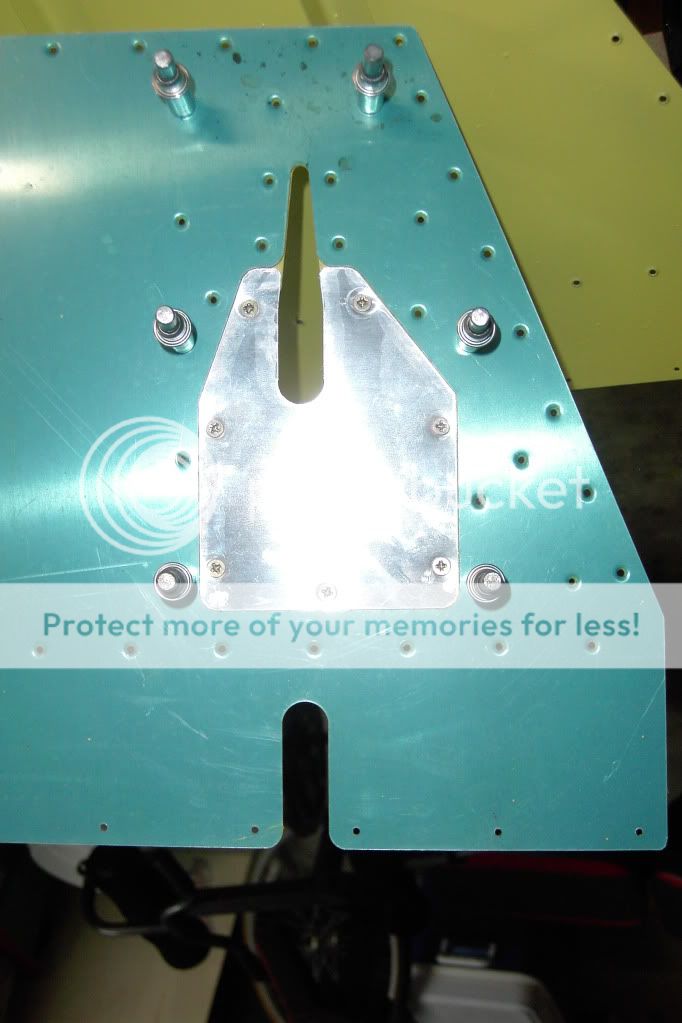
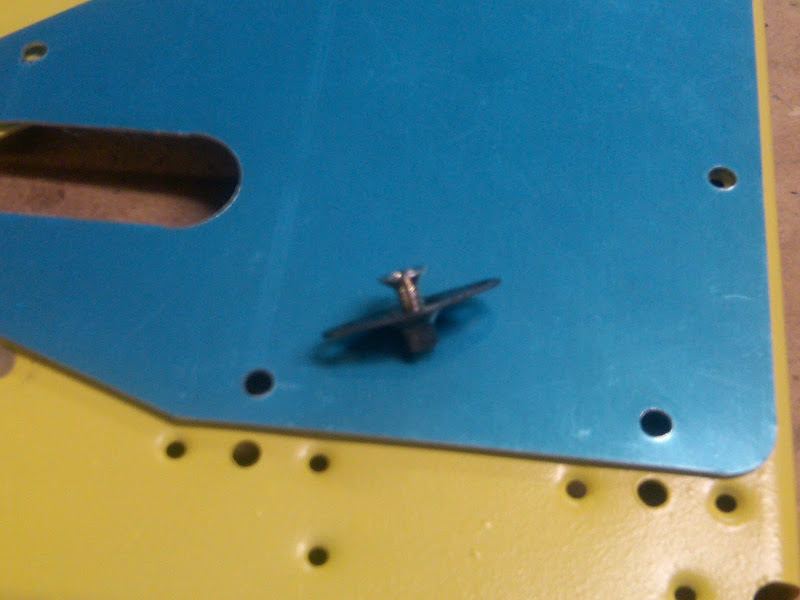
I am prepping the little cover panel that covers the trim mechanism on the left elevator. I riveted the first anchor nut in place (the K1100-6). I then inserted one of the size 6 machine screws. It will not go in all the way which I understand is how the anchor nut is designed so that it will hold the screw in place. However, it sticks out so far that after countersinking the cover panel, these screws will protrude the height of their heads.

I could muscle in the screw with a big screwdriver to get it in far enough to fit flush but common sense says not a good idea. Should the screws fit further into the plate nuts?

IMG00033-20111218-2330.jpg


https://picasaweb.google.com/102408902014969471592/RV8Elevator?authuser=0&feat=directlink

Thanks

Mark Jackson
 
Last edited by a moderator:
The screws shouldn't bottom out in a platenut, assuming there is enough room behind it and it's not hitting something else as soon as it exits. Some suggestions have been chase it with a tap or run a 'waste' screw all the way through to loosen up the grip a bit for those small ones. Too tight and the craniums will snap right off if you force it enough.
 
Last edited:
BoeLube

Mark, also might try coating the screw threads with boelube before inserting. Sure helped ease the torque required to insert the screws when I did mine.

Steve
Skyking902001
RV-8 in progress
 
Mark, if you post a picture you will get a flood of mostly good advice. You need to upload your pictures to tiny pic or photbucket, then paste the link in your post here. Sounds like you're missing something basic. One picture and everybody will line you out. Whether you like it or not.
 
Yup...you have a long way to screw them in yet.

You should see threads beyond the back of the plate nut.

Do not worry about not being able to screw them down un-mounted. Once mounted in the doubler it will be a little easier to get them to screw in deep enough.

Once mounted (riveted on), the structure acts like a lever and counters your screwdriver force and those will screw in just fine.

I did notice that the screw holes on your doubler in the first picture are NOT dimpled and they should be to accept the dimple of the access cover. Notice the plate nut you are using also is countersunk to accept the dimple of the screw hole in the doubler.

I also see that you dimpled the holes for the plate nut mounting rivet locations. Not a problem there other than now you have to dimple the plate nut mounting holes as well to have it sit flush with the doubler. Many are using NAS1097-AD3's here. I did and here is my log entry that outlines why.

Hope that helps!
 
Last edited:
It looks like the hole for the screw isn't dimpled to match the dimpled platenut. Thus the screw is bottoming out on the aluminum surface thats still flat.
 
Both the cover, and the plate under it need to be dimpled.

You will have to drill out the rivets holding in any nut plates, dimple, then install the platenuts.
 
I haven't dimpled the backing plate yet as I wanted to figure out all the steps before bending anything. I have some old 6x32 screws from the Mooney that I will use to open the plate nuts a little. I planned to dimple the reinforcing plate as well as the cover plate.

Which brings up another question. I dimpled the two rivet holes in the one plate nut I put on but it was not a great job. The dimple dies were basically too big. I don't want to countersink as there isn't a lot of material around the plate nut holes. Anyone have a good method for dimpling the plate nut rivet holes?
 
...Which brings up another question. I dimpled the two rivet holes in the one plate nut I put on but it was not a great job. The dimple dies were basically too big. I don't want to countersink as there isn't a lot of material around the plate nut holes. Anyone have a good method for dimpling the plate nut rivet holes?
Mark,

I think I'm going to give Rick Galati's method of installing nutplates a try. The 1097AD3 rivets (#3 rivet with a #2 head) he talks about have a shallow enough head that you can countersink sheet as thin as 0.025 to accept them. No nutplate ear dimpling required.
 
Last edited:
Have you had a chance to take a build class yet, Mark? For a project of this magnitude, it would be well worth your time and money! It will answer a lot of your questions and probably save you a lot of money in the long run. Just as importantly, it will give you a lot more piece of mind.
Good luck, and have fun with the build.
 
You might try some beeswax on the screw threads to make installation easier.

Works wonders, and unlike running a tap through the nut plate, it doesnt destroy the ability to lock the screw in place.

By the way, that looks like a Stainless screw------makes the beeswax even more important to keep it from galling.

If you use a power screwdriver, run it slowly.
 
Mark,

I had some similar questions about the tight fit of the screws. I used some other screws that I had laying around with some Boelube on the treads to run through the nut plates. Then I mounted the access plate with the screws supplied with the kit. That way if you mess up the head of the screw it will still look good when you are done.

One other comment. I should have mounted the nut plates before I did the final fitting of the access cover. The dimpling changes the cover very slightly and I felt like I could have gotten a better fit if I had done the operations in the reverse order.
 
Got everything to work. I dimpled the cover plate and the reinforcing plate, then riveted the nut plates in place. Once the nut plates were in place, took an extra 6x32 screw, coated it with Boe-Lube and was able to screw it in to open up the nut plates. The cover fits in place perfectly and the screws fit into the dimples :)

PDRM0225.jpg


PDRM0226.jpg


PDRM0227.jpg


BTW, I never use a power screwdriver on the plane. I spent about a week fixing an inspection panel on my Mooney after a mechanic used a power screwdriver on it.
 
Last edited:
Back
Top