What's new
Van's Air Force

Don't miss anything! Register now for full access to the definitive RV support community.

I made an extra hole...

KCBerner

Well Known Member
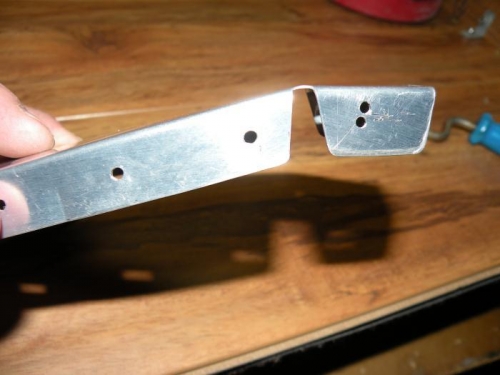
I'm 99% sure this part is trash but thought I'd put it out here to see if anyone has any thoughts. I was dimpling leading edge skin tonight and the skin slipped off of the dimple die. Before I knew about it, I had made this new hole
8xm1cn.jpg

Of course the new hole had some cracks so I tried drilling/reaming it out. I got to a #30 and it will need to go larger to get rid of the cracks.

Worst part to me is that it is under the rib flange so there's no convenient way to fabricate a patch panel
35jyqf7.jpg


So, assuming that I would have to ream this out to a #19 at least to clean up the cracks, any great ideas or am I just calling Vans tomorrow for my first over $100 mistake?
 
When you flatten it, do NOT use a rivet gun and bucking bar - you'll just thin the metal and cause further problems. Use a squeezer to flatten the dimple.
 
Ok, I've had a few deep breaths and a beer so I'm a bit calmer now.

I flattened it out with a hand squeezer and reamed ultimately to a #18. It's clean and crack free. I emailed Van's to see what they think. I'll let you know what they say.

nq4xhx.jpg
 
Looks like a good place for a drain hole. Lets just say I will have no water staying in my plane!
 
Don't worry about it, I have one of those on my fuse. At first I couldn't believe I used the skin, now I'm lucky if I find the mistake.
 
Repairing hole

Taking care of the small cracks was the main issue and you appear to have done that. Here's a suggestion for fixing the blemish. Cut about a one inch square piece of aluminum and lightly sand one side of it and the same size area around the hole and epoxy it over the hole. Butt it up to the rib flange. Only the edge of the piece of aluminum will cover the hole but remaining surface is large enough to provide a good bonding surface for the patch. This will seal the hole off so you can fill it with a dab of epoxy and micro ballons. Sand it smooth and it will not show after being painted.
 
Miller Time hole

I did it too in a different place. My tech resource (engineer builder) advised to add a hole either side spaced 4X diameter from any other hole and match drill the rib/spar then debur and dimple. This provides the intended structural strength. The bad hole and adjacent hole are abandonded to be filled when painted.
Just my $.02.
 
of course call Van's. but...

I'd put a rivet in it, file a little away from the rib so it fits flat, and move on.

:eek:

CC
 
Joe Blank replied to my email and suggested trying to fabricate a backing patch. I'm thinking I'll see how it looks to make a thin patch out of .016 aluminum and just let the the rib go over it. Maybe combine that with what Larry suggested about making a new hole on each side to re-inforce and abandoning the nearby hole.

If that lay nicely, I'll probably just do as Jerry suggested... I'll post how it turns out.

I hope that's AFTER the mistake! If not, then I think I see your problem...:D

It was after...which raises the flipside of the question...
 
...I'm thinking I'll see how it looks to make a thin patch out of .016 aluminum and just let the the rib go over it. Maybe combine that with what Larry suggested about making a new hole on each side to re-inforce and abandoning the nearby hole...

That sounds like overkill to me. Be mindful that the greater the complexity of what you do, and the more times you do it, the more likely you are to mess things up. I'd go with Jerry's plan and call it good.

These are relatively conservatively designed airplanes, and I think that the structural margins designed into them are plenty wide enough to absorb a few oopsies such as this one.

Thanks, Bob K.
 
Back
Top