What's new
Van's Air Force

Don't miss anything! Register now for full access to the definitive RV support community.

Fitting Wings one at a time vs as a pair

tailcreek_flyer

Active Member
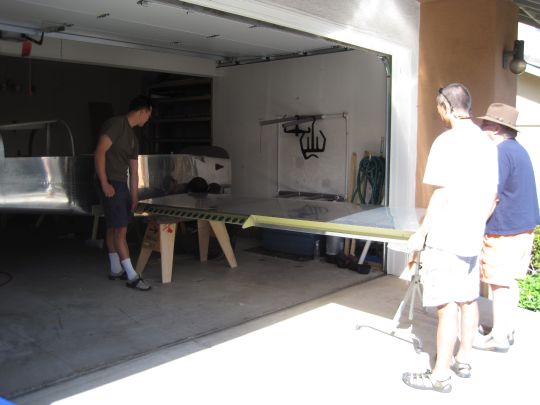
My work area only permits me to fit one wing at a time. Obviously there is some risk in the wing incidence drilling task going this way, not being able to snap a line from tip to tip or measure back from tip to tail ,etc. I am wanting to reduce my final assembly time in the hanger by do as much as possible in the home shop, however I am starting to think that the benefit of doing the wing fitting once I am set up at the hanger outweighs the risks of trying to do it one wing at a time in my shop.
Can anyone share their thoughts or experience on having fit one wing at a time, did it turn out as planned? Did it make you wish you had waited?
Thanks
Cam Andres
RV9A, ready for finally assembly
Aerosport IO360
 
My approach

Cam,

I built most of my wings and fuse in a friends' large shop, and then had to move to my garage. The last thing I did before moving to the garage was mount the wings and drill the rear spar holes. To me, this is the most critical task I have done to date. I would not attempt this one wing at a time. Now that I have other stuff done, I'll probably mount one wing at a time to rig the flaps, adjust ailerons, trim the wingtips, etc. I, too, want to get as much done as possible before heading to the airport.

That being said, I have not done this before, and the advice of those who have gone before us should weigh more heavily.

Cheers,

David
 
I did my wings one at a time ....

... for the same limited-space reason you note. It was not a problem. Yes, it took a little more time and attention but was quite do-able.
I dropped a plumb line from the centerline of the fuse and drew a Sharpie line on the floor. Then drew perpendiculars from there at approximately the wing leading edge position. When I had the wing mounted, I dropped plumb lines from the leading edge and measured the distance from the perpendicular marked earlier. It was very easy to see any variation from the correct position. Not a big deal.
When you move to the hangar for final assembly, you'll be astounded by how much there is to do. I recommend you get as much done as possible before you make the Big Move. I'm glad I did.
 
I did both wings together, in the garage, with one wing sticking out into the driveway for just a few hours.

The only critical step that really ought to be done with both wings on simultaneously is the drilling of the rear spars, and that can be easily accomplished in a day.

With that done, the wing incidence and sweep is set, forever. So you can take one wing off, which makes everything fit neatly into a two-car garage again, and you can then do everything else: fit the flaps, root fairings, etc. with just one wing on at a time, in the garage, at your leisure.

I did a detailed write-up here.

20100508_02.jpg
 
One at a time

I did mine one at a time due to space, and found it to be easy - an I believe not risky. Lots of pics help, as you're working. I used a set of laser lines for perpendicularity setting, then some geometric measuring to confirm. The line of fuse skin to center section rivets and the lower wing skin rivets form a nice line to shoot a laser down.

An extra measurement I added was with a builders square, along the rear spar rivet line to the horizontal of the fuse longeron. Perfect third reference if you can comfortably confirm the geometry of that area of the fuse to the spar box. (if the side rails look good to the skin . . .)

One at a time let me take my time with the wing to fuse fairings and the leg to fuse fairing. Time well wasted.

I will tell you I was able to get them mounted by myself, but could not safely remove them alone. The pin fit nightmare I was prepared for did not occur.

Drilling the rear spar bolt perpendicular to the spar was the toughest element.

Rick 90432
 
Fitting wings

Friend & avid trip videographer Troy Branch built both a 9 & 10 in his garage. When time came to fit & drill his wings, he just pulled the projects out onto the driveway for the afternoon, entertaining the neighbourhood. Task should take only a couple hours if properly prepped. While the wings are on, don't forget to mark out the screw holes in the belly skin to lower wing skin area.
 
Fitting one wing at a time..thanks

Thanks to everyone for the ideas and suggestions on this task. Its somewhat ironic that I have over 10,000 square feet of greenhouse space available 8 months of the year (where I assembled my last aircraft) but not when I need it this time around. I'm sure the shoppers would love piling their flowers on the wings while they shopped for more.
Some ideas got me thinking differently, and now with winter finally over i may be able to pull her out on the driveway, do the wings and then retreat back inside over the course of the weekend as Ralph suggested.
BTW, good write up on your web page Roee!
Thanks again.
Cam Andres
RV9A with Aerosport IO360
CH701 with EA81
www.tailcreek.com/tcaviate
 
While the wings are on, don't forget to mark out the screw holes in the belly skin to lower wing skin area.

Great tip from Ralph. I forgot to do that on the L side ...which required a second temporary L wing install. Given all the other excitement going on when the wing(s) are in place, it's easy to forget that small step.
 
Back
Top