What's new
Van's Air Force

Don't miss anything! Register now for full access to the definitive RV support community.

I'd like to see your ADAHRS tray design for RV-7 & -9

ron sterba

Well Known Member
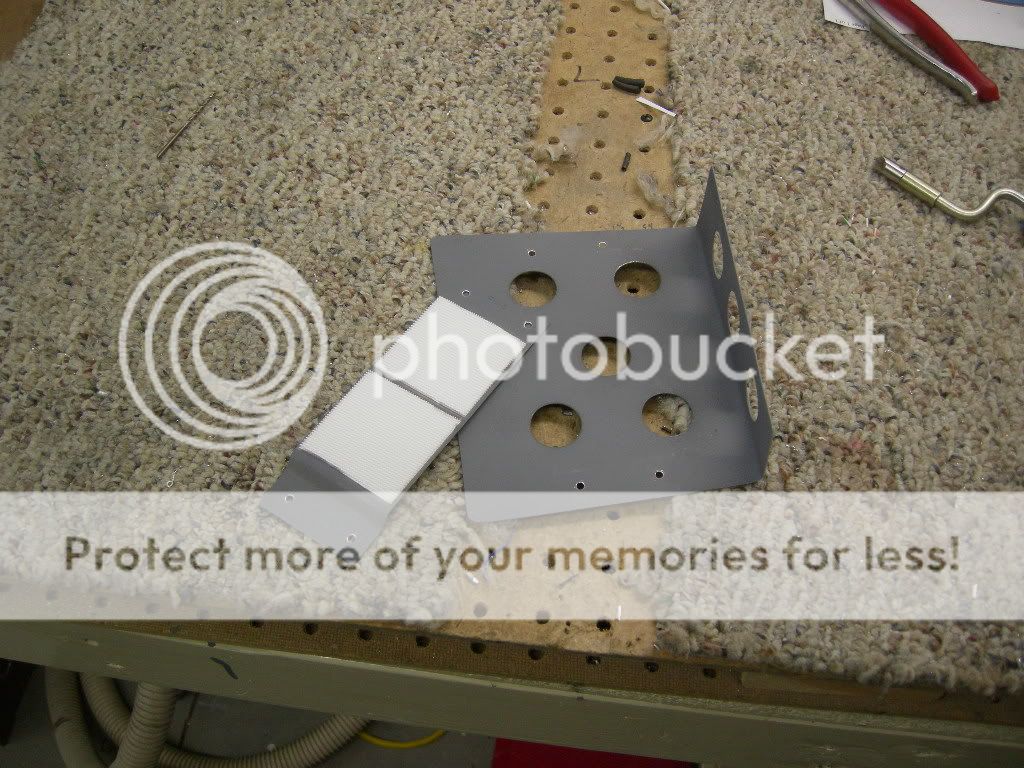
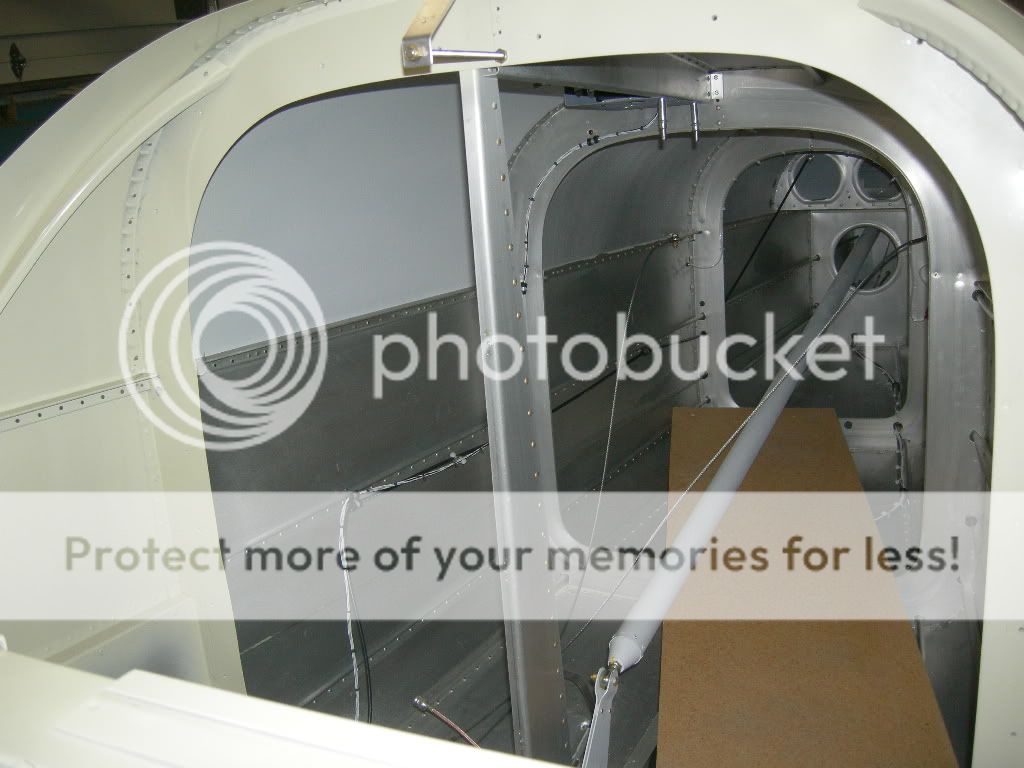
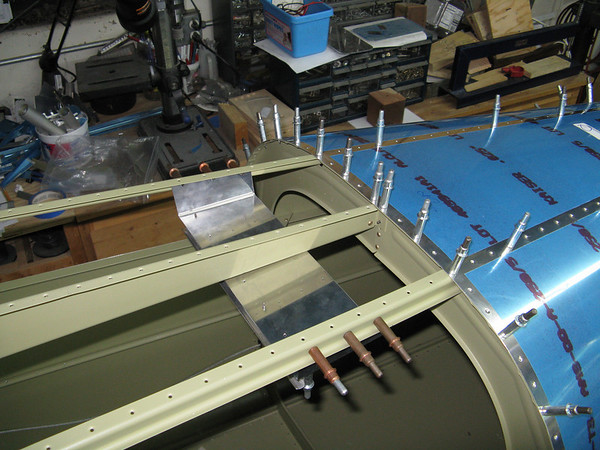
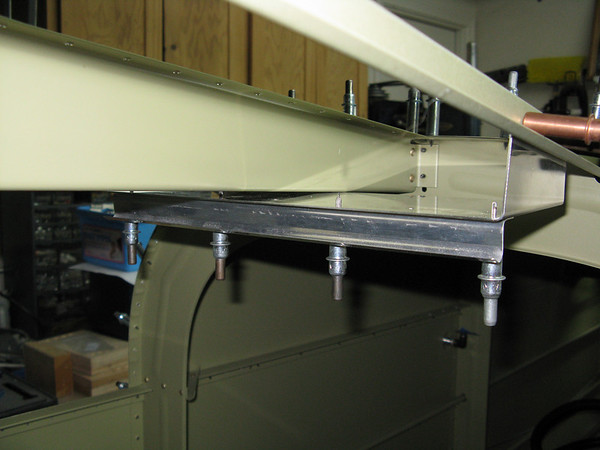
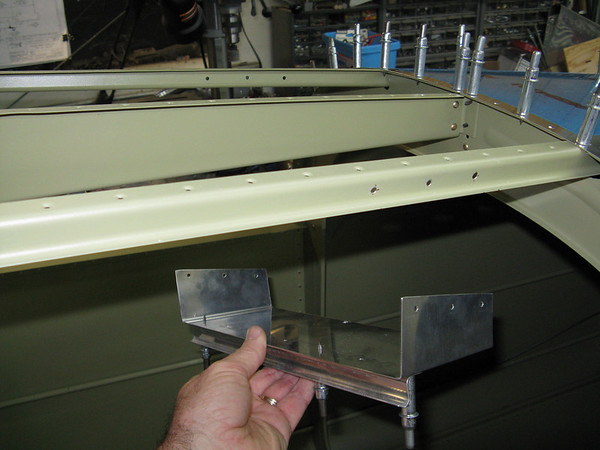
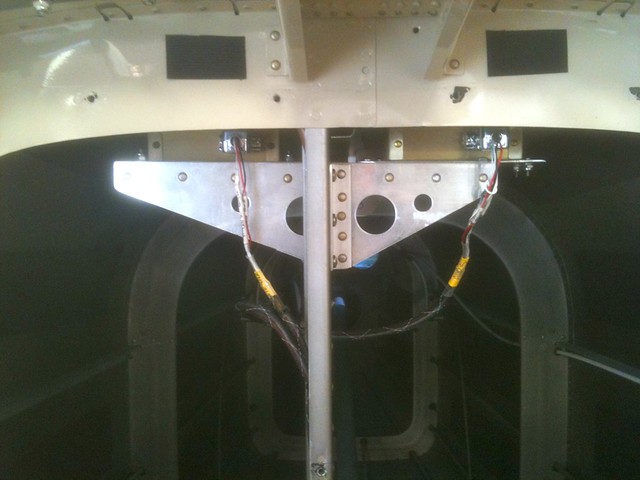
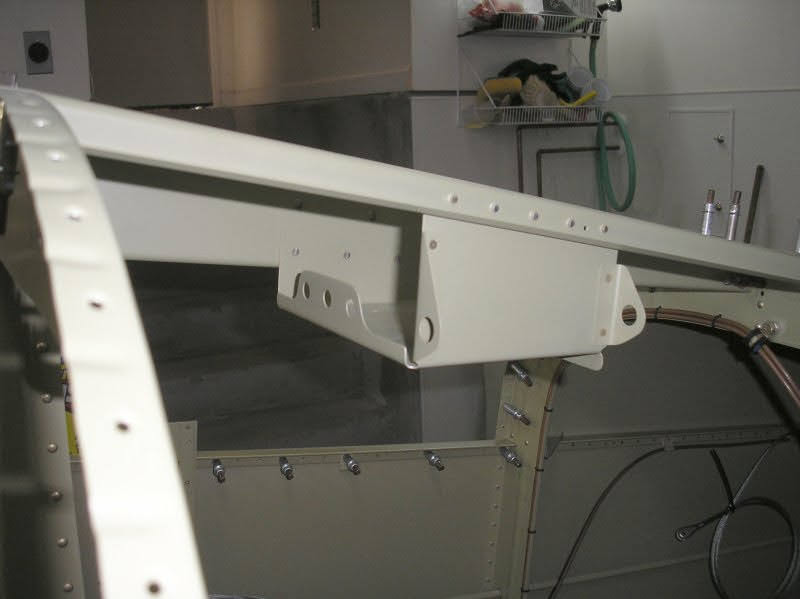
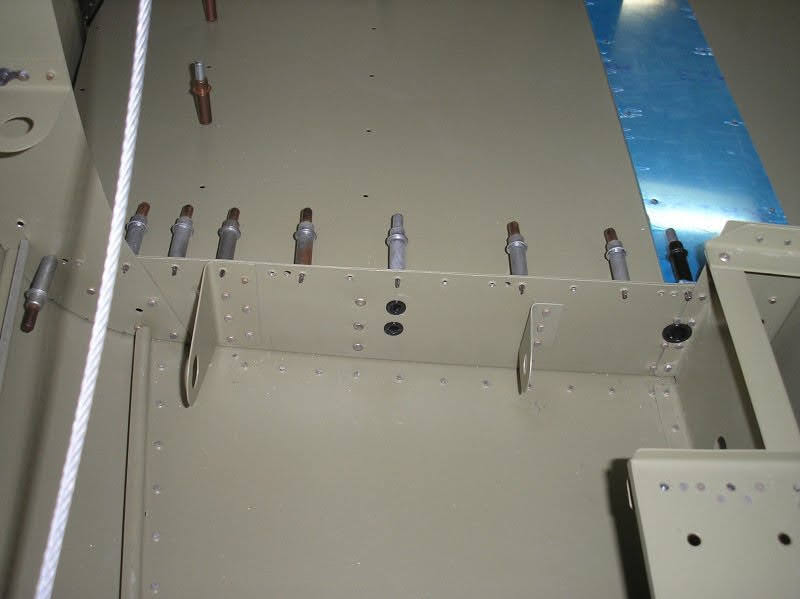
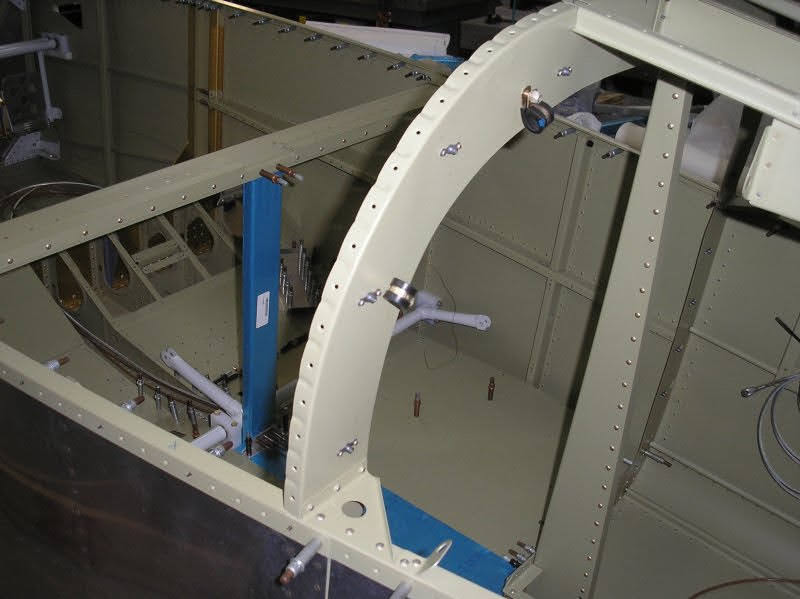
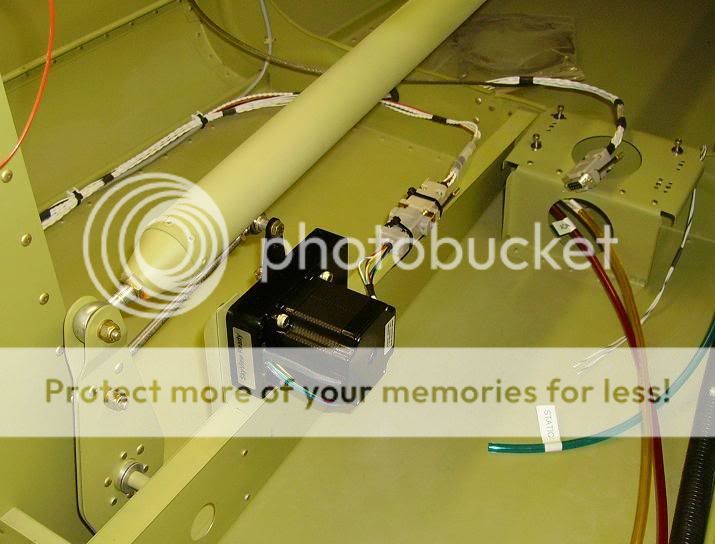
Just installed my static ports on my RV9A and routed my static tubing to the F707 bulkhead where I need to build a tray for my ADAHRS (All Dads Aim Higher Rock Solid) almost sounds like (A HEARTS) made up a little sentance to remember ADAHRS. OR if you have a better jingle to jog the memory lets hear it! If anybody who has installed that tray and has a picture that would be cool too! Was wondering about hanging it from the top of the bulkhead or build a bracket across the stringers with some 3 quarter inch angle and a tray to the dimensions in Dynon PDF to a tray for the ADAHRS. Ron
 
Last edited:
ADAHRS tray photo

Here you go!

tU7HDu9vyjhJoboPJrivvSG6rdeQRFCB1f-XT8kqVouH8X_JluZTqRidQl8pCRBqElFgnhRQN7b_QGSK7iOrBSTsacdZIfeEu20NouXDbgjKzB_5ppvpurVlole9AgGnxHT5JMiyOFCGLywkAAOVx_sGO1s_jaSZjK3UsWER411i2oH8G5vsBdAFKHZpPCu1fB-LMzxKh8yfLzTS3XK325lcvlj_exTNEQ8DI26F_pY_owNCUXXW5PwrdKiNa_Mcbdy8YKNM4t5oEOOSOXrxo-9cBzJ5dLiR_EiNZ8BCSDVPdFMZJMmTVuZ4yXac97XHlX_sTXrMWrnyiakoGPw1GqEX4qUTSrKi0kHbz9OaqiUsp_wUaww4UnYIU94MegB8ZLQFbYzHf-rkwXvMZ1Qo1hTme4_6Q2tW6Yi3Bf_9S0mPsc1KQ9wEIdzKxYUJ1qsOsZTTwvoHx0sXEZ6Q7-gc7E1_5rnL1xW-WDvWQK1ETh-TPKaeQ0Sj8mjtG27xJ07Jr32d-oFFs01F1lohULD6N1kWIVq4XdWLvBZxkvabpA7ltU88m94dZsg0LMrT-TUm__Ia0-kvZmRKaI-6gOVh2d8YGHJNJhDJbDX7GMhMHjmzddgNMhKFGSgeXb9STXnnbBurYGyh7dxMM-SDXvdFhvxatNVtlI3LfKJPxwCyKK4Dob8OwuBNncSQRqL4bGkVVm00vCPOo8o3EuaSMde0B3fZtw=w800-h599
 
Last edited:
Dan, that is a very nice tray you made! Iam assuming from the picture that the two side holes will house the tubing from the pitot tube and static ports to route around to the front. Or would that be the cables to the EFIS unit itself. I can't see from the picture if the holes are also on the other side. I think that the cables will come in from the rear from the EFIS unit if I remember right.. In either case you have done a beauitful job on it! When you get it wired in send me a photo. I would like to see the finished product. Iam think that I'll run my pitot & AOA lines under the bagage floor panels but not sure.Maybe along side the fuselage longerons. I called VANS about 2 weeks ago about drilling holes that might weaken the part like the main spar. They said draw a straight line between the holes that are in the spar already and stay in that alignment, drill your hole no closer that 3 diameters of the hole to another holes and no larger than 3/4". Better would be the size you need. So drilling of holes i have a better feeling that i haven't jepardized the integrity of the airframe. Thanks Dan Nice job. Ron
 
Last edited:
More detail

The photo is taken from the left side of the fuselage. The three holes across the front take 375-4 snap bushings and are strain reliefs for the three tubes (pitot, static, and AOA) that go into the ADAHRS. I'm using push to connect fittings in the unit. The holes in the side brackets are also for snap bushings and carry the wiring harness around to the back of the ADAHRS where the DB-9 connector is.

KyqI3OynTcM4bf7h34IpEfaTCE60N4tCQd9OOrdBPna6JPScfDQSdtKh47NV4V8C_AvNz_fPOkMWeNeqStVLDyxUQaujWsMrS2ej0dST9P7szNIHEiD_deXWZvJAQ1yOP3A04KaunuAR_ljhENS45XuPJVkjQCyT_UXnVCTmEz--zc08wtfnIyBNv09zCrLXiexOo6FAsWCcN3uEyLYpC5YB_gxj0owmaXt8OklVCuu1acGrvkUGKYyEJ-ksyoUJti1WcwdkHxYkLwWaIbaBYcrQCNCn-1ds1Dd9c6OwXlfkRiiwcLxXb801rqZythtPYMBDofg3-yMfT0_zKoDiG4zutObwodltwAhUVfDUWI3BsnOqrvulbS4YaLB2jkjBKNVv1RE-Kc93orLv0oqrEjLAJlhuATuqhFu6042tEaR62tx2BtYJ63Y0N4g44RLjReW7p26y51NVjYykwGbi-Ie_kppc2vzYpJN1BX5i8smmYx4IuGMFPy6nvJ4OMc0Lm2w_cLSqP5SSMAot0J6CtzimZRu_yRg4Q8GjhlFIUIGnmRP6iShRVRFBxUH2xebkTlNfDXJQhDIerSo7VMFpzv78F3dagUa0B0LGOogFqGKLuOeyNz2kg1eKXPi_nNghKBiRq18QoWoChSx1SrDpxVBeKIplQH0iYmxxuW7keZH7kXoCCafADAijvi0ULaBK4LYMtqPhWIuRhxx8TggKkoMEgA=w800-h599


I routed the pitot and AOA lines under the baggage floor. The static line runs along it's normal path parallel to the longeron. The harness comes through the center tunnel. The harness and the three tubes are routed along the left, aft side of the F-706 bulkhead (baggage bulkhead) and run through a combination of adel clamps and fabbed up brackets with snap bushings. The lines and the harness make a smooth curve from the back of the bulkhead and into the snap bushings on the front of the bracket.

T03f3Gu4zEbOLUlNj6jXdZPjtvSrQd234KwqEQbYm3NMpKFsJsl5x8teGGCZVwV0aKW-gUyzE8uINNKYLyEBJ2LsBB5XaJPi165p4b9SKMwiinzb7y1P_l0izbxSkYSa5V7mkz5nOT5GismTBWD6kCMWSpYmMYsBdLWACky0A7ZsMHY5Z0sn-3-d_OxiCmlwIPbwR6hRsSnWKmp2IdRPaOj6l7aL0sEa8uG2yQYku2Df1Rmxv6FBz8CuGU2FJHWkYKe3zimjxoeZUQhHmMzeFtNZtG8jjU7YJJU1-V8rXCKc1-r65abfAtyWB7G5u6zIrZ8-3s4Oot4VVSg8CaWUkk5wa1WITVbRK346A4zx5Gtf2UwT_H_lxinsAc0wVhGjykWhbUZWeTFq-NCiKus5NoDD1c4acrGI0WUba-7wGSSBqwalTYb17pbbv7IGNDDsqThzRAF0MjtKksTMfNLJwdT5mcqKXsJgeK0RW3dr3dHvy61Muen-w-ar7Too0rnzZzKAMZA7sBivnazVSnlOCeF_8E3MOtyh8UHHgCWrN50FDvNZPyGuv2ow1A3xjNTuZaS8eS_6dAp_Qbhwoj0rlQF8RdtW_J6afq4Je7FuH-0v3EVfFQ37qYKcvDA9C-EJpM4D0V0BA5xK9Pe4Sre6_OMHdtCQ5Q7RlR2gPls2pVwxmM1-KB4wOlAksOIEYNcC8C-oG0nVZsTiAbx4HuOEY2-MZw=w800-h599


GhGXu4x6chCWeTOCm4zbMuACrxHvGBNbwKq3rzTM9H5hZGGjYDFFrgysSGlHpyyscfRXAOdW4NQtQ9nXxiFXiHZVWX2iEhhBxkaOMCBl5sBApvXzoquHQm4kA1MoCb3gvuF9QZCu_H_vWPbTPVQOEYWRLO7SP_eZqjxt1s-GiibAZc1pAV_nk0P_7uw4v4_m53xHzm9P0BZWjGR79EdzTSYs5UtMgD7de2UyjKYpyA8GQUr-jvl_DTeJ8iDO10A2aMRbs1jG9WfFoK0NoRdQEIV-osrrsTdTp5SWXRfdO18Fj5ycIzduYpKKEUdyQmUavOV6tk1fJV_kG6NGovF07eEV9-cBaxuw0jrdMOmGmIGk0aPltMtCvSfxct7k3HRZBYl8Oa-wCxz1gn2x0d9dBIi0Ne-PM5ZGRQAYwX0LyONOcORZVrIQ9jpvdDLHR4zoKJtssnsyEujLCxB-SoZrfhwqVq_atMZL7BAyOsA8tc2O5jRM3ySYsYZq0Uxkh0naZCWXLt6ImfmM-bRgKlAkWJPuPjfCF6mNDOv67HWziKqBLqsCjFE7DYuOXrpi-GWqYXw_LOH3rBzWH9lmC6EFB_bxd3XfaoTMKspe-avcLQRTE8-niZgzQnQsO8NWxKRxeOTr927Abu3AEXo3UzRYAC6L6CzcRMisMzf_nGVW6DoDLuFys24a1Oi4DfgqwzVT724p5SIjQG2Us53b07tR_QRtYw=w800-h599


To make installation/maintenance of the ADAHRS a little easier, I made a couple of nutplate strips each with a pair MS21048-08K stainless steel nutplates. This allows me to install #8 brass screws through the bottom of the bracket without having to try and get any wrenches, etc up inside the bracket. The nutplate strips sit on the lip of the ADAHRS and only have to be held long enough to get the screws started.
 
Last edited:
I used the Van's AHRS/ELT kit to mount it on the floor next to the push tube for the elevator. Seems to work just fine there. ELT ended up on the side of the tail cone using another Van's kit for mounting ELT/etc there.
 
Dan thanks for the additional pictures I thought about a nice run up and around to the ADAHRS unit I like the idea so I'll run mine that way too! Thanks so much Dan for your advice. Looks like our RV discussion here has been viewed by many. Thats good!!! and Corey it sounds like you have a similar set-up. I didn't know VANs had a tray. I'll have to check into it on their catolog page. Sounds like a good fit for you too Corey. Just this morning I was looking on Vans catolog for Rudder cable fairings but they didn't have any. Avery did but for $12, not a bad price but wanted $8.50 for shipping 2.5 OZ by fed-ex so I didn't buy so I'll have to look elsewere. I heard you can make your own. Thanks guys for th help. Ron in Oregon
 
Hey Dan, Ron here again. I got my new GPS. Its a 7" color touch screen. Its called IFLY700 by Adventure pilot. Its way cool!! so easy to use. Believe it or not it comes with a REMOTE CONTROL so if the unit is located on the right side in your cabin you can mount the remote on the yoke!!! Any way check it out if you get a chance. Ron
 
Dan, what did you use to prime the interior? Like the look. How do you keep it clean? Everything I touch gets dirtier and dirtier after I prime.
 
I have the bracket installed for the Dynon AP servo in the fuselage. I am wondering if the Van's ADHARS mounting kit would be compatible.
They both seem to be located pretty close to one another. Would an AP servo affect the ADHARS ability to get a proper magnetic heading?
 
AKZO green epoxy

Dan, what did you use to prime the interior? Like the look. How do you keep it clean? Everything I touch gets dirtier and dirtier after I prime.


For some reason, my camera is picking it up as rather a brown color - but I can assure you it is really green! Not a problem with keeping it clean - this stuff is bullet proof. I can wipe it with MEK or alcohol or whatever it takes.
 
Maybe . . . . .

I have the bracket installed for the Dynon AP servo in the fuselage. I am wondering if the Van's ADHARS mounting kit would be compatible.
They both seem to be located pretty close to one another. Would an AP servo affect the ADHARS ability to get a proper magnetic heading?


That's exactly the reason I mounted mine up high. This keeps the unit more than two feet away from the servo.
 
same loc as Dan

I mounted an AHRS and a magnetometer just aft the baggage bulkhead. This meets the requirements for distance from steel cables and motors. It's attached to the vertical support (bellcrank channel) on the baggage bulkhead as well as the horizontal stiffener web between the bulkheads.

DSC07555.sized.jpg
 
I have the bracket installed for the Dynon AP servo in the fuselage. I am wondering if the Van's ADHARS mounting kit would be compatible.
They both seem to be located pretty close to one another. Would an AP servo affect the ADHARS ability to get a proper magnetic heading?

Is the bracket for the Dynon servo on the pax side of the plan? (The TruTrak bracket is). The AHRS mount from Van's goes on the pilot side, and works just fine with the TT servo bracket.

The magnetometers are separate from the AHRS from GRT, so mine are mounted in the tail (with wires running to the AHARS unit).
 
Last edited:
ADAHRS mounting

I to like your bracket Dan. I'm building the bracket now for Dynon ADAHRS in my 7A. Does anybody else have a photo of their AHRS mount? Much appreciated.
 
RV-6A - but similar in this area...

pitch-servo-small.jpg


Meets the Dynon one foot number, but not the two foot number...:)

Stainless attach hardware and I will shim under the mounting ears to get the level accuracy required.
 
Where to route the Static, Pitot, and AOA lines?

Builders, I'm reviving this thread because it seems the closest to my question. I too have put the tray for my single Dynon ADAHRS unit in the upper fuse just aft of the baggage compartment. Now I'm having second thoughts, because I'm uncertain of a good way to route the 3 air lines (static, pitot, and AOA) from that area forward to the instrument panel.

The two basic routes are the center tunnel, and along a fuselage longeron. Both have disadvantages:

The center tunnel is already crowded with cables; more importantly, the existing holes and snap bushings penetrating several floor ribs are already full of wiring (two Dynon cables assemblies for elevator AP and ADAHRS, two flap motor wires, tail nav light, strobe power supplies, yet-to-install ELT and maybe some others).

There are existing holes penetrating the fuse side bulkheads for routing wires, but at the beefy F-705 bulkhead there is no existing hole. Instead, there are some doublers, angles, and lots of rivets. Drilling 3 holes there, even just large enough for the tubing without snap bushings, gives me pause.

What have you guys done? I see one poster said "I routed the pitot and AOA lines under the baggage floor. The static line runs along its normal path parallel to the longeron." That sounds reasonable, only one smaller hole penetrating the F-705 bulkhead, and other two lines out of the center tunnel following their own path through the floor ribs.
 
ADAHRS Mounting

Buggsy, if you are VFR, no need to bring any of the three lines to the instrument panel. On my RV-6, I am using an aileron spar (0.040) to mount ADAHRS unit--spanning top of longerons behind baggage bulkhead. Sandwich the longeron between the spar and some .063 with bolts. Mel Jordan @Dynon recommended this location. All three axis' easily defined.
 
Here's mine

RV-7 - Slider
DSCN2764.jpg


The above pic shows a ramp (with the white patch of velcro). The ramp provides the proper inflight horizontal angle for the ahars. This ramp is rivited to the larger angle bracket. Then the whole assembly is riveted to the top of the fuse behind the baggage bulkhead.


DSCN2767.jpg


This almost shows the whole the assembly held in place with clecos to the top stringer. I used aluminum screws, washers and nuts to attach the slider channel to the fuse.

Everything works well except the canopy has to be closed while the GRT EFIS initializes, else the steel canopy frame induces a 30 degree error. For me this is a pita during the hot summer and during engine start and taxi with formations. I may lower this assembly to a lateral fuselage mid-way point.
 
I built a shelf that sits between the J-stringers on the top fuselage skin. Made it wide enough for 2 ADAHRS, but I'll go with just one for now.
1126420658_Np9er-M.jpg


1126420733_o3aFj-M.jpg


1126420827_HUyJ9-M.jpg


I also ran some of Van's 3/4" conduit under the seat pans and baggage floor. I plan on snaking the AOA/Pitot lines in that route, then up the fuselage sides where it meets the static line and all 3 will go up to the ADAHRS. I am not planning on bringing any of these lines forward to the panel.
 
I installed the Dynon heated pitot/AOA in the left wing with the plastic lines running behind the spar for easy routing to the ADAHRS aft of the baggage area. I am installing a simple bent tube Vans SS pitot in the right wing with the plasticline running forward of the spar to route to the D6 EFIS. This way, I only need to route the static from the rear to the D6 at the panel. The other benefit is a completely independent pitot for the backup EFIS with very little additonal weight.
 
Buggsy, if you are VFR, no need to bring any of the three lines to the instrument panel. On my RV-6, I am using an aileron spar (0.040) to mount ADAHRS unit--spanning top of longerons behind baggage bulkhead. Sandwich the longeron between the spar and some .063 with bolts. Mel Jordan @Dynon recommended this location. All three axis' easily defined.

Thanks...I am planning for IFR, and anyway would like round gages for Altimeter and Airspeed in addition to the Skyview display, thus, the desire to run the lines back to the panel. I'm still thinking under the baggage floor, but outside the center tunnel.
 
Just did this last week, and I now have brass screws to anchor it to the angles. And yes, I did check to make sure I can access it through the holes under the tail fairing.

0000019d.jpg
 
I'm uncertain of a good way to route the 3 air lines (static, pitot, and AOA) from that area forward to the instrument panel....What have you guys done? I see one poster said "I routed the pitot and AOA lines under the baggage floor. The static line runs along its normal path parallel to the longeron." That sounds reasonable, only one smaller hole penetrating the F-705 bulkhead, and other two lines out of the center tunnel following their own path through the floor ribs.

And...that's what I did. I'll document my work here for future reference...

IMG_7582-1.JPG

The static ports in aft fuselage. I used Razor Static Ports from:

Darrell Reiley
2313 Logan Drive
Round Rock, TX 78664-7703

Don't know if he still offers them.

1000000560-1.JPG

Static line going forward; note Tee to ADAHRS.

IMG_7587-1.JPG

Hole drilled in beefy bulkhead (forgot the part number); had to remove a bit of flange on opposite side to clear static line there.

IMG_7592-1.JPG

I made these little Al clips per Vans plans, very helpful to retain tubing under top longeron. Since I have a QB kit, I drilled out the flush rivets where these were, then re-riveted.

1000000561-1.JPG

Back to ADAHRS; connections of all lines, note use of SafeAir 90deg connectors attached to angle brackets, and standoffs with nylon cable clamps from Terminal Town

1000000562-1.JPG

Side view of connections to ADAHRS.

1000000565-1.JPG

AOL (blue) and Pitot (green) tubes drop to fuselage bottom, using two more 90deg connectors, and under baggage floor (past strobe power supply).

1000000567-2.JPG

AOL and Pitot lines make a big curve to wing area. Nylon hole mounts are part CTM-HM from TerminalTown.
 
While doing some research for my SkyView install I ran across your pictures and have a few thoughts for your consideration.

1. All of those connections are a potential leak that will be a challenge to track down. You might want to think about removing them and just running the lines in such a way as to eliminate as many of them as you can.

2. With those fitting attached to the aft side of the baggage compartment bulkhead, how are you going to remove the bulkhead for your annual condition inspection? Remember, you have bearings back there that you will want to look at and lubricate every year.

3. With the ADHRS so close to the baggage compartment, anything you put back there with metal (tools, electric razor, belt buckles, etc.) in it will cause havoc with your SkyView.

Before you close up your plane, you might want to rethink that installation.
 
Just did this last week, and I now have brass screws to anchor it to the angles. And yes, I did check to make sure I can access it through the holes under the tail fairing.

0000019d.jpg

Greg,

Again, I found this picture while looking for tips to do my install and here are a couple of thoughts for you.

1. Before you close up your top skin, you might want to drill the holes for a 2nd ADHRS unit while you have access. When and IF you elect to install a second one, you can unbolt what you have and move it over.

2. While you have great access to that area now, once that skin is in place, you won't be able to get back there again. Having just installed my dual ADHRS in my finished -9, there is no way I could crawl back that far to do any kind of maintenance.

3. Since you are building an "A", I would be very reluctant to put any kind of weight that far back. The ADHRS don't weigh that much but even a few ounces that far aft adds up.

Just some more thoughts for future builders.
 
1. All of those connections are a potential leak that will be a challenge to track down. You might want to think about removing them and just running the lines in such a way as to eliminate as many of them as you can.
True, but the fittings and tubes seem very high quality and I believe they won't leak. To feed their air pressure to both the ADAHRS and analog instruments most of the fittings are necessary.

2. With those fitting attached to the aft side of the baggage compartment bulkhead, how are you going to remove the bulkhead for your annual condition inspection? Remember, you have bearings back there that you will want to look at and lubricate every year.
Those fittings are removable. Anyway the bearings you refer to in the elevator bellcrank are near the floor, so removal of just the lower baggage bulkhead is sufficient.

3. With the ADHRS so close to the baggage compartment, anything you put back there with metal (tools, electric razor, belt buckles, etc.) in it will cause havoc with your SkyView.
There is ferrous metal and electrical current in the elevator bellcrank and servo closer than anything in the baggage compartment.
 
Greg,

Again, I found this picture while looking for tips to do my install and here are a couple of thoughts for you.

1. Before you close up your top skin, you might want to drill the holes for a 2nd ADHRS unit while you have access. When and IF you elect to install a second one, you can unbolt what you have and move it over.

2. While you have great access to that area now, once that skin is in place, you won't be able to get back there again. Having just installed my dual ADHRS in my finished -9, there is no way I could crawl back that far to do any kind of maintenance.

3. Since you are building an "A", I would be very reluctant to put any kind of weight that far back. The ADHRS don't weigh that much but even a few ounces that far aft adds up.

Just some more thoughts for future builders.

Bill - all valid points, and I appreciate you pointing them out, don't get me wrong. I've already considered all three.

1 - The ADAHRS unit for the backup MGL EXtreme Efis shipped yesterday and will be mounted there before closing up.

2 - The Skyview ADAHRS was installed intentionally through the tail fairing access holes once I had the brackets in place, just to prove to myself it can be done with the skin in place. I'll do the same for the MGL.

3 - I am intentionally putting weight in the rear of mine, and keeping careful track of how much and how far back, because I'm going to be running an IO360 with CS prop up front and I'll need to counter some of that forward weight. I'll have an additional 17 pounds FWF for the engine, plus some for the prop controller (WW200RV prop) plus an SD8 standby alternator, so I'm counterbalancing that by putting some avionics and the battery aft.

So my question is...why didn't you just go ahead and mount the units right on the aft deck itself instead of blind mounting them inside the holes? Sure you may be able to technically get to them in there, but seeing things makes it a WHOLE LOT easier than working in the blind (been there done that wayyyyy to many times)!

Also note that with the WW prop, you won't be as nose heavy as you think you might be, although it sounds like you should end up pretty well overall W&B wise.

Just my 2 cents as usual.

Cheers,
Stein
 
tinker toys

1. All of those connections are a potential leak that will be a challenge to track down. You might want to think about removing them and just running the lines in such a way as to eliminate as many of them as you can.

Wow, It's like tinker toys back there with all those fittings. :eek:

3. With the ADHRS so close to the baggage compartment, anything you put back there with metal (tools, electric razor, belt buckles, etc.) in it will cause havoc with your SkyView.

I'd defend that the location near the top of the baggage bulkhead is the best overall location in the RV7, though clearly other locations like the tail or the wing tip must be working for many. Near the -7 baggage bulkhead is very serviceable and you can maintain at least 2 feet from distance from servos, strobes, and rudder cables. I don't get why you want to duct tape your electric razor near there. :cool: The location in the back of the fuse may be fine, but it does brings the ahrs closer to moving rudder cables and potentially to strobe lines, both of which my installation guide frowned on.

Here's my dual magnetometer setup. I used to have a crossbow AHRS on the right but a panel change resulted in dual magnetometers instead.
6897108556_6ceaceb75c_z.jpg
 
True, but the fittings and tubes seem very high quality and I believe they won't leak. To feed their air pressure to both the ADAHRS and analog instruments most of the fittings are necessary.
You are correct, they are high quality but they are plastic and rubber, which will leak eventually.

Those fittings are removable. Anyway the bearings you refer to in the elevator bellcrank are near the floor, so removal of just the lower baggage bulkhead is sufficient.
Once you remove the hose from the fittings or the tube twists in the fitting, you are going to introduce more leaks.

Working in that area for your condition inspection, fishing out a mouse, or whatever will be a challenge without both the top and bottom of that bulkhead removed.

There is ferrous metal and electrical current in the elevator bellcrank and servo closer than anything in the baggage compartment.
Correct and those ferrous items may well induce issues. I mounted my old magnetometer back one bulkhead and never had an issue. That, BTW, is the same location as my dual ADHRS setup.

Anyway, I wish you luck with your installation. Please report back once you are flying.
 
So my question is...why didn't you just go ahead and mount the units right on the aft deck itself instead of blind mounting them inside the holes? Sure you may be able to technically get to them in there, but seeing things makes it a WHOLE LOT easier than working in the blind (been there done that wayyyyy to many times)!
...
Just my 2 cents as usual.

Cheers,
Stein
Ditto! A number of people have mounted them on that shelf with good results.
 
...
I'd defend that the location near the top of the baggage bulkhead is the best overall location in the RV7, though clearly other locations like the tail or the wing tip must be working for many. Near the -7 baggage bulkhead is very serviceable and you can maintain at least 2 feet from distance from servos, strobes, and rudder cables. I don't get why you want to duct tape your electric razor near there. :cool: The location in the back of the fuse may be fine, but it does brings the ahrs closer to moving rudder cables and potentially to strobe lines, both of which my installation guide frowned on.

Here's my dual magnetometer setup. I used to have a crossbow AHRS on the right but a panel change resulted in dual magnetometers instead.

BTW, The Dynon SkyView ADHRS also contains the ports for the static, AoA, and Pitot and they point forward, not aft. So mounting the new stuff in your location may be tricky.

As for duck taping my razor up there, I occasional carry long metallic objects or other such thinks in the baggage compartment, which would impact the remote magnetic compass.

It is best to mount such a device in a location so that you do not have to concern yourself with what is loaded in the baggage compartment or where it is loaded.
 
Just did this last week, and I now have brass screws to anchor it to the angles. And yes, I did check to make sure I can access it through the holes under the tail fairing.

0000019d.jpg

Food for thought and YMMV.
I upgraded my AFS-3500 to a AFS-5500. The AHRS was internal to the 3500 and external on the 5500. The new AHRS replaces the magnetometer plug and play.

My issue: I had the magnetometer mounted under the VS. In my opinion, the new AHRS mounted under the VS is to sensitive. I plan to move it forward and mount it directly behind the aft baggage bulkhead.
 
ahrs mount

Hi I have a rv7 with the magnometers mounted in a fabbed tray just underneath the turtle deck. The only problem I have is if I turn on the skyview with the slider canopy all the way back it will interfere with one magnometer causing a cross check error. If I keep the canopy near closed I have no problems. Just something to consider. I do like the location but wish Perhaps I mounted them further away from the top skin.
 
Dual ADAHRS mount in an RV-7 slider. Wanted to mount in the middle of the fuselage to hopefully avoid issues when the canopy is slid back and wanted to avoid putting it in the tail to keep the CG forward. Will also be going with stainless seat belt cables to avoid other potential interference. Aircraft isn't flying yet but hopefully will be soon!


Back
Top