What's new
Van's Air Force

Don't miss anything! Register now for full access to the definitive RV support community.

Shop heads not forming fast enough

Status
Not open for further replies.

sbalmos

Well Known Member
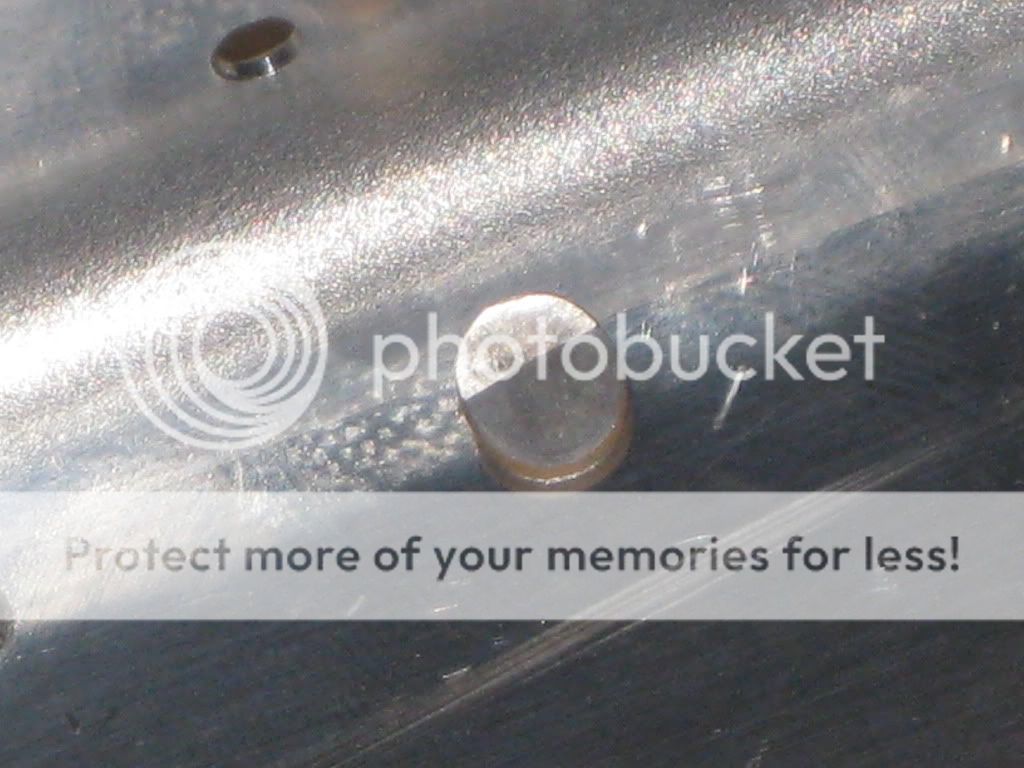
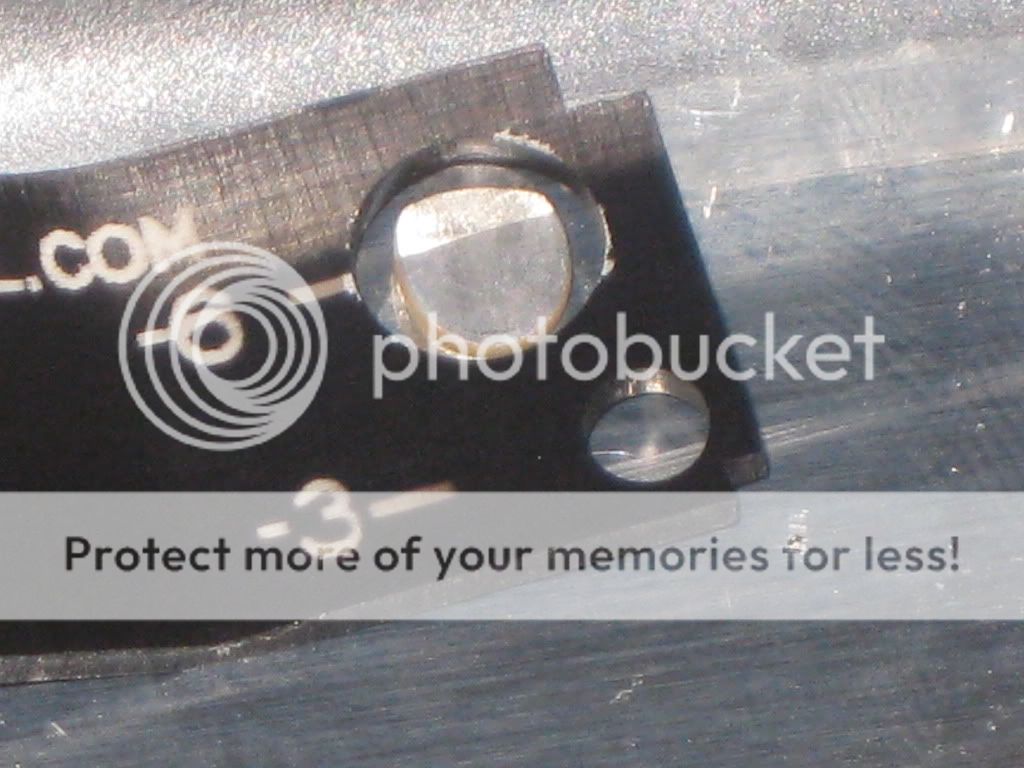
Newbie question... So I just pounded the first four rivets in my bird. They're 470AD4-6's, between the HS spar and doubler plate. Now if I'm reading my trusty Cleaveland rivet gauge right (the -6 hole), then the shop head isn't nearly wide enough. Yet the height is right. It just seems like I'm using a *lot* more pressure with my bucking bar than I did with the practice kit, and still not getting the shop head anywhere near wide enough. So far, it's looking like they're matching up to the -4 or -5 holes.

I'm running my 3x at 40psi using the standard bucking bar that comes with Avery's rivet gun toolkit. Any tips?

And I imagine I'm going to have to drill these out anyway, because the gun starts to slip and dents the machine head.

002.jpg


003.jpg


004.jpg


006.jpg


007.jpg
 
That -6 is for a -6 size rivet where yours are 4-6's, the 6 in your rivet number is the length not the diameter..... You need to use the 4 size hole...

Clear as mud....
 
That's what I thought after a few minutes. Kept staring at the -6 hole and thinking "there's no way it can be that wide. That'd be overdriven!".

Yeah, no kidding gstone. It's the dash that throws us new kids off who are still new to rivet specs. The -6 for the length makes sense. But then you see the -6 for the hole, and nothing in Cleaveland's instructions says you should really be matching with the first number after the AD, which matches the diameter.

Or maybe I was just being dense, since they were the first rivets. :/

Okay, so actually the shop heads are fine then. Should I worry about the dents on the manufactured heads?
 
Last edited by a moderator:
Okay, so actually the shop heads are fine then. Should I worry about the dents on the manufactured heads?

If you're talking about the last picture. YES. Surely there is someone within a half hour drive that can show you 10min worth of basic riveting?
 
I would suggest that you not drill them out until an experienced friend can come out and help you with your technique. Initially, if you can find someone who is experienced and work with them for a 100 rivets or so with one of you driving and the other bucking, you will learn quite a bit and it will prepare you for doing the deed on your own. Don't sweat it, you'll get the swing of it!
 
Like the others are saying. Stop and get some help.

You are gonna need to address those scratches on the spar bars as well.

30 minutes with someone that knows how will get you going correctly.
 
Scott - get plugged into this group

http://groups.yahoo.com/group/OhioValleyRVators/

Hi Scott. Saw you are close to Cinci. My advice to you is to join this group. RV gods galore belong to said mystical tribe....

Seriously though, there are some really good people with tons of skill that communicate through the Ohio Valley RVator group. Info on tools, techniques, other projects in your area, Fly out gatherings, etc. is there.
 
Scott,

I'm still learning and far from a pro, but I live in Goshen. If you'd like, we could get together and maybe, just maybe, I can help you out. I'm currently working on the wings for an RV-7. Let me know if you're interested.

Brad
 
Set

Stop! Get some instruction. 30 minutes is not going to do it.
Perhaps your local community college offers aviation courses.
Drilling out rivets without buggering up the hole is something that has to be learned also.
Looks like you're using a set that is too small also.
 
Use a piece of scrap.

Scott, make your own rivet gauge.

Drill a 9/64" hole for the size of a 3/32" rivet shop head.

Drill a 3/16" hole for an 1/8th" rivet shop head in a piece of scrap and no numbers to confuse you.

Those numbers equal 1.5D of the starting diameter.

Best,
 
Take those rivet gauges and throw them in the trash can where the belong. Get yourself a set of dial calipers and the Mil-Spec on riveting, which is available for download from Van's website. You'll find all the numbers you need for rivet size, edge distance etc. The much talked about "rules of thumb" like 1.5X diameter are just approximations, and are very conservative compared to the actual requirements.

For example, the 1.5 rule of thumb on an AD4 rivet requires a 0.188" diameter shop head. A look at the Mil-Spec reveals that the actual requirement is 0.163". So there is 0.025" of slop built in to the rule of thumb. So what, a little more is better, right? Wrong. In addition to carrying around all that extra weight (multiply it by 16,000 rivets) you've set up a scenario where you'll feel compelled to drill out a perfectly acceptable rivet, just because it fails the rivet gauge test. And, as you are about to find out, you can easily cause a lot of damage to a part by drilling out a rivet if done improperly.

You could do like Pierre suggests and make your own, but I recommend that you size them properly and not use the 1.5X. For example, the for a AD4 rivet, the callout is for 0.163. The closest drill bit is a #19 at 0.165. For the AD3 skin rivets, the callout is 0.122, and the closest drill is 1/8" or 0.125. For comparison, the "rule of thumb" is 0.141".

The edge distance rules are very similar in their relationship between the Mil-Spec and the rule of thumb.
 
Last edited:
trash

while you're at it throw that pesky 43 13 out too. Oh and Van's construcyion manual is just a suggestion.
Firstly, before you worry about anything else you need to learn to shoot a rivet.
There's nothing wrong with using rivet gauges.
 
while you're at it throw that pesky 43 13 out too. Oh and Van's construcyion manual is just a suggestion.
Firstly, before you worry about anything else you need to learn to shoot a rivet.
There's nothing wrong with using rivet gauges.

There is if you you use the 1.5D as gospel and rework rivets that are within the Mil-Spec but below 1.5D.

Don't rework good rivets - with good being defined as acceptable for the military.

That was why Brian Yablon and myself scanned the Mil-Spec paper document many many tears ago and redrew the figures to put it in web form.

Vans - and many others - stole it and it is here -

http://www.vansaircraft.com/public/Specs.htm

Aim for the perfect 1.5D rivet, but don't rework if it falls within the acceptable range.
 
Last edited:
Take those rivet gauges and throw them in the trash can where the belong.

Wow, you are a tech counselor and dishing out information like 'throw your rivet gauge away and use a caliper on every rivet'??? Our rivet gauge is the 1.5 times standard. It allows you to place it over a rivet and see where you are. You still have be be the judge as they won't all be perfect. You could make go/no go gauges with the max. and min. requirements, but it is just not necessary (much like measuring each one with a caliper). The gauge is a time saver for the new guy. We both know that you actually check very few of your rivets once you get the hang of it. How many hundred have you checked that you couldn't even see just by smashing your finger against the shop head and looking at the indent of your finger? My point is that if you are worried that people are going to get too picky and drill out rivets un-necessarily, don't suggest that a tried and true method for thousands of builders should go in the trash, while stipulating impractical alternatives.

-
 
Keep the gauges

Thank you! I would even suggest using a feeler gauge to be sure the manufacturers head isn't gapped. While an inspector at Vought on the B-747 line we used rivet and hi-lok gauges constantly. But then Boeing has a high standard for quality; I've sent many a part to the scrap heap. A quality product is not hard to achieve.
 
Wow, you are a tech counselor and dishing out information like 'throw your rivet gauge away and use a caliper on every rivet'??? Our rivet gauge is the 1.5 times standard. It allows you to place it over a rivet and see where you are. You still have be be the judge as they won't all be perfect. You could make go/no go gauges with the max. and min. requirements, but it is just not necessary (much like measuring each one with a caliper). The gauge is a time saver for the new guy. We both know that you actually check very few of your rivets once you get the hang of it. How many hundred have you checked that you couldn't even see just by smashing your finger against the shop head and looking at the indent of your finger? My point is that if you are worried that people are going to get too picky and drill out rivets un-necessarily, don't suggest that a tried and true method for thousands of builders should go in the trash, while stipulating impractical alternatives.

-

Mike, since there is no "max" diam. for the shop head in the Mil Spec referenced, why don't you make a two hole version of your colored gages?

One hole would be the "perfect" 1.5D and the other hole would be a "too small" at 1.3D

This way any questionable smaller rivets could be rapidly checked to see if they need to be driven more, while the 1.5D hole is used as the goal...
 
Last edited:
Well, this thread, predictably, went out in left field...

I am getting in contact with a few locals, and we will go from there. I am closing this thread so it doesn't continue to go overboard. If you want to continue debating the merits of rivet gauges vs yet more equipment for a new builder like me, or what is a "good enough perfect" vs "the perfect" shop head size, please take it elsewhere.

Thanks for the private offers of help off-thread.
 
Status
Not open for further replies.
Back
Top