
Van's Air Force
You are using an out of date browser. It may not display this or other websites correctly.
You should upgrade or use an alternative browser.
You should upgrade or use an alternative browser.
Got to love holidays.....
- Thread starter mbishop
- Start date

Hammer & dolly, followed by large flush rivet set & dolly and lots of patience. Then fiberglass work and lite filler could hide any remaining imperfections. Good Luck.
That will work but it is not the best choice......
Never use a hammer unless it is the only way to apply force to the dent.
Hammering a thin piece of material only makes it thinner which in turn is stretching it and causing the problem to be worse.
The best way is to apply a force directly the revers of what caused the bend or dent.
If it is a dent, try and push with an appropriate shaped object in the opposite direction.
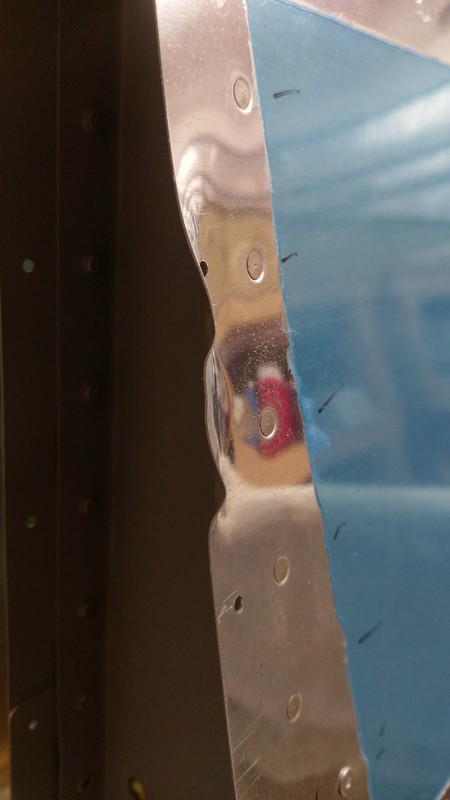
If it is a bend (like this) use tools (hand seamer, smooth jawed pliers, etc.) to impart a bending force in the opposite direction, across the bend points.
Start where it is the worst and work outward. Do a little bit at a time and check as you go.
Once the bend has been reduced a lot, you can even use flat dies in a hand squeezer to work it flatter. Sometimes I will even use the squeezer to induce some bending force because you can get a good good grip and concentrate it in a localized area.
Carl Froehlich
Well Known Member
Buy a new skin. It will save you hours of aggravation and be perfect just like you want it. New skins are cheap (I should know).
Carl
Carl
This is a great time to decide what type of build you will be striving towards. Perfection, Utility, or somewhere in between. Then use that to judge the advice you receive. I was amazed that someone would recommend skin replacement for this. On the flipside, others will consider it craziness not to replace the skin and start over. We are all looking for something different in our plane.
I had a similar situation, but it was on the flat surface extending over the rear wing spar (the part that the flap rides under). I was able to remove the damage, but the metal had stretched and created a wave. I didn't not know how to shrink AL, so my choices were install a new top skin or slice it to relieve it. I chose the latter and put a 3/4" slice in it and did some clean up with filler. The skin lays perfectly flat over the flap and the 3/4" slice is really not that noticeable. 200 flight hours and one year later, it really doesn't bother me. Others would be saddened each time they walk past it on every inspection.
From a strctural and safety perspective, we should always strive to meet or exceed the design parameters of our planes. But the cosemetic side is bit different. Perfection oftens comes wih a price and that price for those without experience is time. You just have to apply your goals to that trade off.
In this particular case, if you have any skill with filler, the repair will be 100% undetectable. I ended up using filler over this complete seam to hide what I thought was an unattractive seam with pop rivets. Took maybe 2 hours for both sides. I do have a decent experience with filler though.
Best of luck.
Larry
Last edited:
I don't even want to imagine drilling out those hundreds of rivets to replace the skin. I think I can make it almost undetectable after I install the tips with some filler before paint.
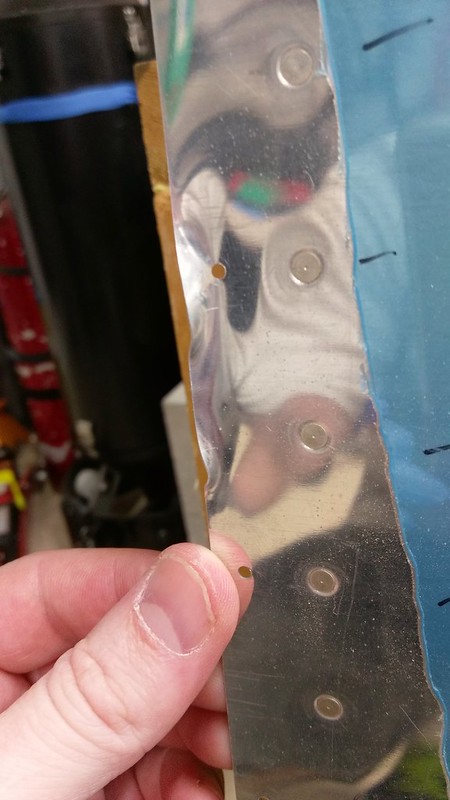
I've got some scrap skin so I guess it is time to practice on it with the seamer first and a smooth jawed plier. Let's see how the practice material comes out before I think about using a hammer and dolly (I don't think it is that bad).
And really, it will be something I can give my Dad s*** for years to come so there is no reason to get upset, shout and throw things. Just laugh it off, smile, tell him I'll figure something out, and if you need anything in the garage, have your wife get it for you.")
Family 1st. Plane 1.5
I've got some scrap skin so I guess it is time to practice on it with the seamer first and a smooth jawed plier. Let's see how the practice material comes out before I think about using a hammer and dolly (I don't think it is that bad).
And really, it will be something I can give my Dad s*** for years to come so there is no reason to get upset, shout and throw things. Just laugh it off, smile, tell him I'll figure something out, and if you need anything in the garage, have your wife get it for you.
Family 1st. Plane 1.5
Luckily this is a pretty easy place to repair and fix with some micro and epoxy when you attach the tip. Worst case scenario you try to flatten it back out, and then decide it's just not good enough and then replace the skin. I bet you can work it out and make it ok - I know I have had to, hah. Be sure to have your dad autograph the area after you flatten it and prep it for the filler. That way he'll know he contributed and his name is memorialized in there somewhere.
Luckily this is a pretty easy place to repair and fix with some micro and epoxy when you attach the tip. Worst case scenario you try to flatten it back out, and then decide it's just not good enough and then replace the skin. I bet you can work it out and make it ok - I know I have had to, hah. Be sure to have your dad autograph the area after you flatten it and prep it for the filler. That way he'll know he contributed and his name is memorialized in there somewhere.
That's a great idea

