

precession
Well Known Member
Apologies in advance if this is a dumb question or making a mountain out of a mole hill. I'm not the original builder, but I do have the plans/drawings for the RV-4, and in addition to having read them and the Vans SBs, have spent quite a while reading threads on here about fuel tank sealing, sender grounding, etc.
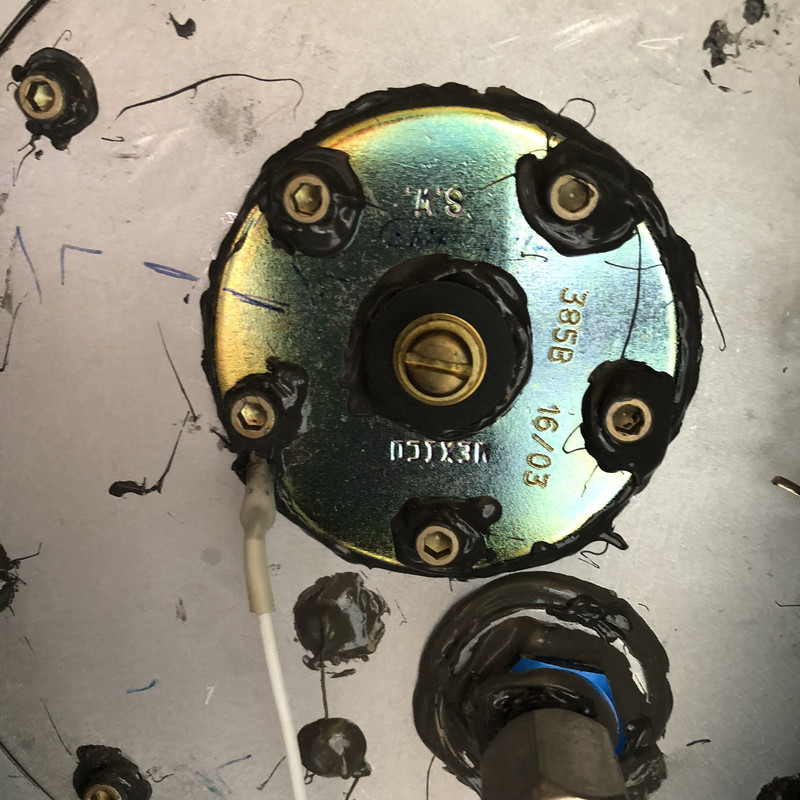
So I'm getting ready to install a new fuel sender onto the RV-4 fuel tank access plate (T708), after complying w/ tank SBs (anti-rotation bracket, etc.). I will also be re-attaching & re-sealing the tank access plate to the tank rib.
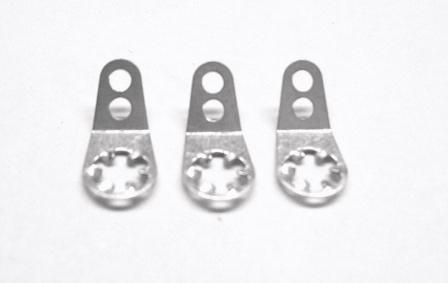
Question: A couple of posts here recommend using a lock washer on one of the screws that attach the sender to the access plate. The idea being that the sender must be grounded to the access plate, and the presence of tank sealant around all the attaching screws, and between the sender and the tank access plate, might impede an electrical connection. Presumably, the installation of a washer will provide a good connection.
As originally built, the plane had cork gaskets on both the sender and access plate, but now I’m planning on just using Vans tank sealant, no cork gaskets. It’s my understanding that is Vans current recommendation.
Of course, once the sender is grounded to the access plate, then obviously the access plate will need to be grounded to the wing rib in order for the sender to actually be grounded, and I think I also read one post saying to use a lock washer on one of the attaching screws of the access plate, for the same purpose.
So I’d like to hear if people think this is a good idea for accomplishing the necessary electrical connection. I’m wondering why Vans doesn’t give any guidance on it either way (to my knowledge at least).
Actually, since when screwing down the access plate apparently I’m supposed to leave a small gap between the access plate and the tank rib (gap filled with sealant of course, but wide enough to allow a knife to be inserted between the two plates in case the access plate later has to be removed), I’m wondering if it wouldn’t make sense to place washers on the screw shafts BETWEEN the access plate and the tank rib. That way, I could go ahead and tighten the screws right down, and the lock washers underneath the plate would provide me with a small but uniform thickness gap between the two plates.
Comments or recommendations would be appreciated.
So I'm getting ready to install a new fuel sender onto the RV-4 fuel tank access plate (T708), after complying w/ tank SBs (anti-rotation bracket, etc.). I will also be re-attaching & re-sealing the tank access plate to the tank rib.
Question: A couple of posts here recommend using a lock washer on one of the screws that attach the sender to the access plate. The idea being that the sender must be grounded to the access plate, and the presence of tank sealant around all the attaching screws, and between the sender and the tank access plate, might impede an electrical connection. Presumably, the installation of a washer will provide a good connection.
As originally built, the plane had cork gaskets on both the sender and access plate, but now I’m planning on just using Vans tank sealant, no cork gaskets. It’s my understanding that is Vans current recommendation.
Of course, once the sender is grounded to the access plate, then obviously the access plate will need to be grounded to the wing rib in order for the sender to actually be grounded, and I think I also read one post saying to use a lock washer on one of the attaching screws of the access plate, for the same purpose.
So I’d like to hear if people think this is a good idea for accomplishing the necessary electrical connection. I’m wondering why Vans doesn’t give any guidance on it either way (to my knowledge at least).
Actually, since when screwing down the access plate apparently I’m supposed to leave a small gap between the access plate and the tank rib (gap filled with sealant of course, but wide enough to allow a knife to be inserted between the two plates in case the access plate later has to be removed), I’m wondering if it wouldn’t make sense to place washers on the screw shafts BETWEEN the access plate and the tank rib. That way, I could go ahead and tighten the screws right down, and the lock washers underneath the plate would provide me with a small but uniform thickness gap between the two plates.
Comments or recommendations would be appreciated.
Last edited:
")


