Sorry, had a couple of questions on the hinge …
Wow! First post. Official welcome will be along soon. Don't apologize. Now is the perfect time to make mistakes, ask and get help.
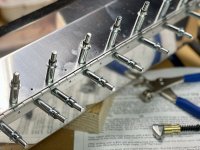
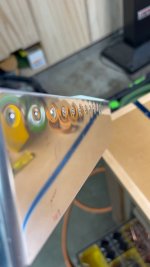
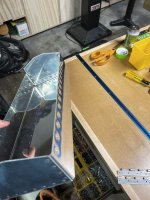
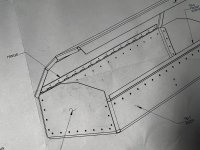
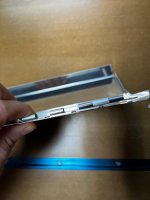
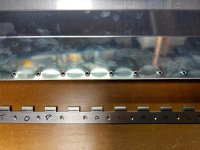
First, I dimpled the box and lid before I did much research on the hinge and realized I should not have dimpled the box since I was going to countersink the flush rivets.
Actually, you did it correctly. The rivets will be flush outside. You only need to countersink the hinge for the dimples. Nice when things fall into place!  Technically, it's not the way Vans intended, but hinges on the airplane are rarely dimpled. They are usually countersinked. They distort when dimpled. You did it right.
But when I went to countersink the hinge for the box, the eyelets are in the way of the countersink cage. They're even in the way of dimple dies if I wanted to dimple it. How the **** do you get in there? Is there a special cage, like a half cage I could buy, or would I need to cut it away, or grind my precious dimple dies? Or maybe I don't have the hinge on correctly and that's what's causing the issue?
The toolbox hinge is smaller material than the airplane. It should be inside. Looks like you have one side of the hinge on the outside. The easiest way is to remove the cutter from the cage and countersink using a 1/4-28 extension on the drill press. Or put the cutter in a debur tool and do it manually. Also, most grind a flat on the female dimple dies to dimple tight spaces. You can also buy close quarter dies.
—
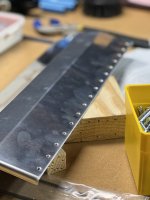
The second question I had was around dimpling and what is a normal amount of distortion. I watched Paul Dye's video on setting up the squeezer for dimpling (leave enough room where the dies meet, but can twist), but after squeezing it looks like there's a bit of distortion on the metal. Is this normal? Would you back off a bit, or tighten up?
The distortion is actually "under dimpling". If it's a manual squeezer, set the dies where they touch with no parts between when the squeezer is closed. The jaw will flex a tiny bit when a partbis dimpled. Tighten it up.
Funny how much I'm in the dark on this stuff and getting more nervous by the day about this build, lol.
I suggest finding a Mentor to help you start. A couple hours will answer a multitude of questions and avoid developing problematic processes.
Any help is appreciated, also if you see anything that could have been better, would appreciate a good critique. thank you!
Just under dimpling. Pretty hard to fix. You kinda need to get dimples right the first time. No worries. Buy some scrap and practice. Assemble the toolbox then drill it apart. Drilling out rivets is as important a skill as driving them. Thanks for the diversion. I had a bad day in the shop and it feels nice to help someone.