What's new
Van's Air Force

Don't miss anything! Register now for full access to the definitive RV support community.

Having one of those BAD days

Av8torTom

Well Known Member
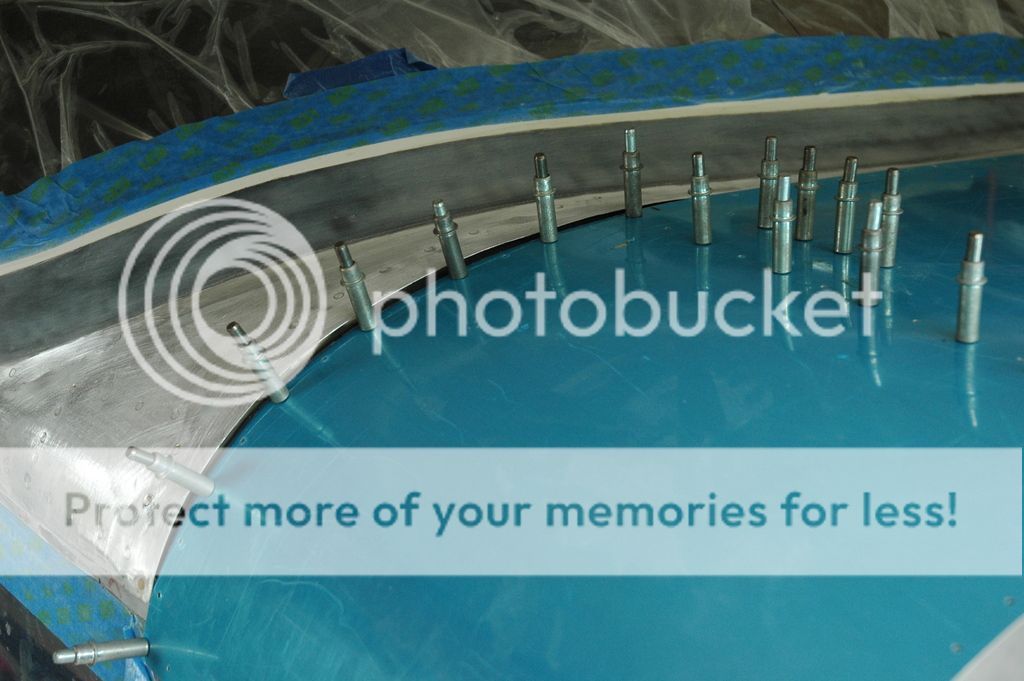
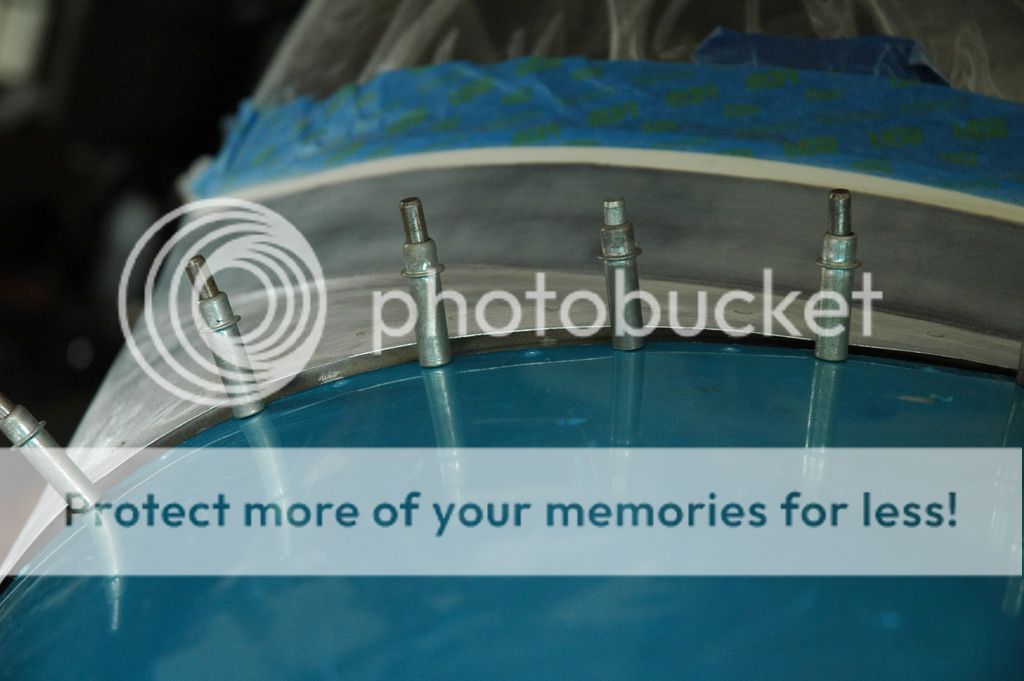
Now that my canopy is all glued in the frame and the fiberglass fairing is done I cannot for the life of me get the top skin forward of the canopy to go into position (can't get the rivet holes to line up - at all. The clecos you see are about all I can get in place). Also there's a serious difference in elevation between the canopy and the forward skin. AND one of my gas struts is dead...

Any suggestions???


Last edited:
Forward skin

Similarly, this was a tough area to align with the underlying ribs. id recommend very gently filing any underlying high points...just enough to help relieve pressure on the Clecos. As for the offset between the tip up skin and forward skin, a lot of folks build up this area with fiberglass till there's a smooth interface. Be patient!

Jim diehl 7a
Lock haven, pa
Flying since 2012
 
As for the offset between the tip up skin and forward skin, a lot of folks build up this area with fiberglass till there's a smooth interface. Be patient!
Jim diehl 7a
Lock haven, pa
Flying since 2012

Much easier to shim the skin to level.
 
If I shim the skin I'll NEVER get the holes to line-up and the piece to fit. I'm thinking I may need to fashion a new piece myself and drill holes to match.

That's what I liked about our earlier kits. We didn't have to worry about any holes not lining up. We didn't have any holes to begin with.
 
On my 7 it seems that front structure is quite flexible without that skin. I would suggest you remove the gas struts and the canopy and then try to bring it into alignment one hole at a time. I have a routine by starting in the middle and working out to both sides at the same time. I found it really tough to get the final rivets down the longeron. I keep them in place with the clamping clecos. It will fit. Then install the canopy frame. Getting that to fit is a completely different state of affairs.
 
Last edited:
Thanks everyone - I'll try fitting the skin without the canopy.

I had already added stops to prevent the canopy from sliding forward...

 
Sorry you are having a bad day - I know how those go. You did the right thing: set back, ask for opinions, and don't rush a fix.

I understand what you mean by not getting the holes to line up with a shim, but it looks like you might have enough space to make C shim and rivet that down, then rivet the skin to it in the original holes?

On the bright side - A bad day in the shop is better than a good day at work, and much better than a bad day in the air...
 
A little more work but in a few cases I have made a new skin and shimmed it up to match the Canopy. The prepunched skin is just to tight to allow much shimming. You can also remove the flange in the offending areas and replace it at a proper position up or down, along with the new skin if necessary . Use the weather strip angle as an example of how to do this using the appropriate size metal
Maybe more work but the outcome will determine the size of smile on your face for as long as you have the plane. :)
Larry
 
Thanks Larry - I may just have to do that. I don't mind the work at all, I just want it to look good and function perfectly
 
"I understand what you mean by not getting the holes to line up with a shim, but it looks like you might have enough space to make C shim and rivet that down, then rivet the skin to it in the original holes?"

Not sure what you mean by this? C shim?

Thanks,

Tom
 
I did what Bill outlined ... always started clecoing in the middle and worked to the outside. As you know already, that skin requires a cleco in every hole, not every other one as in others areas. Another trick when you're fitting the canopy and the fwd skin is to temporarily pop rivet the fwd skin using cheap all-aluminum pop rivets from McMaster-Carr. They drill out with just a touch of #40 drill before final riveting, and since they don't get in the way like cleco's, you can open and close the canopy as needed. IIRC, those cheap pop rivets come 250 in a box. (I still have at least 150 to 200 of 'em.)
 
I like the shim idea, you may need to relocate a few holes on the forward skin.

Jim Fogarty
RV-9A Flying
 
Just to make sure I understand before making another suggestion. You wrote you were going to pull the canopy and try to fit the skin, how did that work out?

I shimmed mine using a 0.032 strip along aft edge of that skin, but you gap looks a lot wider than 0.040.
 
My gap is QUITE wide yes - a few shims is NOT going to do it. I have not had a chance to pull the canopy yet because I don't want to attempt it alone in the cramped space I have. I don't hold-out any hope for things magically shifting into place once the canopy is removed, but I'm curious to see if I can get any insights as to why things all fit reasonably well prior to gluing in the Plexiglas to the canopy frame, and now they don't. I also suspect my frame was not formed properly as the forward side edges of the canopy frame don't meet the fuselage either. Regardless, whatever gaps there were got much worse when I glued in the Plexiglas.
 
Bend it like Whatshisname

The last post triggered some recollections from my canopy build. I was having the same problem as the OP, but to a lesser extent (gap) on the sides. I found a thread here in VAF where, after clecoing and trial fitting a TU canopy, a builder removed the clecos and applied brute force to the canopy frame to bend it into a more congruent shape with the fwd skin and fuse. He used some kind of strap arrangement to apply the force. He said it helped a lot. I tried the same approach in w-a-y cruder fashion .... sat on the floor, put my foot in one spot on the canopy frame, and pulled back on the sides as much as I dared. It did seem to help. I recall it reduced the gap on the L and R fwd edge at least 1/8", which was a marked improvement.
This may be a useless approach for the OP, as I recall he has the canopy glued in and the front FG work done, but it might help some other builders out there.
 
My gap is QUITE wide yes - a few shims is NOT going to do it. I have not had a chance to pull the canopy yet because I don't want to attempt it alone in the cramped space I have. I don't hold-out any hope for things magically shifting into place once the canopy is removed, but I'm curious to see if I can get any insights as to why things all fit reasonably well prior to gluing in the Plexiglas to the canopy frame, and now they don't. I also suspect my frame was not formed properly as the forward side edges of the canopy frame don't meet the fuselage either. Regardless, whatever gaps there were got much worse when I glued in the Plexiglas.

Lets get your front skin on, then tackle the canopy. It is a B word, not Bear. I did figure then thing out, though, and if a mistake is made early it gets worse as one progresses, like a bad instrument approach.
 
It seems you are down to two potential causes. The subpanel has somehow shifted or the canopy frame has shifted. The first will probably be the easiest of the two to address, the second much more difficult.

It seems unlikely the subpanel would move unless it is not riveted in place. The next logical thought is during the process of attaching the canopy the frame was distorted and the canopy is holding it in the new position. I would not try to bend or alter the frame with the canopy attached. The stress could very well crack the canopy. Pulling the canopy and attempting to cleco the forward skin is the first step to diagnosing the cause.

Did you attach the canopy to the frame while the frame was on the aircraft, or did you attach it with the frame on a workbench?

Hope this helps.
 
Update

Well lookie here.... :eek:

I finally got someone to give me a hand removing my canopy and I was able to get the forward skin to fit without too much trouble.

Now I need to get my friend back to help me put the canopy back on and see how things line-up then... and deal with that difference in elevation between forward skin and canopy skirt.


Back
Top