

After getting the aft fuselage skins drilled and clecoed in place, I was looking for things to keep me busy so we didn?t have to look at (and deal with) some of the tougher areas forward of that point. My eyes settled on the baggage compartment ribs, which I had decided to hold off on until the skins were in place because I had figured out that they were simply too short as delivered in the kit. Well, after the skin was installed, they were still too short (by about 5/8?, not having grown any (dang stable aluminum!) while sitting in the corner. But at least I had come to be at peace about the problem, and cutting off the aft flanges to make a new set didn?t sound all that bad anymore, so I decided to tackle the job, and get these things mounted.
Of course, the first thing I did was consult the drawings, only to discover that the design has the ribs off-set from center to accommodate the big honkin? battery box. One rib is four inches from centerline, the other only three. Well, heck, I seriously doubt that I am going to put a big honkin? battery in the plane, so why create a nightmarishly unsymmetrical structure? Sure, Louise and I will be the only ones that know what lies under the baggage floor, and I doubt anyone will crawl under the belly with a ruler to see where the two rivet lines lay, but still! A quick note to Van?s confirmed that I was at liberty to center the ribs if I wished (but it was pointed out with a wink that it would still not be symmetrical, as both ribs have their flanges pointing the same direction to make the trapezoidal parts identical?so would I put the rivet lines or the webs on center?), so I measured off an even 3.5 inches to either side of center, and drilled two lines of holes. Marking centerlines on the rib flanges, I held it up from below as Louise drilled a couple of keeper clecos right through the lines, and I finished them up from there.
Next was the flange transplant. I had plenty of material from the trim bundle, and it was nothing to make a couple of flange extensions, cut off the existing flanges, and mate it all up together under the fuselage. I marked a quick rivet pattern (overkill for sure, but I hadn?t driven a rivet in weeks ? it felt good!), and before I knew it they were done.
A few pictures:
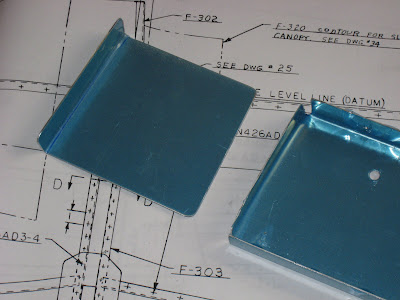
Factory rib and new flange
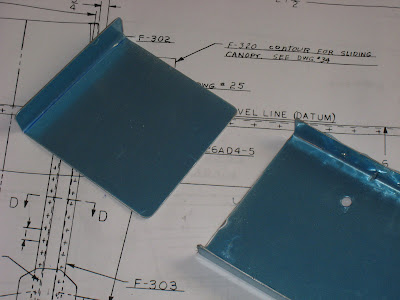
Flange cut off of "too-short" rib
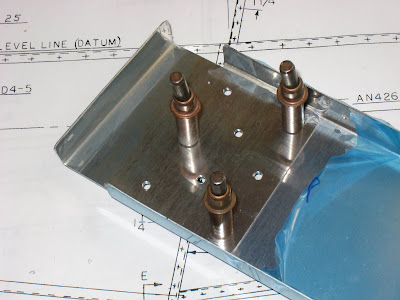
New flange clecoed in place
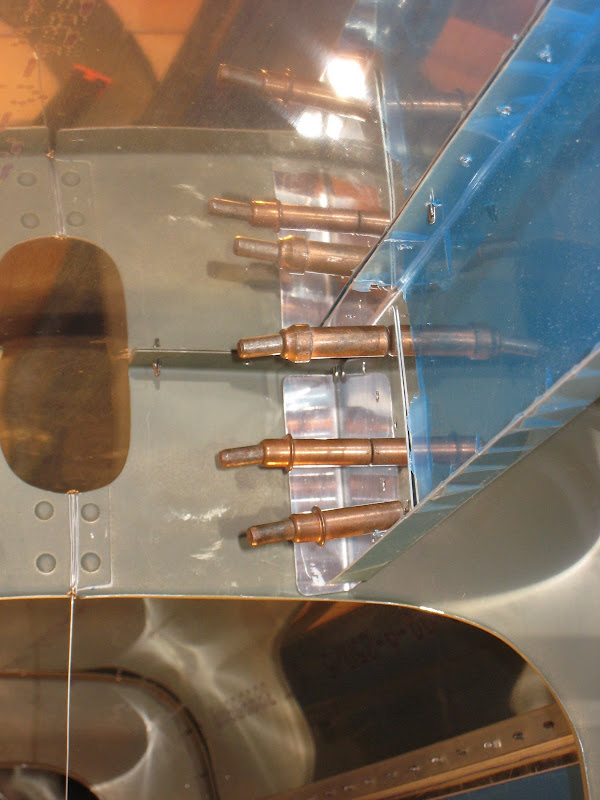
Fits like a glove!
So?.two things for future RV-3 builders come out of today?s exercise:
1) You can center the ribs if you want to make things symmetrical.
2) Expect to need to lengthen the ribs (I heard from two other guys that their ribs were too short as well).
For those not building -3's - enjoy the pre-punched, "fits like a glove right out of the box", parts!")
Paul
Of course, the first thing I did was consult the drawings, only to discover that the design has the ribs off-set from center to accommodate the big honkin? battery box. One rib is four inches from centerline, the other only three. Well, heck, I seriously doubt that I am going to put a big honkin? battery in the plane, so why create a nightmarishly unsymmetrical structure? Sure, Louise and I will be the only ones that know what lies under the baggage floor, and I doubt anyone will crawl under the belly with a ruler to see where the two rivet lines lay, but still! A quick note to Van?s confirmed that I was at liberty to center the ribs if I wished (but it was pointed out with a wink that it would still not be symmetrical, as both ribs have their flanges pointing the same direction to make the trapezoidal parts identical?so would I put the rivet lines or the webs on center?), so I measured off an even 3.5 inches to either side of center, and drilled two lines of holes. Marking centerlines on the rib flanges, I held it up from below as Louise drilled a couple of keeper clecos right through the lines, and I finished them up from there.
Next was the flange transplant. I had plenty of material from the trim bundle, and it was nothing to make a couple of flange extensions, cut off the existing flanges, and mate it all up together under the fuselage. I marked a quick rivet pattern (overkill for sure, but I hadn?t driven a rivet in weeks ? it felt good!), and before I knew it they were done.
A few pictures:
Factory rib and new flange
Flange cut off of "too-short" rib
New flange clecoed in place
Fits like a glove!
So?.two things for future RV-3 builders come out of today?s exercise:
1) You can center the ribs if you want to make things symmetrical.
2) Expect to need to lengthen the ribs (I heard from two other guys that their ribs were too short as well).
For those not building -3's - enjoy the pre-punched, "fits like a glove right out of the box", parts!
Paul


