What's new
Van's Air Force

Don't miss anything! Register now for full access to the definitive RV support community.

New New Zealand RV7 build.

swift12

Well Known Member
Hi Glenn from New Zealand. In Palmerston North. ordered a standard build RV7 kit...tail dragger. bit of a wait because as you all probably know...there is a lead time...i'm told 4 months for the tail and 7 for the wings and fuse. Im one month down from order.
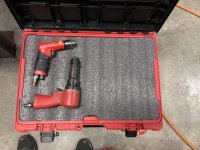
I have tooled up mostly from Cleaveland Tools. They are on the way. All the standard RV7 stuff for a kit CT has plus the pneumatic squeezer.

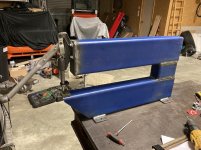
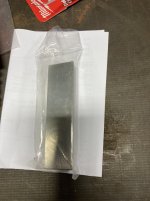
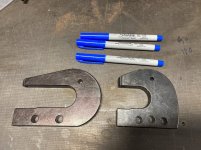
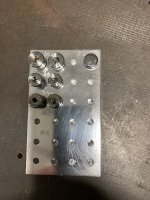
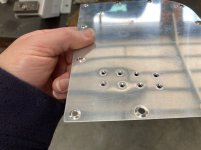
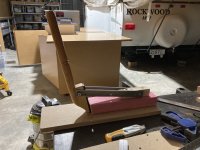
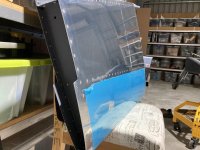
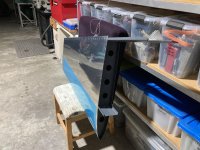
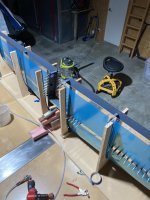
I was given an installation kit to make a drdt2 Dimpler and I have made the frame...used 3"x6" x1/4" thick for the frame. (thats 75mm x 150mm x 6mm for us kiwis) but i'm adopting the imperial lingo as much as possible!

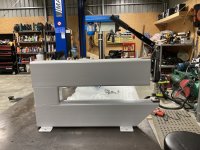
The Dimpler frame is at the powder coaters...

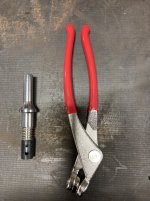
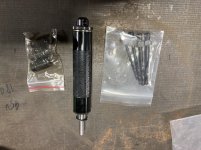
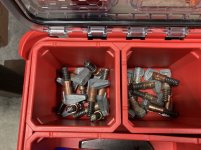
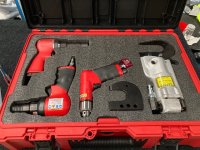
I also have some stuff from the yard store and browns tools too. new 2x Sioux rivet gun...3x used sioux and a used 1412 sioux drill. Borrowing clecos from here in nz as shipping is quite a bit on those. I have a 1.5" and 3" yoke....all the Cleaveland dimple dies, drills, reamers, hand tools, back rivet set, swivel mushroom set, micro stop needle bearing cage, single flute countersinks, etc etc. Most tools are CT. I wanted top quality gear to build with and I think I've done ok.

Vans are sending some clecos, a scotch brite wheel and some practice kits with my empennage kit.

So my build will be.
lycoming 180 hp M1B with cold air induction and EIS to give closer to 190 HP....(thanks lycoming for the 13% increase...DOH!) and a cato three blade fixed.
Ive thought long and hard about the whole CS versus fixed debate but Im not hugely into aerobatics nor making a short field machine and like the "keep it simple stupid" approach. Yes Im aware of the whole debate but I have 21000 flight hours flying boeing and airbus for the last 21 years so I can manage energy and don't need extra stuff to play with in the cockpit (oh except a nice electronic avionics package!)
 

Attachments

  • 64603649191__2BBA06B8-EF46-475A-8315-FCF8914249ED.JPG
    64603649191__2BBA06B8-EF46-475A-8315-FCF8914249ED.JPG
    192.6 KB · Views: 373
Welcome to VAF!

If you are new to Experimentals I can’t over-recommend you come to Oshkosh this month. I’ll watch my PMs, and buy you a coffee there if we can meet up!

Carl
..
 
Congratulations on your new build! You may want to study the Vans instructions, the part about FP vs CS props, in some detail before you finalize that decision. Lots of good advice in there. When I was making this decision, the metal FP prop had a barred speed range, and I wasn't keen on the maintenance issues of wood FP props. Even though Vans earlier (ie RV-4) demo planes had, I believe wood FP props, all of the recent ones (-7,-8,-9,-10,-14) have CS props. I made my decision for a CS prop due to the wide speed range, better climb performance, and better fuel economy in cruise.
 
Welcome to VAF!

If you are new to Experimentals I can’t over-recommend you come to Oshkosh this month. I’ll watch my PMs, and buy you a coffee there if we can meet up!

Carl
..

Cheers Carl. Unfortunately work is busy but I will do Oshkosh one of my build years for sure. Nice place Houston...I spent quite a bit of time there flying the 777 into Houston. I got caught up in hurricane Harvey....we got stuck in the hotel and ended up being a 10 day trip in the end. We helped the skeleton staff they had to run the hotel! Was a bit of fun.
 
Last edited:
Congratulations on your new build! You may want to study the Vans instructions, the part about FP vs CS props, in some detail before you finalize that decision. Lots of good advice in there. When I was making this decision, the metal FP prop had a barred speed range, and I wasn't keen on the maintenance issues of wood FP props. Even though Vans earlier (ie RV-4) demo planes had, I believe wood FP props, all of the recent ones (-7,-8,-9,-10,-14) have CS props. I made my decision for a CS prop due to the wide speed range, better climb performance, and better fuel economy in cruise.

Cheers for the info. Yeah I kinda have. The cost and maintenance plus the Governor of the CSU prop turns me off....the Cato is a composite prop. With nickel leading edges it has very little maintenance. Not a lot of weight difference as the Cato needs extra weight for weight and balance. Noise and fuel economy ....yep...but I’ll lose a few knots and throttle back....just enjoy the fly...it’s not all about speed and numbers to me....do enough of that flying the bus.
Climb performance is just a number...at 190 horse I gather it will achieve a good rate of climb.....the Cato more or less 15k less to set up....will buy a lot of fuel. So cheers for the comments but I’ll stick with the FP....the engine has the hollow crank so maybe one day if I felt like modding it.

Btw....Vancouver....one of my Fav destinations. I have family in Chilliwack. Spent 6 months there when I was 18 helping my Uncle with clear cut spraying. He flew a piper brave. That was many breakfasts ago.
 
Last edited:
Congratulations

As a 46 year ag pilot, I concur…simplicity.

Our 6A had a 180 hp Lyc, which we overhauled and used a three-bladed Catto…a fast, trouble free bird for 7 years and as many hours…a great combination.

Regards,
 
Hi Glenn,

With the M1B and a Catto propeller you may want to look at using the slightly longer O-320 engine mount instead of the O-360 to avoid having to use the ballast weight. The RV-7 has a tendency to be tail heavy with your combination (the M1B is about 30lb lighter than the O-360 angle valve engine the mount was intended for), limiting your baggage weight. There are a few threads on the forum covering this. These aircraft fly so much better when they are light, so avoiding dead weight is well worthwhile.

Tom
RV-7
 
Last edited:
As a 46 year ag pilot, I concur…simplicity.

Our 6A had a 180 hp Lyc, which we overhauled and used a three-bladed Catto…a fast, trouble free bird for 7 years and as many hours…a great combination.

Regards,

Cheers....thanks Pierre. I guess it’s horses for courses....the csu is a wonderful bit of kit but like yourself I want to keep it plain and simple and just enjoy the fly....thanks for the back up. Cheers Glenn.
 
Hi Glenn,

With the M1B and a Catto propeller you may want to look at using the slightly longer O-320 engine mount instead of the O-360 to avoid having to use the ballast weight. The RV-7 has a tendency to be tail heavy with your combination (the M1B is about 30lb lighter than the O-360 parallel valve engine the mount was intended for), limiting your baggage weight. There are a few threads on the forum covering this. These aircraft fly so much better when they are light, so avoiding dead weight is well worthwhile.

Tom
RV-7

Hi Tom thanks. I’m guessing you mean the M1B being lighter because it’s a parallel valve rather than the angle valve. Is there a requirement to change the cowl if I use the 1O-320 engine mount in this situation? I’d avoid ballast if I could....cheers Glenn.
 
Kia ora mate from Arizona, and best wishes on your RV-7 build. You're going to love the airplane!
 
Kia ora mate from Arizona, and best wishes on your RV-7 build. You're going to love the airplane!

Cheers Gash...I have had a wish to build an aeroplane for as long as I can remember and it was always going to be an RV6 until the 7 came along.....

Very exiting day today as my first shipment of cleaveland tools turned up today and boy are they nice. I pick up the DRDT frame tomorrow from the powder coaters. Today I got a 3" pneumatic squeezer yoke, a tungsten bucking bar, 3/32 and 1/8 dimple dies, a #1 flat squeezer set, three Blue sharpies, a #30 chucking reamer, back rivet set, swivel mushroom set, pop rivet style dimple die set...next shipment in a week..I love great tools.
 
Yes Glenn, you are right. I meant angle valve. Was writing late at night and the brain was not functioning as it should. The 320 mount is a little longer. With my IO-360 cowl, there were still a few inches of cowl spare that I had to trim, so this may be long enough, but I suspect the 320 cowl is longer, but I would check on widths etc.
It would just kill me to save all that weight with a light propeller just to add it back as dead weight just so that you can fill the baggage compartment. I run the Hartzel BA which is beastly heavy (56 lbs if I remember correctly), and my CG is 79.35” empty (weight is 1113lbs) and I’m still nudging the aft limit with 100lbs bags and minimum fuel, so trimming such a huge amount of weight that far forward is definitely going to impact your zero fuel baggage without a wad of ballast or a longer mount.

Tom.

cheers...no worries...I understand the issues. I have yet to finally decide on the setup and i have not yet bought the finishing kit because of it. Ill just do the tail wings and fuse...then see where i am! :D:eek:
 
today I put my DRDT2 together. Home made frame and donated installation kit...Thanks HUGH!

Cleaveland tools dimple dies. its heavier than the plans but still flexes....:eek::cool:

I also bought this gear which is really nice...I may get the trolley pack too. the squeezer and rivet guns should fit in the foam and all the little tools in the top part. The drills will go in a plastic block Im making and the dimple dies in another plastic block....if these tools find their way into my large tool chest they will get lost and beaten up so they are going to have a home every day after building.:cool:
 

Attachments

  • 64733191859__14B65F7B-F2D6-464A-B2AF-BF48460D6D4B.JPG
    64733191859__14B65F7B-F2D6-464A-B2AF-BF48460D6D4B.JPG
    178.6 KB · Views: 286
  • 64733193605__EC3845A5-9E39-4277-9F30-0C4791974430.JPG
    64733193605__EC3845A5-9E39-4277-9F30-0C4791974430.JPG
    212.1 KB · Views: 272
  • 64733196464__BC0DA3AF-FCE6-47AE-B522-44483A2C6CF0.JPG
    64733196464__BC0DA3AF-FCE6-47AE-B522-44483A2C6CF0.JPG
    191.6 KB · Views: 297
  • 64733230253__1F76C411-5041-478E-A1C8-AD11639F9E87 2.JPG
    64733230253__1F76C411-5041-478E-A1C8-AD11639F9E87 2.JPG
    200.1 KB · Views: 287
... an installation kit to make a drdt2 Dimpler and I have made the frame...
I see these “kits” online for $209. But isn’t it just a push/pull toggle clamp?
Does anyone know how much dimpling force the DRDT2 is rated to provide?
-c
 
I see these “kits” online for $209. But isn’t it just a push/pull toggle clamp?
Does anyone know how much dimpling force the DRDT2 is rated to provide?
-c

Hi the installation kit is the bit on the front of my c frame that does the dimpling.....the second answer is unknown for me but judging by the lever I’d say plenty. My frame is 6mm thick (1/4”) not 3/16” and even then it flexes when I clamp it down. I’m amazed it does as it’s so heavy....:rolleyes:
 
. The drills will go in a plastic block Im making and the dimple dies in another plastic block....if these tools find their way into my large tool chest they will get lost and beaten up so they are going to have a home every day after building.:cool:

Here's a couple of new tricks I taught myself for convenient storage of these things. I bought a "bitster" tool holder from Aircraft Spruce, so now I have a "go-to" for all the drills / reamers / bits while building. I keep my dimple & squeezer dies in a small plastic covered box, which now has self-adhesive magnet strips on the bottom, and this now lives on the top of my DRDT-2 frame. It's still easy enough to just grab and take elsewhere in my shed if needed.
 
Hi the installation kit is the bit on the front of my c frame that does the dimpling.....the second answer is unknown for me but judging by the lever I’d say plenty. My frame is 6mm thick (1/4”) not 3/16” and even then it flexes when I clamp it down. I’m amazed it does as it’s so heavy....:rolleyes:

Thanks.
I see that air squeezers lost their force at 3000psi. Since those also can be used to dimple I’ll assume DRDT2 is <3000psi. I’m just wondering if I can build it with an off the shelf cam toggle clamp if I find one capable of applying 3000psi.
 
Here's a couple of new tricks I taught myself for convenient storage of these things. I bought a "bitster" tool holder from Aircraft Spruce, so now I have a "go-to" for all the drills / reamers / bits while building. I keep my dimple & squeezer dies in a small plastic covered box, which now has self-adhesive magnet strips on the bottom, and this now lives on the top of my DRDT-2 frame. It's still easy enough to just grab and take elsewhere in my shed if needed.

Cheers. Yes I like the idea of every tool in its place. I like to have all my drills in their own place so I’ll drill out a plastic block for that. I’ll do the same for the dimple dies. But the magnetic base is a good idea. I could incorporate that into those blocks to sit on the drdt cheers.
 
Thanks.
I see that air squeezers lost their force at 3000psi. Since those also can be used to dimple I’ll assume DRDT2 is <3000psi. I’m just wondering if I can build it with an off the shelf cam toggle clamp if I find one capable of applying 3000psi.

I wouldn’t know. I’m guessing the installation kit is a small cost to building the aircraft. If I didn’t get given one I would have bought one. Only reason I was given it is the builder that gave it to me admitted he built his frame too light and had a hammer type c frame so got used to using that. Also your drdt won’t lose much value after the build so is sellable but your cam clamp one won’t probably recover it’s cost.
Anyone that says their drdt dimples does not flex in the arms is not looking hard enough. They flex for sure. Mine is 150x75 and 1/4” thick not 3/16” thick and it still flexes the arms. But I see this is not an issue....if they are not flexing it sounds like you are not putting enough pressure on the dies.
Good luck with it. Cheers
 
I bought this Milwaukee Stuff to keep my aircraft tools in.

top one will be for rivets...second one the two rivet guns, the drill and the squeezer and yokes. The bottom one for heaps of clecos and my drill and reamer sets. plus I can wheel it around. they clip together...seems to be really good plastic and construction.

so this is my tungsten bar, swivel mushroom set, dimple dies, 3" yoke, back rivet set, Flat squeezer set, #30 reamer and three blue sharpies from Cleaveland tools. The 1.5" yoke, spare 3/32 dimple dies (so I can grind them if i need more room) surplus sioux 3600 rpm palm drill and 3x rivet gun, bunch of used cleco clamps, rivet removal tool and cleco pliers are from the yard store. Have to say the dimple dies from the yard store are made in taiwan and to be fair look awesome....

Next shipment from Cleaveland on the way. reamers, drills, flat squeezer sets, single flute countersinks, air hose, imperial step drill, countersink microstop with the bearings and nylon foot...plus other stuff i have forgotten...then lastly the squeezer in a couple of weeks...oh and the new sioux 2x rivet gun on its way from Los Angeles with a colleague soon.
 

Attachments

  • 64756794329__0AB49D8C-CF37-442F-8641-0EA560B52977.JPG
    64756794329__0AB49D8C-CF37-442F-8641-0EA560B52977.JPG
    199.7 KB · Views: 291
  • IMG_1333.JPG
    IMG_1333.JPG
    199.1 KB · Views: 264
  • IMG_1334.JPG
    IMG_1334.JPG
    131.8 KB · Views: 274
  • IMG_1335.JPG
    IMG_1335.JPG
    199.2 KB · Views: 279
  • IMG_1336.JPG
    IMG_1336.JPG
    186.9 KB · Views: 245
  • IMG_1337.JPG
    IMG_1337.JPG
    202.3 KB · Views: 227
  • IMG_1338.JPG
    IMG_1338.JPG
    169 KB · Views: 256
  • IMG_1339.JPG
    IMG_1339.JPG
    177.3 KB · Views: 286
  • IMG_1340.JPG
    IMG_1340.JPG
    170.4 KB · Views: 257
  • IMG_1341.JPG
    IMG_1341.JPG
    160.7 KB · Views: 250
Last edited:
Hi Glenn
Looks like you are having fun getting set up.
I've also got some newer dimple dies from Yardstore, plus some older ones from Avery Tools, which I think Cleaveland may now carry. The Avery dies give a slightly better, sharper dimple than the Yardstore dies, see the attached picture of a recent test. It's subtle, but noticeable when there is a whole skin full of dimples.
Something else for you to consider getting, if you don't already have, is a mechanics service trolley on wheels. About $100 for this little cart with 3 shelves and a handle so you can wheel it around to where you are working with your drill bits, markers, clecos etc.
Cheers
Paul.
 

Attachments

  • 20210710_154227.jpg
    20210710_154227.jpg
    352 KB · Views: 328
Hi Glenn
Looks like you are having fun getting set up.
I've also got some newer dimple dies from Yardstore, plus some older ones from Avery Tools, which I think Cleaveland may now carry. The Avery dies give a slightly better, sharper dimple than the Yardstore dies, see the attached picture of a recent test. It's subtle, but noticeable when there is a whole skin full of dimples.
Something else for you to consider getting, if you don't already have, is a mechanics service trolley on wheels. About $100 for this little cart with 3 shelves and a handle so you can wheel it around to where you are working with your drill bits, markers, clecos etc.
Cheers
Paul.

cheers Paul....yes ill test them too...I was advised by a friend here to get a backup set of dimple dies so they could be ground to "fit" in some areas...I wasn't going to do that with the $45 USD cleaveland ones...The $15 ones from yard store ones will be the ones to do that on if needed. and yup...I love tools..the milwaukee thing has a handle and wheels so i can trolley it around as needed. Its really nice gear. My friend is sending me some alclad to start mucking around with....soon the cobalt drills and reamers will be here as well as the countersinking gear so i can start practicing even before my practice kits arrive in the empennage kit. Im heading down to his place after he has his RV8 wings finished to "steal" his clecos...lucky me...those suckers cost bugger all to buy and a small mint to ship!:mad:
 
Hello

Hi Glenn,

I’ve just about completed my 7 wings and live in the Wairapara. There’s also an 8 being built down the road. I’d be more than happy to catch-up if you wanted too. I have folks in Feilding so occasionally pass through Palmy.

Cheers
Tony
 
Hi Glenn,

I’ve just about completed my 7 wings and live in the Wairapara. There’s also an 8 being built down the road. I’d be more than happy to catch-up if you wanted too. I have folks in Feilding so occasionally pass through Palmy.

Cheers
Tony

Absolutely Tony....very keen to meet fellow RV builders. You know Hugh? RV 8 in Nelson?....
 
nice to meet you Tony and your "7". getting excited to see my empennage but not holding my breath as its a few months still. now i know of two local "8's" and a "7". that will be invaluable. I have some serious catching up to do...flying the airbus domestically does not give me near as much time off as international!!! so im keen to go back to inter soon as I can but it will be a few years....:mad:. I have a job so thats good....:)

got zero done today on setting up my tools or mowing the lawns...instead I had a brainwave to ride 112 km (70 miles) hitting rain and 4 degrees c (39 f) to see a fellow 7 builder....hows that for dedication....(or stupidity!) but it was very much worth it!:D
 
I wouldn’t know. I’m guessing the installation kit is a small cost to building the aircraft. If I didn’t get given one I would have bought one. Only reason I was given it is the builder that gave it to me admitted he built his frame too light and had a hammer type c frame so got used to using that. Also your drdt won’t lose much value after the build so is sellable but your cam clamp one won’t probably recover it’s cost.
Anyone that says their drdt dimples does not flex in the arms is not looking hard enough. They flex for sure. Mine is 150x75 and 1/4” thick not 3/16” thick and it still flexes the arms. But I see this is not an issue....if they are not flexing it sounds like you are not putting enough pressure on the dies.
Good luck with it. Cheers


According to one of the Cleaveland videos on Youtube the DRDT2 makes about 3000lbs at the business end. That's about the same as a pneumatic squeezer.
According to the same video the presenter explained that the DRDT2 flexes under pressure which makes it unsuitable for setting rivets. For dimpling he recommends adjusting for 1/8 deflection of the frame (see 4:20 in https://youtu.be/_mpbsQF1eu0).
So even though you built it beefier, the flex is expected.

-c

Definitely expected. Just some of the comments on it some are saying “no flex at all” I’m just making the point that it’s not true. For others looking for information on it. Soon I’ll try dimpling with it let ya all know
 
Welcome

Gidday Glenn, welcome to the Kiwi and wider RV community. There's also a bunch of us at North Shore Airport, so please don't hesitate to get in touch next time you're up this way, or need any assistance.

Of course we also have a FB page - RV Flyers NZ
 
Gidday Glenn, welcome to the Kiwi and wider RV community. There's also a bunch of us at North Shore Airport, so please don't hesitate to get in touch next time you're up this way, or need any assistance.

Of course we also have a FB page - RV Flyers NZ

Excellent...Thanks Steve. Much Appreciated.;)
 
made a dimple die holder today. played with the drdt2 I made. Mucking about with the cleaveland tools dimple dies I got a great result...plenty of pressure...slight shadow more on one side so a little shimming to do. also not proper alclad just some rubbish 28 thou Ali I had laying around so ill wait till i get the right stuff before shimming it and get it perfect...nice flat dimples though and nicely formed on the back side.
 

Attachments

  • 64828163443__5C6782C0-990A-43F7-8A4F-927DEAFCD81F.JPG
    64828163443__5C6782C0-990A-43F7-8A4F-927DEAFCD81F.JPG
    176.4 KB · Views: 340
  • 64828277248__3F54A618-EE01-498A-8D80-3B784A4844D9.JPG
    64828277248__3F54A618-EE01-498A-8D80-3B784A4844D9.JPG
    124.4 KB · Views: 363
  • 64828341252__DF2DF54D-83F5-4C79-AD39-FB957033BC49 2.JPG
    64828341252__DF2DF54D-83F5-4C79-AD39-FB957033BC49 2.JPG
    193.7 KB · Views: 459
Last edited:
These Bad boys waiting for work. A test of two different dimple die sets. 4 are done with CT dies and 4 are not. Care to guess which ones?
 

Attachments

  • EECF13B9-8E65-4DB5-839A-D1BA1A8EB8AE.jpeg
    EECF13B9-8E65-4DB5-839A-D1BA1A8EB8AE.jpeg
    131.6 KB · Views: 366
  • 25D3C811-A212-4711-AC7F-3B42A0D424ED.jpeg
    25D3C811-A212-4711-AC7F-3B42A0D424ED.jpeg
    72.7 KB · Views: 394
Empennage for 75016 is in crating….shipping paid for…..hopefully before Xmas. Wings and fuse around March /April next year. :):)
 
well box 1 of the empennage is here.

Box one arrive and no damage...cannot inventory as I am guess that is in the other box which was split up from this one somewhere. hopefully tomorrow. Also tomorrow another box from Vans with the practice kit and a few items...including clecos, scotch brite etc.

Also been working on getting my compressed air dry...done a small condensation type arrangement with stuff from home.

may help to condensate some moisture out and be able to drain it...I have the filter and a new desiccant water trap to fit. The desiccant will be just prior to the hose for the spray gun. I was going to rattle can it....but have now decided to make a booth...get better gear and do it with non toxic stewart systems ekopoxy. Maybe the next best thing to alodine and zinc chromate...at least i wont have that super nasty stuff around. The gun has a 1.6mm tip as stewarts recommend 1.4 to 1.8. I have a large three phase compressor so air is no issue.

Also cobbled together a rib straightener from bits I found at home....seems to work well on a scrap test rib I was given.

One question i have is the size of the holes....pre punch is number 42. my yard store dimple dies fit into those holes. my cleaveland ones do not...the cleaveland ones measure .094. why do we use a #40 making the hole .098 before dimpling?....#42 is .0935 and 3/32 is .0938 and 41 size is .096.
dimpling with the #40 yields a larger hole than anything else (.103)meaning the 3/32 rivets move about in them. dimpling after a #41 (both using the cleaveland dies) yields a .099 dimple hole...obviously lots of aircraft built like this without issue im just wondering why dimple dies are not closer to a finished rivet size?
 

Attachments

  • IMG_2921 2.jpg
    IMG_2921 2.jpg
    480.2 KB · Views: 282
  • IMG_2923.JPG
    IMG_2923.JPG
    196.1 KB · Views: 291
  • IMG_2925.JPG
    IMG_2925.JPG
    201.4 KB · Views: 378
  • IMG_2940.JPG
    IMG_2940.JPG
    201.8 KB · Views: 320
Underway.

After setting up my machines and paint booth I got the practice flap done. Learnt a lot…got a bent trailing edge…rest of it seemed ok. Got to building the VS.

The paint booth still needs a door….I have some stick on zippers coming today. The booth is cobbled up out of stuff mostly from home. I’m surprised that the fan blows air through the booth and pressurises it well!….good air coming out the far filter. I’m using Stewart systems eko poxy.

I have a bandsaw, sander and I made the linisher. I geared it down turning the 3m wheels at 1600 rpm. One medium and one fine. Lots of working room around the wheels….the vacuum system helps a lot…

The VS appears to be coming out ok so far….I’ll see what happens when I get near it with the rivet gun. It’s match drilled ready for dimpling.
 

Attachments

  • 94E185C2-B490-4CF0-A48C-C1ED8B0AA511.jpeg
    94E185C2-B490-4CF0-A48C-C1ED8B0AA511.jpeg
    245.1 KB · Views: 280
  • 43762E2C-B0BF-4F47-970B-A31974F4B6F3.jpeg
    43762E2C-B0BF-4F47-970B-A31974F4B6F3.jpeg
    251.5 KB · Views: 282
  • 388FC072-CBF3-45C0-8EE9-A1F094F161F1.jpg
    388FC072-CBF3-45C0-8EE9-A1F094F161F1.jpg
    447.3 KB · Views: 263
  • 0B38BFD1-D07A-4BB5-94D9-B626EEC3DF56.jpeg
    0B38BFD1-D07A-4BB5-94D9-B626EEC3DF56.jpeg
    382.6 KB · Views: 323
  • 743D08D5-906F-4E4E-8D8E-076602FA4AE9.jpeg
    743D08D5-906F-4E4E-8D8E-076602FA4AE9.jpeg
    246.6 KB · Views: 339
put a deposit on an IO-360 M1B with two P mags. **** price rises...wrong time for the engine but another 15% is huge. 13% 6 months ago....how long will they sit inhibited and still be ok? wont see it until next year...longer the better.

Had to also dep on the finishing kit although vans is not enforcing it currently due long lead times. still i did it to stave on any more price rises on that too.

I ordered the tail wings and fuse last june and since then its gone up by $4000 so glad i did that.

here is the vertical stab. happy with the way it came out. into the rudder and horizontal stab now.
 

Attachments

  • IMG_3719.jpg
    IMG_3719.jpg
    326.2 KB · Views: 322
  • IMG_3716.jpg
    IMG_3716.jpg
    380.5 KB · Views: 308
  • 66713143247__1143EFAB-77A5-45D7-8B31-91170687CC3B.jpg
    66713143247__1143EFAB-77A5-45D7-8B31-91170687CC3B.jpg
    388.6 KB · Views: 265
Hey Glenn,
Looking good, you are really getting into it, the shop looks nicely set up so that will help.
When the engine arrives you can preserve it longer term by over-filling with motor oil so that everything inside is bathed in oil and no contact with air. Or, make a dehydrator that pumps through dried air. Prices are only going to go up further I expect!
Cheers,
Paul.
 
thanks Paul. I guess im reasonably well covered on the cost rise front. exchange rates still are a factor as they will come a calling for the balance at some stage next year. cannot ask for the motor past 31 dec 2022 however i dont see that as a problem because like vans lycoming are inundated with engine orders out their ears...i dont think ill have to pay till mid next year. The finishing kit ill use in its entirety except the spinner which I removed as I'm going to go fixed pitch Catto.

Not reinventing the wheel just be nice to have everything bolt up and fit. not interested in fancy exhausts or CSU's....just an efficient quick fit up. I have been down the road of putting every mod i could on my race car and all it did was create more problems, time spent and cost.

my formula is a bone stock rv7 with a nice bit of paint, a stock M1B with fixed pitch, G3X avionics package and the sliding canopy. only thing that is a want is a ballistic recovery chute....im not scared of the RV or flying...got 20000 hours in aeroplanes....just a personal want.
 
well Im going to make that dehydrator for the engine...plus I have knocked up a "dry room" to store my parts in both finished and unfinished as well as the engine when it gets here. The fuse when being built will have to sit in the main shed but everything else can be stored in the dry rooms. Fully insulated and carpeted parts get cold here in the winter but stay dry. out in the main shed condensation can be an issue. The new room will have a walk through into the games room to push the wings into on wheeled stands.
 
Got the hs done while on leave

Man it’s been busy at work but this two weeks off has got my elevator skins primed and the stiffeners fitted and my hs skins primed and riveted together.
Happy with the outcome although I managed a few snafu’s along the way I was able to recover from them.
 

Attachments

  • EC35E581-E364-4E16-8A4F-0FF2302F88C5.jpg
    EC35E581-E364-4E16-8A4F-0FF2302F88C5.jpg
    347.4 KB · Views: 154
  • 78D45248-3AF7-4362-AEF3-4F0E216E685F.jpeg
    78D45248-3AF7-4362-AEF3-4F0E216E685F.jpeg
    512.3 KB · Views: 137
  • 5FF9A335-07FB-4B9C-B66F-572CCC0C18BD.jpeg
    5FF9A335-07FB-4B9C-B66F-572CCC0C18BD.jpeg
    554.4 KB · Views: 144
It's about time you stopped mucking around with your workshop and actually made some RV progress.. ;)
 
Back
Top