What's new
Van's Air Force

Don't miss anything! Register now for full access to the definitive RV support community.

RV-7A JCarne

jcarne

Well Known Member
Patron
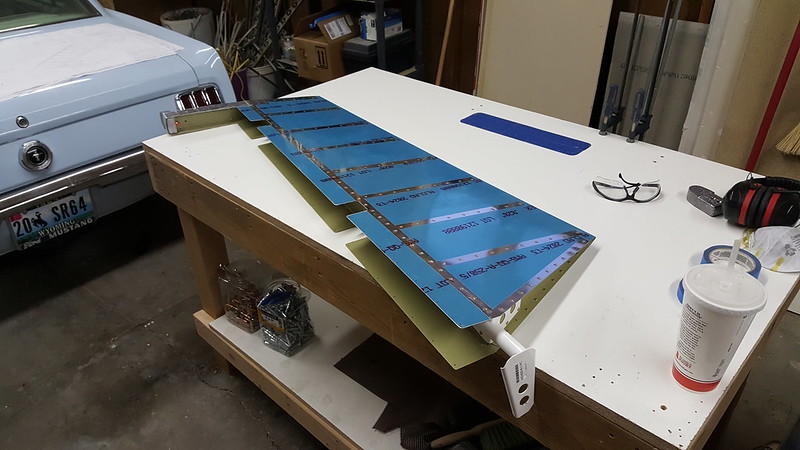
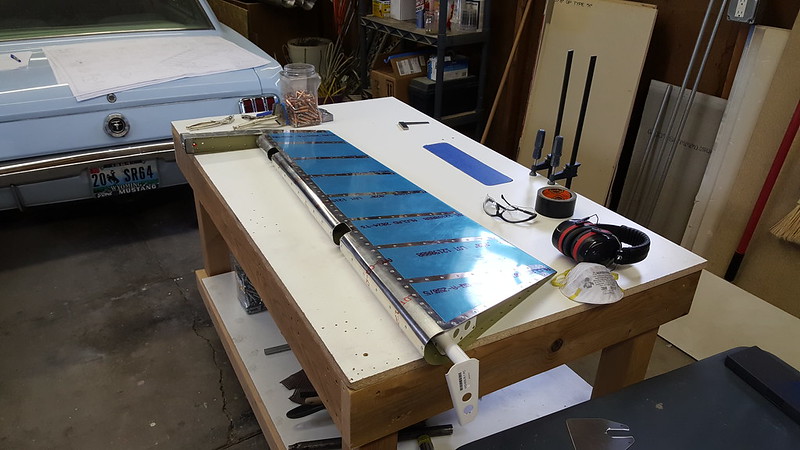
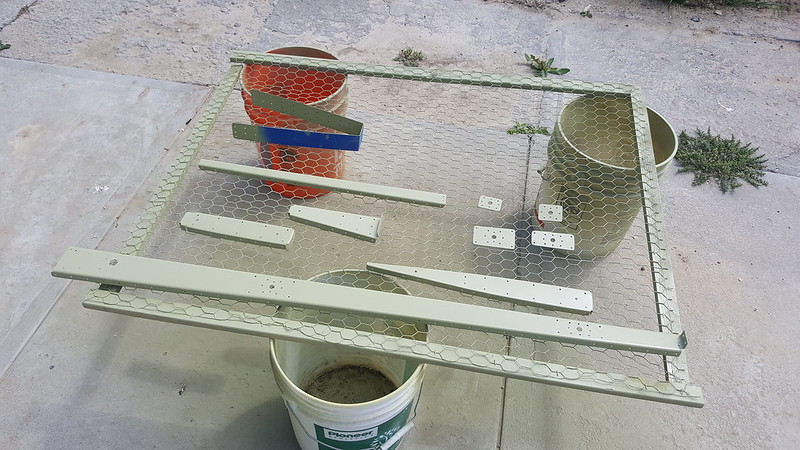
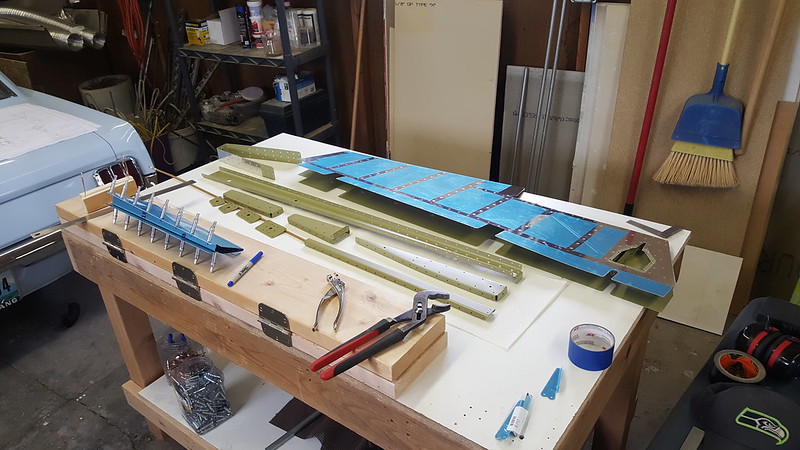
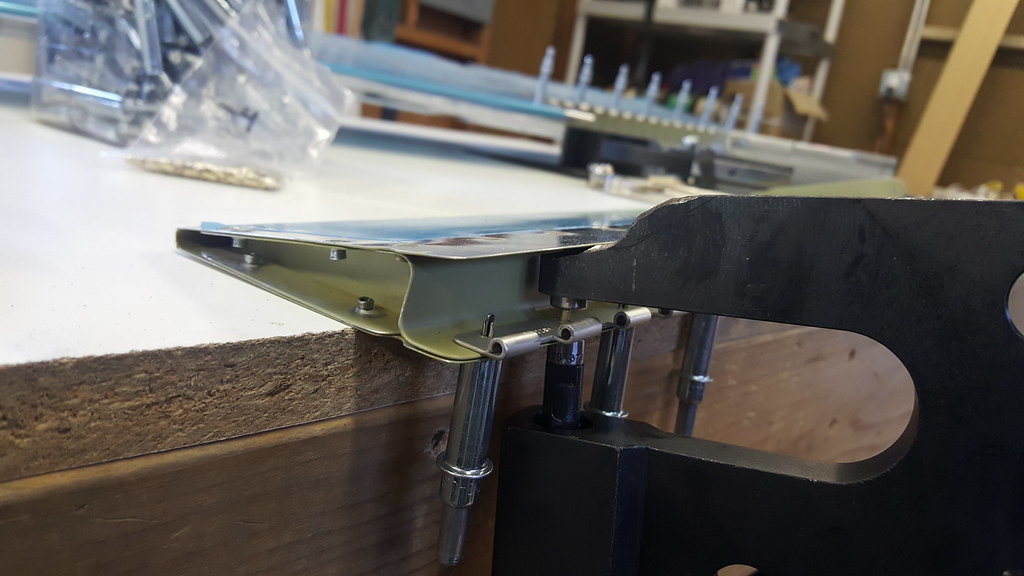
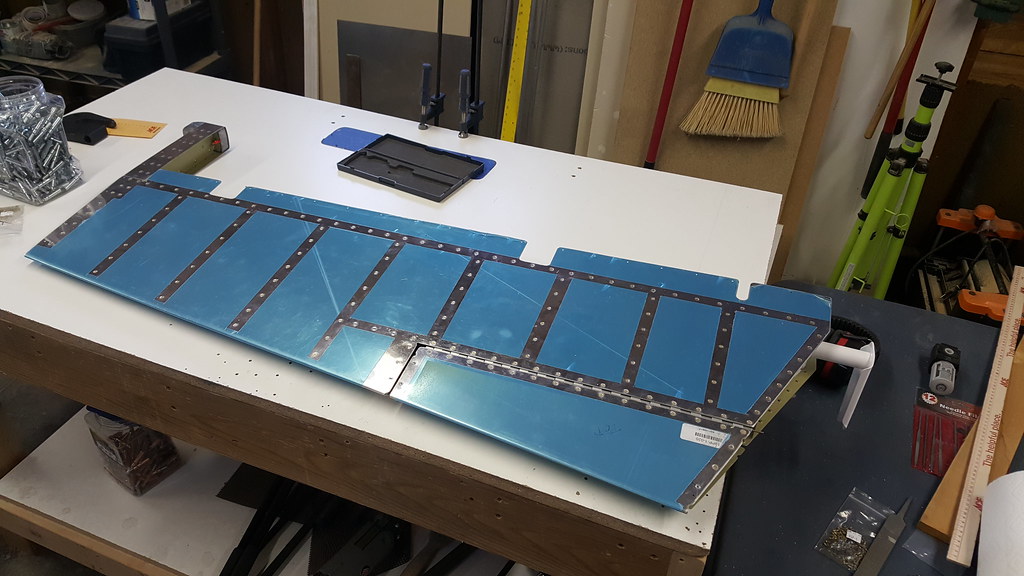
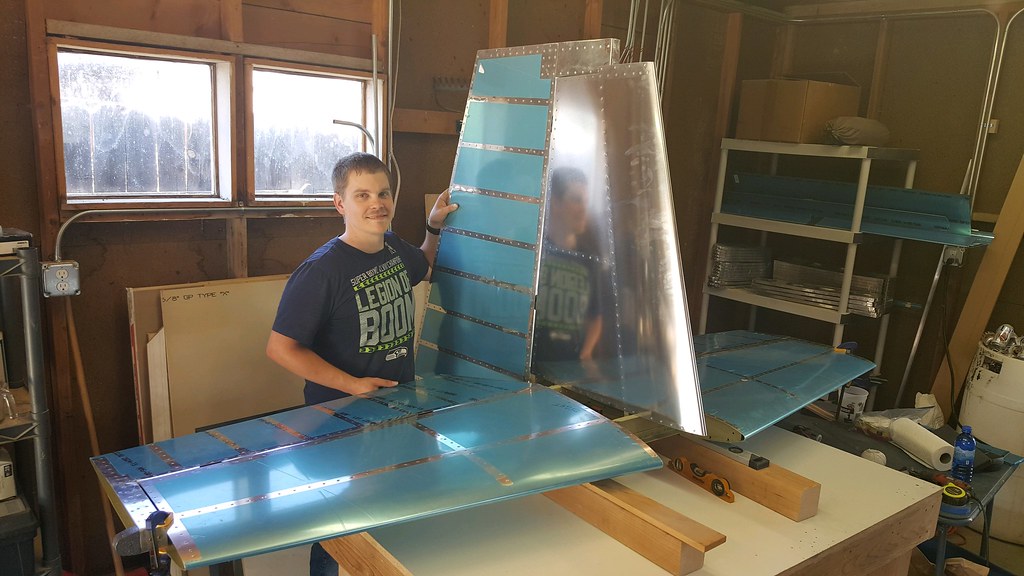
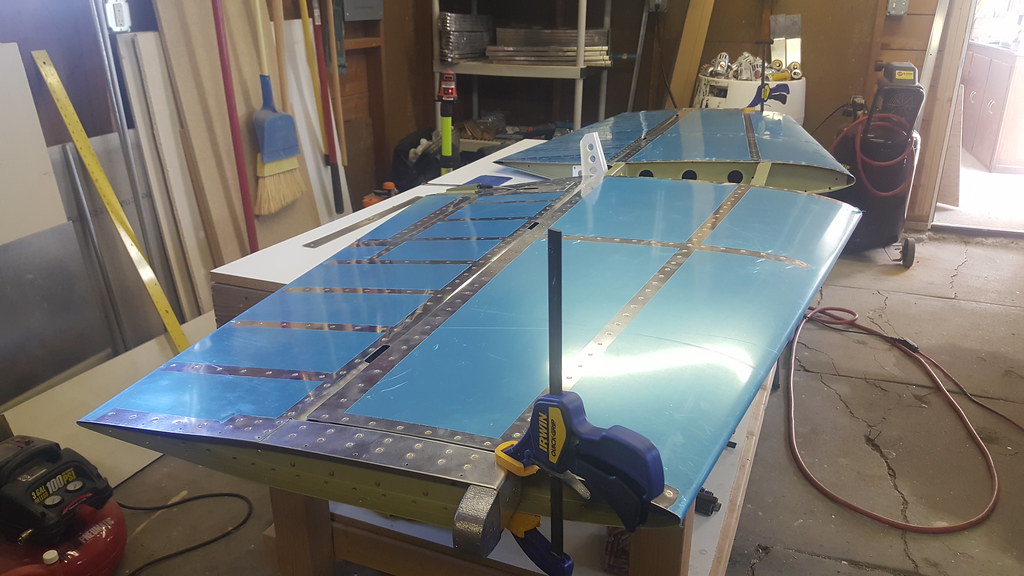
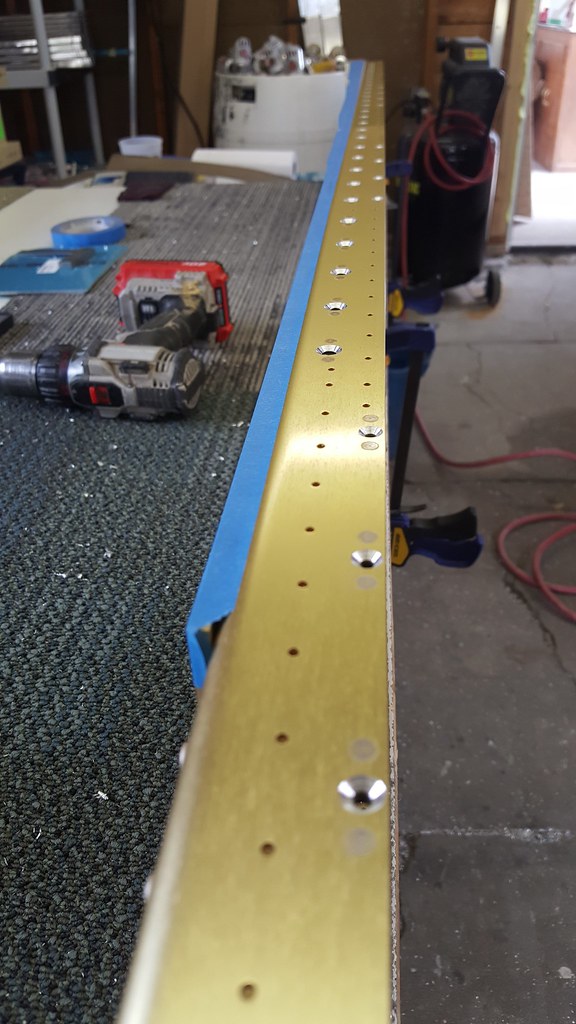
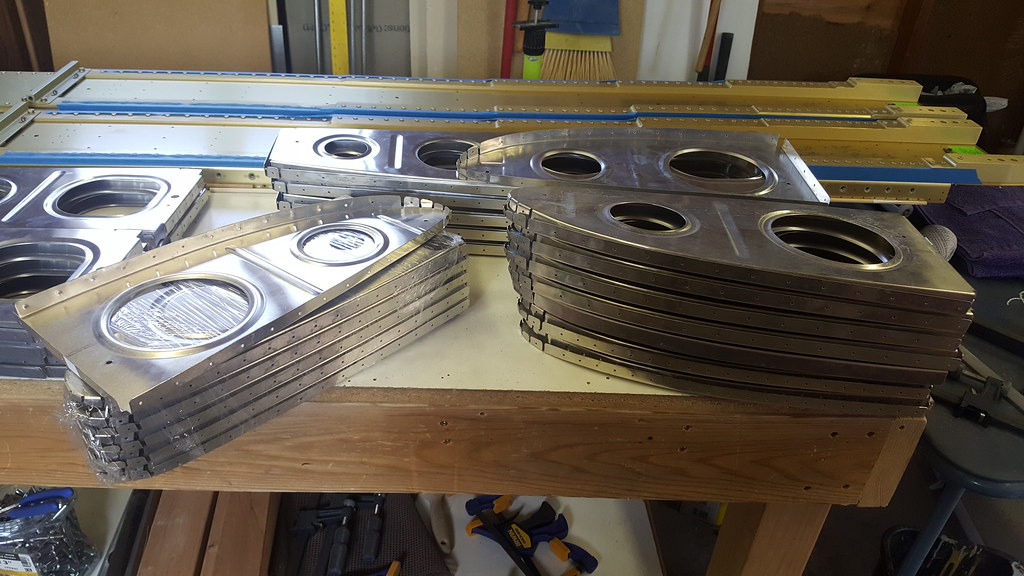
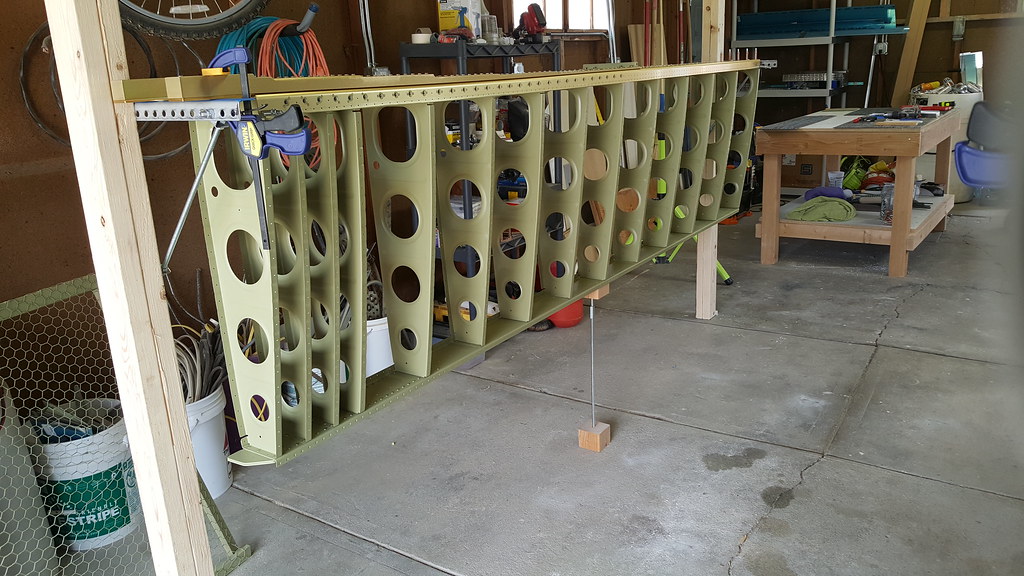
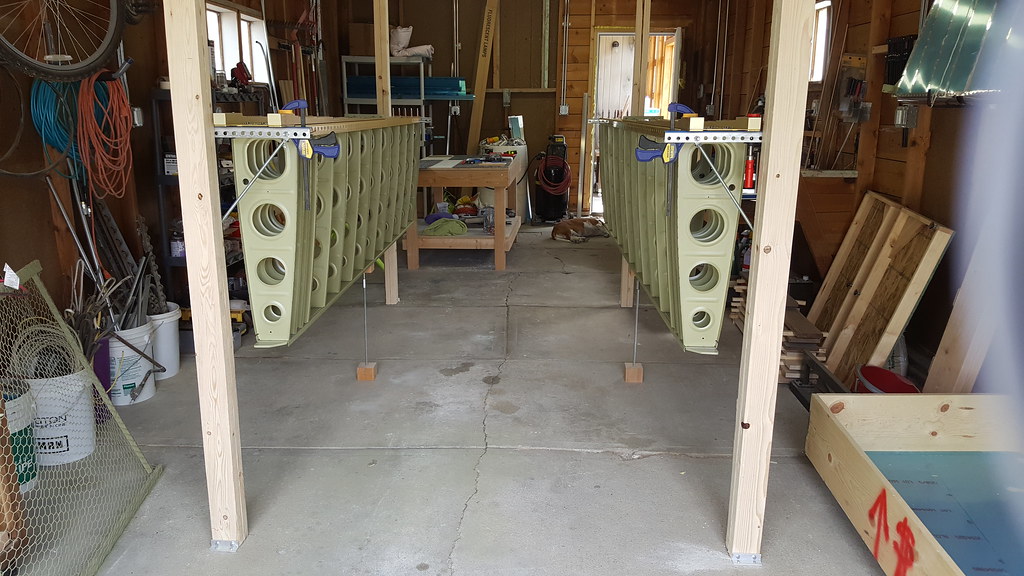
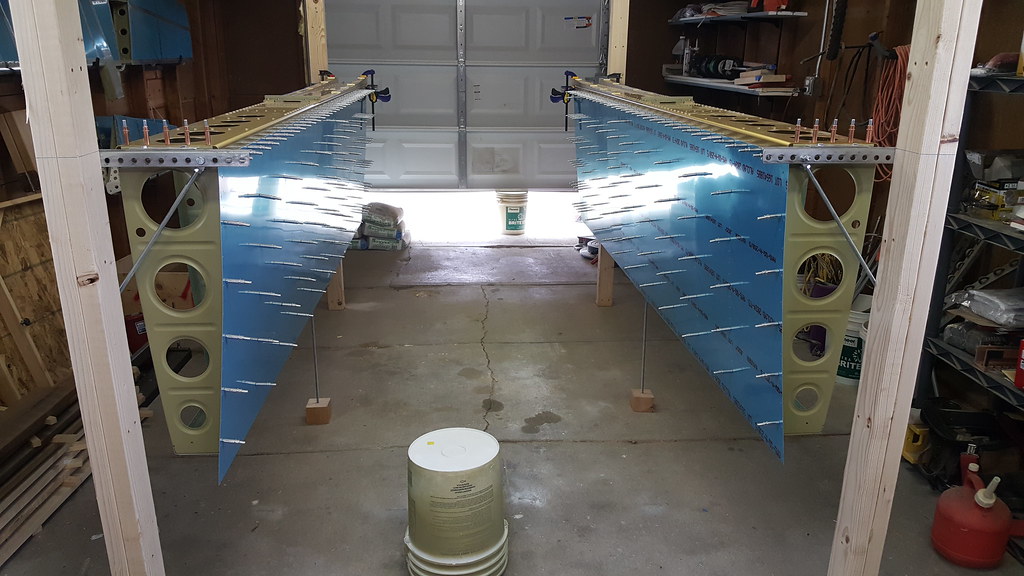
Well I just noticed this section here so I figured I would start a log so people could follow my build. The picture here puts a face to the name. Also I am done with everything on the tail except for the elevators.:D

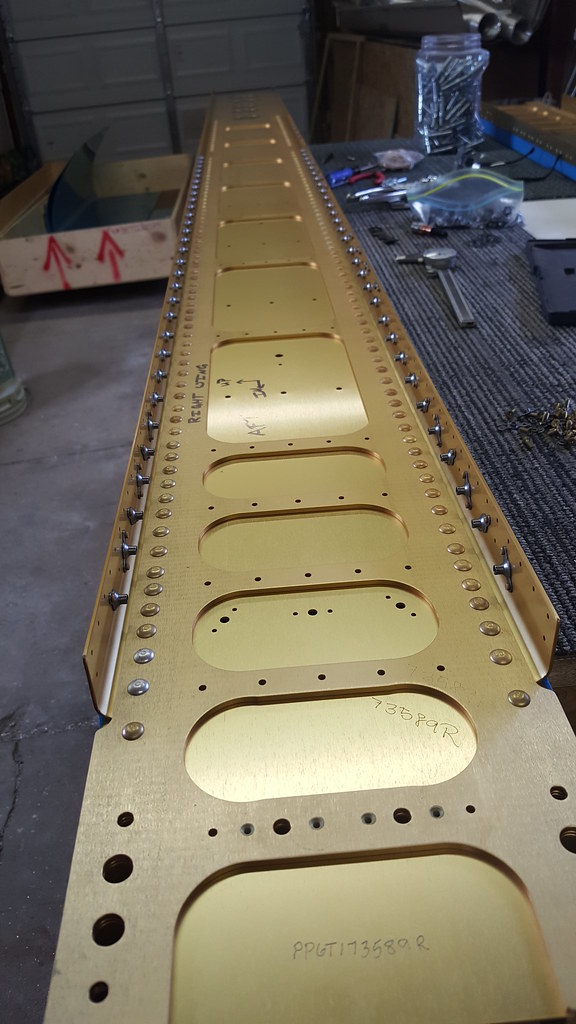
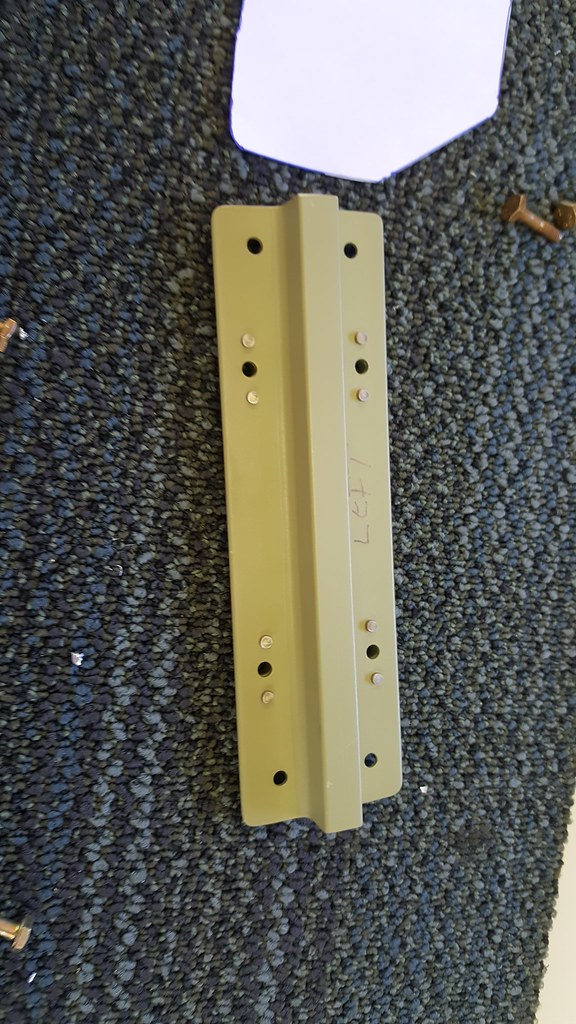
20170217_192533 by Jereme Carne, on Flickr
 
Last edited:
Looks great, Jereme. I first flew my -7A in late January. You are going to LOVE it. I call it my Corvette in the sky compared to the Cherokee 140 I owned previously. Still have the ground version, which is a 1984 Corvette that mostly sits in the garage looking good :)
 
Looks great, Jereme. I first flew my -7A in late January. You are going to LOVE it. I call it my Corvette in the sky compared to the Cherokee 140 I owned previously. Still have the ground version, which is a 1984 Corvette that mostly sits in the garage looking good :)

Ray I remember you posting about your first flight, awesome man. You may also notice in the pic that there is a car next to me; that is my wife's 64-1/2 mustang (planes and cars go together I guess haha). The car is getting the boot when my wings get here though! Okay it is just moving to a new temporary home.
 
You may also notice in the pic that there is a car next to me; that is my wife's 64-1/2 mustang

I saw the picture and from just the corner of the car window and thought to myself "that looks like a 64.5-66 hard top". How bad is that?
I am the second owner of an unrestored 66 fastback which I have owned for essentially 30 years. Once the airplane is done the Horse gets its turn in the shop.
 
I saw the picture and from just the corner of the car window and thought to myself "that looks like a 64.5-66 hard top". How bad is that?
I am the second owner of an unrestored 66 fastback which I have owned for essentially 30 years. Once the airplane is done the Horse gets its turn in the shop.

Sam pretty impressive you noticed that. My wife's grandfather gave this car to her when he passed on because she showed so much interest in it while younger. Getting my wing kit will be a double win because the car is getting moved to her brother's house and he is going to redo the engine for us. (he is a mechanic)
 
Well some what of a big day today. Not big in the sense that I completed a new component but I did make a request with the FAA for my tail number. I have been searching for quite some time but was having no luck finding something that was A) meaningful to me and B) easy to say. I finally settled on 187E.

1= first plane I am building

87= birth year

E= nickname in college
 
Just finished the right elevator today after spend 2.5 hrs rolling the edges yesterday. Rolling the edges on the elevator I thought were waaaay more difficult than the rudder.

20170509_183553 by Jereme Carne, on Flickr
 
Last edited:
Turns out those leading edges need the attention you gave them. When it comes time to hang them on the horizontal stabilizer if the profile isn't right they will rub on the aft spar. Ask me how I know. Better to get it right at this step because it's easier than when it's already blind riveted together.
 
Turns out those leading edges need the attention you gave them. When it comes time to hang them on the horizontal stabilizer if the profile isn't right they will rub on the aft spar. Ask me how I know. Better to get it right at this step because it's easier than when it's already blind riveted together.

That is good to know. The only one that I am not super thrilled with is the small section, it just came out slightly wonky. Luckily that one is probably the easiest to manipulate after the fact.
 
Looking good, reminds me of my progress with that Mustang sitting there, I tried so hard to keep the hot rod in the garage, then.....wings in the living room, fuse being built, then at the finish kit, 442 went outside :( then had to sell it for the avionics :D
 
Looking good, reminds me of my progress with that Mustang sitting there, I tried so hard to keep the hot rod in the garage, then.....wings in the living room, fuse being built, then at the finish kit, 442 went outside :( then had to sell it for the avionics :D

Thanks for the reply Bret, how close are you to flying? It seemed like you were getting close but haven't seen any first flight posts yet. Also, sorry you had to sell the rod, my wife would LITERALLY kill me if I even tried. :D
 
that darn trim tab...

Well after taking a few days off of building due to being sick I am finally back in the game! I got the left elevator parts primed and started working on "the first" trim tab. Bending the trailing edge was nice as it came out almost perfect! I did however mess up bending the ears and have to reorder a trim tab skin (bend buckled in a bit so I can't just cut it off) but oh well, looks like I will join the multi try trim tab club. :D I will however abandon this joke of a process and go the riblet method now. I suspected this would be the case but I wanted to try the Van's way first if only to learn more.

20170520_143432 by Jereme Carne, on Flickr

20170520_161607 by Jereme Carne, on Flickr
 
Last edited:
Well while I was waiting for the new trim tab and some new tools to keep moving on the elevator I decided to work on the trim motor. I found the 1-3/8" dimension did not center my motor for some reason and 1-1/4" for the edge of the access cover was the sweet spot. I also decided after reading Mike Bulloc's blog to countersink the aft two rivets on the access cover in order for the shop heads to not interfere with the motor as I have heard this can be a problem.

20170525_182421 by Jereme Carne, on Flickr
 
Last edited:
Well after lopping off the ears I went ahead and make some ribs for the elevator and the trim tab. Luckily I have access to a sheet metal break so I made these out of 0.025 instead of 0.020 just for a little extra strength. This route added a fair amount of time but overall I am pretty happy with it so far. Here are my results. Feel free to tell me what you think!

elevator rib by Jereme Carne, on Flickr

20170526_191514 by Jereme Carne, on Flickr

20170526_191533 by Jereme Carne, on Flickr
 
Ok after screwing up the second trim tab because of one rivet I couldn't set I think I finally got it after the third. I put too many rivets in my riblet and one was under the E-718 trim tab horn and I couldn't set it, not even a MK-319-BS would fit in the hole. As you can see in the pic below I ended up with three rivets on the top side of the riblet and two on bottom. (this photo shows the good trim tab)

20170610_184650 by Jereme Carne, on Flickr

On the other side I used MK-319-BS rivets because even my no hole yolk was having a hard time at them. You can also see in this picture that I had to grind the holy heck out of one of my yolks in order to get at the rivets attaching the E-721 hinge to the trim tab. It's ok though, I have really come to dislike this squeezer which made grinding it fun for the first 30 seconds; the remaining 14 minutes and 30 seconds sucked. (and yes I know the squeezer is not square, it was just a photo op :D) I now call this yolk the "duck".

20170610_194037 by Jereme Carne, on Flickr

Once the hinge was riveted on the trim tab and the elevator I had a hard time getting the hinge pin in as there were a few eyelets out of alignment. There was a little bit of binding when moving the trim tab but not bad at all. If anyone at this step reads this put the hinge pin in before setting the rivets and I think this would help. After aligning some of the eyelets the bind is pretty minimal now and the pin easier to get in but still not perfect. The following pic shows the final trim tab product and what 19.7 hours (trim tab only) can do.

20170610_201929 by Jereme Carne, on Flickr

One more final pic shows the trailing edge alignment of the trim tab. Deeeeelicious!!!

20170610_175942 by Jereme Carne, on Flickr
 
momentous occasion!

Well after 6 months of work I am official done with my tail except for a few odds and ends that will get addressed when I mount to the fuselage. The empennage was filled with great learning experiences and a handful of frustrating ones. I am that much closer to having my dream come true! My wings are here and inventoried, time to start on a new journey!

11800 by Jereme Carne, on Flickr
 
Beautiful looking product! Congratulations.

P.S. I don't know how you craftsmen get that blue film to stay on. My tail kit came with so much duct tape that it was impossible to salvage all of the blue film.
 
Last edited:
Beautiful looking product! Congratulations.

P.S. I don't know how you craftsmen get that blue film to stay on. My tail kit came with so much duct tape that it was impossible to salvage all of the blue film.

Thanks for the complement! I have found that if the duct tap is some what cool, like 70 or below, just get it started slowly and then rip it off fast like a band aid. Every once in a while it will tear the blue but then again maybe I just got lucky.
 
Even though the tail is done I thought I would post a few more pictures from completing the tail as others may find them useful. I am really happy with how the elevators turned out, I was a bit frustrated with them during building them as not all the rivets are perfect and I was worried about getting twist in them. After mounting them to the tail I shot a laser to first make sure the horizontal stab was level. Then I shot the laser on the trailing edges of the elevators to make sure they were in trail while the counterbalance arms were clamped to HS. At this point I have seen quite a few people have a bit of twist in their setup, Van's has accepted a good amount of twist but I am happy to say mine had less than 1/16" of twist between BOTH elevators! :D

In the pic below you can see the laser in the background on the green stand (as well as my favorite drink of choice if you look hard:D). This was very useful in checking for twist. You can also see the elevator horns line up surprisingly well when viewed from the side.

20170623_162819 by Jereme Carne, on Flickr

However, the next picture shows the horns aren't perfect when viewed from the back. I don't know that I have seen a single RV on this forum where the horns were perfectly matched to each other.

20170623_163043 by Jereme Carne, on Flickr

One thing I did after drilling the horns to the center hinge was to use the drill bushing to make a mark on the horns. I wanted to make sure that the series of drillings didn't wonder from center. Making this line made it easy to visually see if the bits were wondering.

20170623_173140 by Jereme Carne, on Flickr

20170623_173640 by Jereme Carne, on Flickr
 
Well I'm a little late posting inventory pictures of the wings. This is what you can expect when you get your wing boxes. Two people can carry these just fine as long as you are both strong. Each box was about 200 lbs.

20170619_164120 by Jereme Carne, on Flickr

20170620_173143 by Jereme Carne, on Flickr

I highly suggest marking these bags as you inventory if you don't have a fancy tray system to put them in. I am building in a small one car garage so things like that just get in the way. :D

20170621_181738 by Jereme Carne, on Flickr

My wife actually helped count all of these bags below. She did however open one that had 210 screws and 210 nut plates and said "let's go have a beer and I'll help with this one when we get back"... she did not...

20170621_181726 by Jereme Carne, on Flickr
 
Well my main spars are just about done. Let me tell you, countersinking them big ole tank attach points on the spar was no easy task! Well let me rephrase, it's not an easy task if you want to avoid the countersink bit from chattering all to heck! I found What works best is to put a lot of weight into the drill while spinning the countersink at slow speed (one or two rotations per second). I set the countersink about .003 short of the final depth and ran through all of the holes. My table is a little tall and my elbow was feeling the pain so I eventually stood on top of a bucket to get easier leverage. Then I went back through them all and finished the last three thousandths with high speed. The access cover holes are a little easier as they are smaller than the tank so no worries there.

20170629_122224 by Jereme Carne, on Flickr

20170629_122247 by Jereme Carne, on Flickr

20170628_110531 by Jereme Carne, on Flickr
 
What I had to do on my countersink was to hold the bottom of it with my fingers and and braced up against the spar and use high speed and went easy with them.

Seeing you post about your wings, reminds me I need to update my own VAF build thread with my progress. I have been keeping it up to date on my website, but not here. I'm slacking. heh.

Interesting Lynn, any kind of high speed on mine caused the bit chatter big time! I wouldn't worry too much about your build thread as you are keeping a really good one on your website! I frequent it pretty often, espescially since you have usually been one or two steps ahead of me. :D
 
Well I have managed to be gone from my house for three weeks, it's nice to be back. One of those weeks was to go to Oshkosh for my first time and boy was it awesome! I have attached a few pics below. When the B-1B flew over one of my good "non-airplane" friends didn't expect the noise and said "it was so loud I gagged" haha awesome.

I have now seen all of our modern military fighter jets fly which was a nice and unexpected surprise (F-35)! This show also came at a very opportune time as I am now just starting rib deburring for the wings and have been dreading it!

20170724_121523 by Jereme Carne, on Flickr

20170724_140932 by Jereme Carne, on Flickr

20170724_144314 by Jereme Carne, on Flickr

20170724_145401 by Jereme Carne, on Flickr

20170724_154211 by Jereme Carne, on Flickr

20170724_115150 by Jereme Carne, on Flickr
 
Well now that the fun of Oshkosh is over I guess it's time to get something done again. I have started the wonderful process of deburring the wing ribs. Without question this is the biggest pain the a$$ I have experienced during the build thus far. Maybe I'm too much of a perfectionist but who knows. I would say that the deburring process is taking me about 20 minutes per rib. At this posting I have about 11 hours into the ribs and I'm about half done with them.

My process is to run the edges over the scotchbrite wheel to polish up the flange edges (this does not remove the burrs on the corners, just smooths the flanges out a bit). The next step is to actually remove the burrs by running a small scotchbrite wheel the length of the flanges (works well and fast). The next step I take some thin sand cloth and "floss" all the nooks and crannies (this is the process I hate! and most time consuming). Finally I take the small scotchbrite wheel and debur the outside of all the nook and cranny areas.

I know it will all be worth it in the end but I can definitely see how some might get discouraged at this point in the build.

20170730_135922 by Jereme Carne, on Flickr

20170730_135933 by Jereme Carne, on Flickr

20170728_140158 by Jereme Carne, on Flickr
 
Nice work! I don't think it was good planning on my part, but the ribs were an excellent winter project - I could do that in my basement. If you're still working, take a couple of ribs to work and sand them during coffee breaks while the other guys are out smoking. ;)
 
Nice work! I don't think it was good planning on my part, but the ribs were an excellent winter project - I could do that in my basement. If you're still working, take a couple of ribs to work and sand them during coffee breaks while the other guys are out smoking. ;)

Thanks for the kind words, I love seeing comments on my build thread! This would be a great winter project for sure if the timing was right. I am a high school teacher and the thought did cross my mind to have my students take 20 minutes and they would all be done! :D Too bad it is summer break... haha
 
Well I have to give a major shout out to who ever figured this tool out. I have seen it many times on the forums so I'm not sure who the creator of it is.

I have found at times that many people make tools and I have tried as well but a lot of the times it never really works as expected (or at least not well enough to justify the time making it). Well folks, that is not the case with this one! This tool does a spectacular job at straightening the rib flanges! It takes less than a minute to run a rib through the tool all the way around. Definitely a must have! Only cost me about 10 bucks to make (steel bars and bolts). I used walnut for the handle because that's what I had laying around other than some high dollar bocote and rosewood which would have made a grown man cry to use for this application.

A couple of tips for those wanting to build this:

1. Keep the pivot point on the handle as low as possible for best leverage.

2. As others have discovered, 11 degrees on the 2 x 4 is the sweet spot.

3. Hardwood anywhere the bolts go through is a must as you put a fair amount of pressure on the handle.

4. Last step is to screw down the hardwood bolt section to the top while making sure the handle is firmly against the angled part of the 2 x 4.

Finally don't do as I did and leave the corners sharp, it will give you a blister! :)

20170731_145705 by Jereme Carne, on Flickr


20170731_145736 by Jereme Carne, on Flickr
 
Well I am waiting on some more deburing stuff (sand cloth and mini wheels) so I figured I would take care of some stuff to prep for the future. I decided to make the wing jig/stands, end plates for the wing stand, and the fuel tank/ leading edge cradle. I am really glad I took the time to do this as I would have been really frustrated later on with how much time it takes when I would rather be making progress on the wings. Doing this took a lot of time, like 5-8 hours worth, mainly because I kept forgetting things at Ace. The following pic is the result! I will try and take pictures at some of point of the fuel tank cradle but you have all seen one before I'm sure. When it comes time to set the wings on the cradle I will also clean out the sides of my garage a bit so I can get to the bottom of the wings. You can also see why I envy a lot of people on these forums that get to build in garage mahals! :D

20170802_133229 by Jereme Carne, on Flickr
 
What a glorious day!

It was a Monday when it happened; I remember it like it was yesterday. Birds were chirping in the cool summer breeze air. Dogs down the alley were barking in joyous harmony. It was the day that I finished deburring the wing ribs...

After what seemed like an eternity 31.85 hours deburring, straightening, and fluting ribs they are finally done. :D:D:D:D

Aren't they beautiful?

Out of respect for the airplane gods I stopped here today at 4:41 pm in order to appease them with a beverage.

20170807_163957 by Jereme Carne, on Flickr


20170807_164421 by Jereme Carne, on Flickr
 
Clecoing a wing together for the first time is huge visual progress!

I couldn't agree more, the skeleton is all riveted together now and ready to hang tomorrow! Its been a long time in the making. Many more adventures await!
 
you can really appreciate the genius of simplicity of this design when you see the skeleton. Of course having designed 10 (and probably more) models helps to refine things and get rid of what is not needed.
 
you can really appreciate the genius of simplicity of this design when you see the skeleton. Of course having designed 10 (and probably more) models helps to refine things and get rid of what is not needed.

I was just thinking about this last night how insane it is to have an aircraft do what this one is capable of on that few of parts in the wing!
 
I'm just ahead of you, working on skins and leading edge.. I don't care how many silver clecos you have, go ahead and order 400 more. I brought 400 back from Osh, ordered 300 more today.

Trying to have both wings going at once...

BTW, Looks like that trashcan in the background's getting kinda full...

Thanks for posting! It's good to know that 400 wasn't enough, I'm up to about 500-600 and was thinking I needed to order more as I'm going to do both wings at the same time. I was going to buy all kinds of stuff at Osh after the airshow, little did I know every vendor is closed by then!

And whats really crazy about that trashcan is that only that top layer of about 15 cans aren't crushed! :D My friends and I may or may not have a drinking problem... lol
 
And whats really crazy about that trashcan is that only that top layer of about 15 cans aren't crushed! :D My friends and I may or may not have a drinking problem... lol

Reminds me of a good buddy of mine in Florida. His beer of choice, Coors Light or Miller Lite. Yeah he calls me a beer snob since I would bring my own beer when I came over, because I KNEW what the options were, lol! But I digress...

Nice progress. It's always extra motivation to see a part that takes the shape of an actual "airplane part"!

haha too funny. I like good beers as well but if I drank nothing but them I would never have enough left over for the airplane! :D
 
I feel like I have made a fair amount of progress in the last few days. I finished all of the priming, riveting the ribs to the spars, and putting the wings on their respective stands.

I found while riveting the ribs the double offset rivet set gave me nothing but trouble! I switched to the straight set and the rivets instantly starting coming out perfect! I only had to drill a few rivets out on both wings during the process.

You can also see I got my first taste of "cleko ocean".

20170814_114836 by Jereme Carne, on Flickr

20170814_114831 by Jereme Carne, on Flickr

20170814_155734 by Jereme Carne, on Flickr

20170814_160603 by Jereme Carne, on Flickr
 
Well after clamping down the rear spar it was time to check for twist and put some bottom skins on. I now have the tops and one bottom side match drilled but how am I going to show you that? ;)

In preparation for getting the rear spars clamped down I followed what Mike B. did and made some brackets out of angle and riveted sheet metal to which I could clamp the spar. It worked out pretty well and I must admit IT WAS DEEPLY SATISFYING TO RIVET THE BRACKETS WITHOUT DEBURRING! (as it's not part of the airplane) :D

Here are some pics and you can also meet my little helper.

(the clamp in this pic is only temporary, it was moved so bottom skin could go on)

20170815_192438 by Jereme Carne, on Flickr

20170815_204958 by Jereme Carne, on Flickr
 
Back
Top