LettersFromFlyoverCountry
Well Known Member
Anyone got a foolproof way of removing one of these babies when stuck?
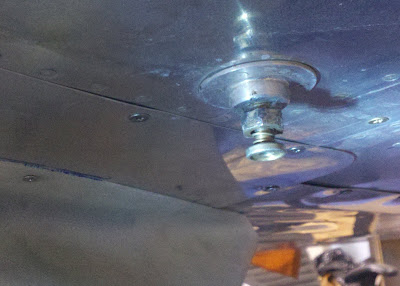
I've got to drain the fuel out of a tank to fix a leak but I'll be darned if I could get it (or its partner) to budge. They went in when it was a lot warmer; it's a lot colder up in flyover country now.
I'm a little worried -- a lot worried, actually -- about breaking the darned thing off; that's how reluctant it was to turn when I put a wrench on it.
Also, can you confirm this is a typical "righty tighty, lefty loosey" deal?
Last edited:
 You could warm it up a little with some hot water then just use some steady pressure and it should come right off.