What's new
Van's Air Force

Don't miss anything! Register now for full access to the definitive RV support community.

Do I cut the countersink cage to fit?

kjowen

Well Known Member
Guys,
I am working on -8 empanage / elevator.
I am to the point of countersinking the spar in 4x to attach the E-709 rib.
Call out requires countersinking as elevator horn fits over spar and must sit flush.
The two inside holes - easy.
What's up with the outside / upper and lower holes?
Do I take a cut off wheel to my micro countersink cage?
Help!
IMG_2846_zpsxxgltwkt.jpg

IMG_2844_zpsljs4zajj.jpg

IMG_2845_zpsktj6aghp.jpg
 
Instead of cutter mod all I did was chuck the bit in a drill or in my deburring tool. Works fine - Do it carefully and check depth with a rivet as you go. At times I got to lazy to get out the countersink and did it this way even when there was no access problem.
 
Look up slim microstop on the ATS website. I bought one last week and it works great! They also have an extended microstop that I should have ordered also.
 
Last edited:
I took the CS bit out of the cage and did it freehand. Easy Peasy. Just take your time. I have a threaded mandreal from an old CS cage that was pretty beat up. I threaded the bit into that mandrel which I then chucked up in my drill.
 
Instead of cutter mod all I did was chuck the bit in a drill or in my deburring tool. Works fine - Do it carefully and check depth with a rivet as you go. At times I got to lazy to get out the countersink and did it this way even when there was no access problem.

I took the CS bit out of the cage and did it freehand. Easy Peasy. Just take your time. I have a threaded mandreal from an old CS cage that was pretty beat up. I threaded the bit into that mandrel which I then chucked up in my drill.

Ditto for me.

I suggest you buy two more microstops; one for #30, one for #40, and one for everything else. I wasted so much time adjusting that thing every time I switched bits it drove me crazy!
 
I couldn?t see any reason not to dimple those. So I did.

Lots of others here dimpled those as well.
 
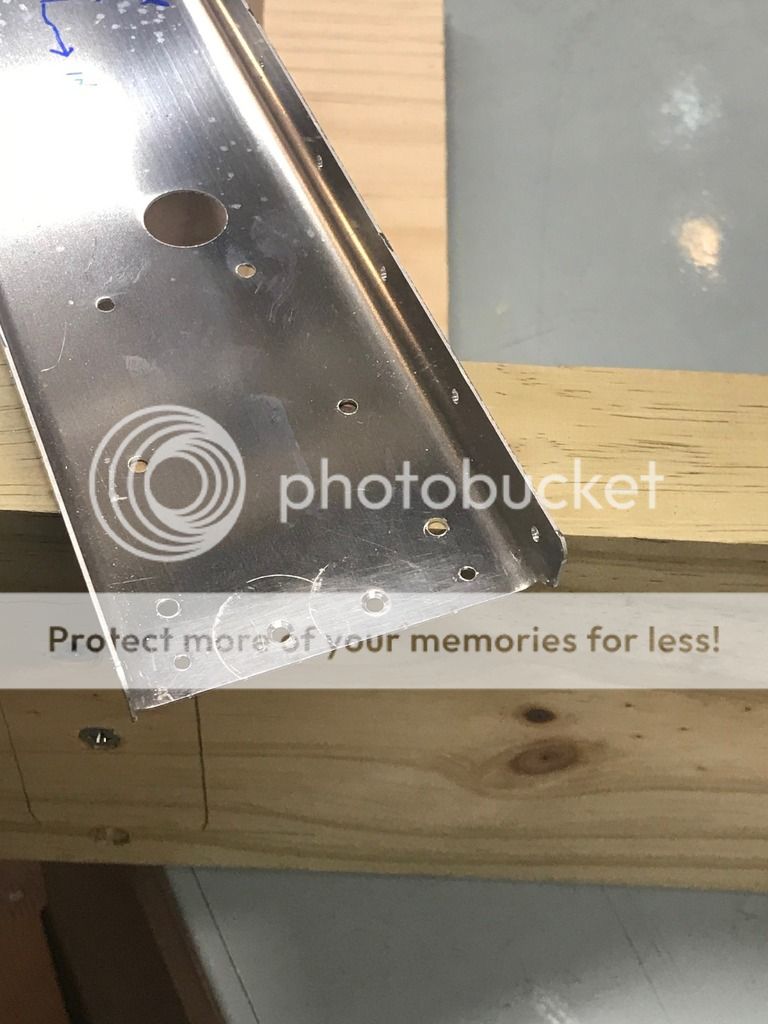
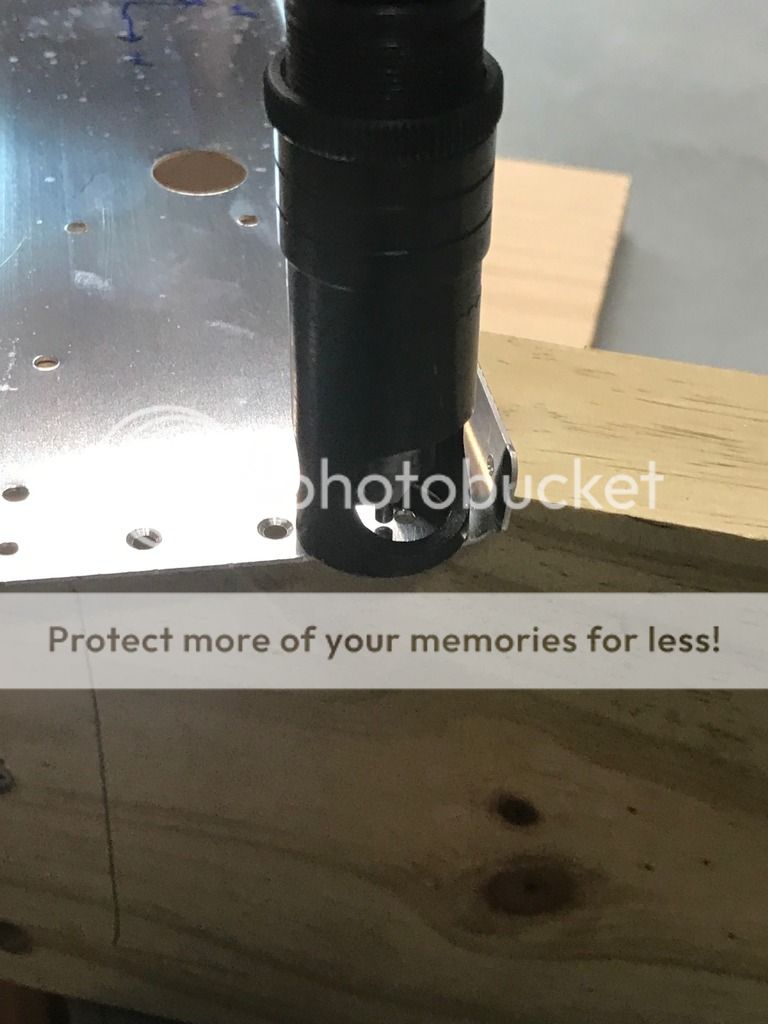
This is a case in example where you are over thinking this. I remember this. In situations like this, ALWAYS recall the option to simply grab your hand debur tool, change out its debur bit with the #40 or #30 countersink (whichever matches the hole) toolling bit, then hand countersink using finesse and care. And move on.
Obviously return the deburr tooling bit back into your hand deburr tool.
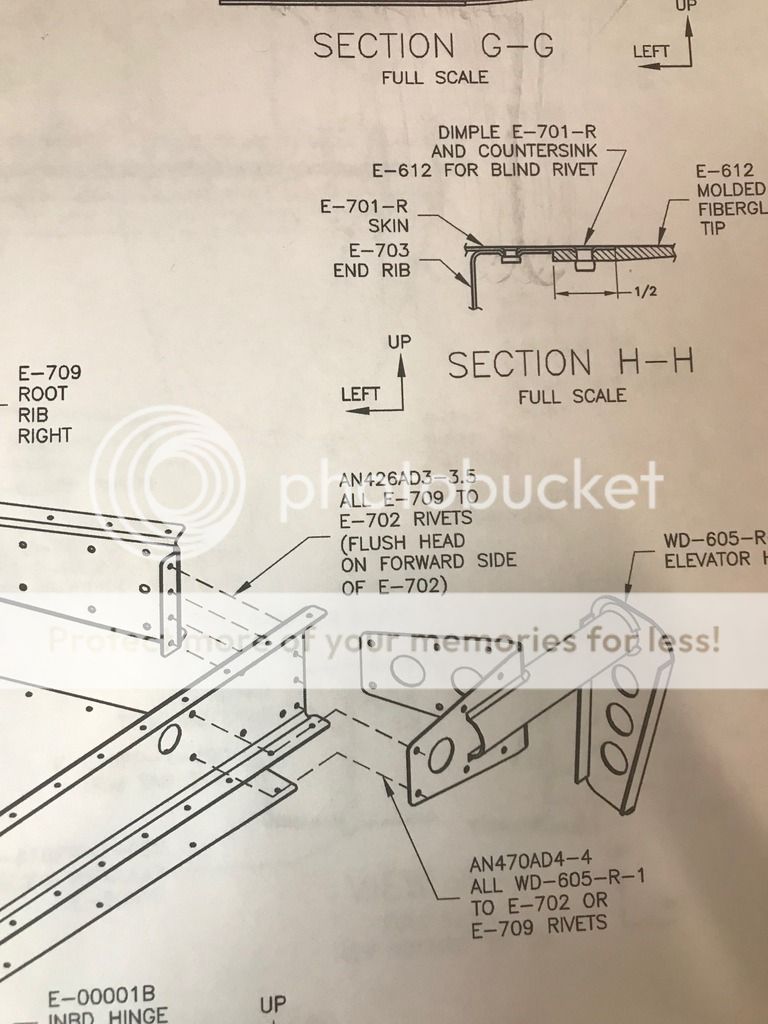
Yes, you can dimple these here. That advice applies. It's just overkill. But yes, dimpling is always better. Just not needed in this instance.

Good time to point out an important SIDE NOTE, for in your future. I learned the hard way. Please trust me; just make a sticky note and do not forget this...When you get to you fuel tanks....(I know, that is down the road), but no one does a good job of conveying this and Vans won't tell you. There is a row of rivets on the rear portion of the fuel tanks (top and bottom) for the Skin to the Rear Baffle. Vans says to countersink these. Absolutely do not countersink these. I did. and these look like horse $#!T. Everything with tanks came out perfect as to plan, but one of the last final steps...these skin to baffle rivets...they ruined this otherwise seamless process. Absolutely no need for the mentioned clearance need that vans state in the drawing. That is BS. Dimple these! Please! You will get a many times over better finish of your tanks. Frustrated no one shared this tip to me ahead of time, otherwise my tanks would have finished out perfect.

Anyways. like I learned....guard yourself from over thinking. Use the MIL spec for your quality guidelines. If the rivet meets MIL spec, move on.
 
Last edited:
Ditto for me.

I suggest you buy two more microstops; one for #30, one for #40, and one for everything else. I wasted so much time adjusting that thing every time I switched bits it drove me crazy!

This. And get one of those extended narrow nose cages too.
 
Dimple

You can dimple up to .040" thick. In fact it's difficult to countersink .040" without knife edging the hole. Be careful.
And the tip on countersinking the tank rear baffle is a good one. I also used fat keeper rivets to hold alignment while riveting it.
 
I have used some scrap aluminum sheet and/or shim stock to level or square up the micro-stop cage against the work piece. Hold downward pressure with one hand to keep the cage in position then go slow.
 
It's not just an oops rivet

It looks like the perfect place (and I found many in my build) for NAS 1097 rivets. Just touch it with a few turns of a deburring tool (a little practice may be required) drop the NAS rivet in for a nice flush fit, works very well. An airline AMT friend of mine suggested this, said they use them all the time at work..
 
It looks like the perfect place (and I found many in my build) for NAS 1097 rivets. Just touch it with a few turns of a deburring tool (a little practice may be required) drop the NAS rivet in for a nice flush fit, works very well. An airline AMT friend of mine suggested this, said they use them all the time at work..

This is great suggestion. I picked up a bunch of NAS1097 rivets in 3/32 size for use in attaching nutplates. As stated above, a few turns of a hand deburr tool is plenty of countersink for the smaller head on those rivets.

As for me, I tend to use my deburr bit (not my countersink bit) for the one off times you need to make a countersink. In my opinion, it takes the same amount of time (or less) to hand cut with the deburr tool and check often than to get the cage set-up perfect for just a few holes. Plus you get more clearance for holes near flanges without the cage!
 
Back
Top