What's new
Van's Air Force

Don't miss anything! Register now for full access to the definitive RV support community.

Proseal tips and tricks

Cadstat

Well Known Member
In the couse of several repair over 6 months, I finally figured out how to deal with proseal. I read all the posts, gleaned the info, and you should too but here's what works for me.
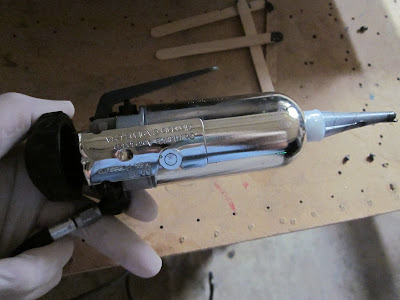
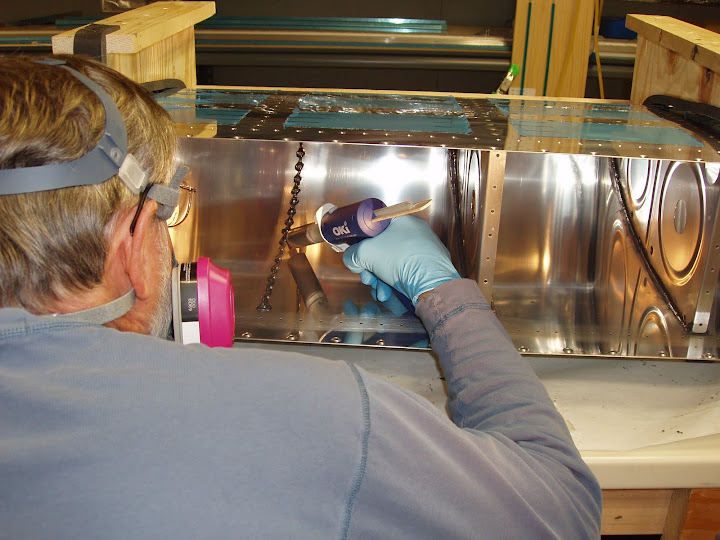
Temperature is the trick. Summer helps but not enough. I pre-heat the proseal in an old cooler with a light bulb. It's 90 degrees or so. I weight the proseal in two separate parts using a cheap gram scale from Harbor frt. I put proseal on two playing card with a pop cycle stick and never try a batch smaller than 3 grams of black to 30 grams white. This will get you close but only within a gram. You need to look at the color and adjust if necessary. I scrape the two onto a metal serving tray and mix with a 1" puddy knife. You can see the 'streaks' very easily as you mix the two. I work in front of a wood stove with a blower in the garage. The tanks are warm to the touch and using a small disposable brush trimmed to 1/4", I paint the proseal on the location. If the mixture cools, I place the metal tray on the stove, wipe the puddy knife across it again, build a glob and warm it until the proseal flows again. It's like honey not peanut butter. This takes only several seconds. Wear nitrile gloves, throw every thing away but the tray and puddy knife, clean up with MEK outside in the yard. Save a little from every batch on a piece of aluminum and date it. Look for variation in color from previous samples. Too gray and it takes long to set, charcoal less time. Keeping the tanks warm speeds the set time.
 
Thanks for that personal insight

I sort of hate the stuff but this information may make it better. One additional thing I have learned is never introduce fuel exposure until the proseal has COMPLETELY CURED!

Bob Axsom
 
Pro-seal tips

I work with it every day installing skins on airliners..it is much more versatile than one thinks, and depending on which type, you will have different results. In the certified business, we put a dab on card with time and date that is used to certify the cure after assembly via a durometer reading. This can help you be sure what you applied actually cures. The basics of reading the type helps to understand the initial consitancy. For example, Pr****B 1/2 translates to : B= puttyknife consistancy, and 1/2 = one half hour worklife before cure actually starts. It will take several days before the final cure is set. If it is PR****A 2, it will be A=brush on consistancy (much thinner) and 2 hour worklife. So, for general reference, we install components together with "B" and topcoat seams,ect. with "A" consitancy. Virtually all of the sealants can be thinned with MEK to a brushable mix, and the MEK will evaporate out, but the thickness layer will be reduced slightly. Mixing by "eye" to a color can get you in a non-cured" state if not careful (ask me how I know) and it is recomended to use the pre-mix cartriges fully ,or the bulk containers by callibrated scale to ensure mix ratio. It is true, warmer=easier mix, but it will "kick" the cure process,and is a normal method of cold environment usage....and then there is cleaning your hands...just get used to looking at it until it wears off! So when your all done with the tanks, just remember there are guys like me who have seen it day in and day out for over 30 years:eek:
 
VERY INTERESTING

I can't imagine making a career out of working with this stuff but I've been around it long enough to say I'd be lying if I said I wasn't starting to enjoy the smell of it.
 
This is the tool that made all the difference for me when working with Proseal. Semco sealant gun Model 250-B. The 250-A model is the same but with the handle. The -B has a small paddle trigger. Also used a microgram scale with a tare feature so I could mix small batches easily. Before that, I hated it like most folks.

IMG_0439.JPG
 
Last edited:
Have you tried the 'cake decorating' trick?

Turn a quart ziplock bag inside out, put it on the scale, & measure out about a golf ball size portion, plus hardener. Reach 'inside' the bag, turn it right side out, expel the air & seal the zip. Roll the mix on a flat surface with a 'rolling pin' of 1/2" to 1" PVC pipe until thoroughly mixed. Snip off one corner leaving ~1/8"-1/4" hole. Now 'decorate' the surfaces to be sealed by squeezing the bag.

Virtually no waste, minimal mess, & if done right, it will go a looong way.

One of the best tips I ever got when I started building.

Charlie
 
Mine is always far too stiff, straight out of the fridge. I did not know you can thin it or warm it, I thought warming would make it set very quickly.
 
I am about to hit the "buy it now" button for one of these, but not sure just how it works. Looks like you would spend hours cleaning it up when you are finished. Do you buy the tips separate? Tell me more on how it is used.!

This is the tool that made all the difference for me when working with Proseal. Semco sealant gun Model 250-B. The 250-A model is the same but with the handle. The -B has a small paddle trigger. Also used a microgram scale with a tare feature so I could mix small batches easily. Before that, I hated it like most folks.

IMG_0439.JPG
 
Dealing with Proseal

Built a -7 and -12 tank last month. On the -7 we used the 3.5 oz cartridges from ACS. They worked fine although it seemed like you just got going and you were out of material. We could do about 2 ribs per tube. So it was go thru the mixing process again or call it a night and add a session. We also had on hand the 1oz.unmixed cups which were nice to do the little "get ready" jobs before the main event.

On the -12 we used the quart can, digital scale and were able to roll thru the tank. We finished everything but the sight gauge and the top in around 4 hours. One thing we did try was using large 2 oz hand loaded syringes, from CVS Drug Stores, to place a nice line of material and get into tight spots. They worked well and preloading 2-3 of them before starting would have worked even better. Additionally, I understand after curing, the proseal will pop right out of the syringe allowing reuse.Good write up on:
http://vieilleburette.blogspot.com/

After having done both I will opt for the quart mix your own proseal, digital scale, and multiple 2 oz syringes. The key is preparation. Think everything thru, have the parts ready, and above all have lots of gloves!
Terry
 
Tips

The tips are available from ACS and others. The manual gun works well too and is cheaper.
Terry

I am about to hit the "buy it now" button for one of these, but not sure just how it works. Looks like you would spend hours cleaning it up when you are finished. Do you buy the tips separate? Tell me more on how it is used.!
 
Cake Method

I tried the plastic bag method after reading about it but I couldn't get it to work. Wouldn't mix well in the bag and then couldn't get it out of the bag evenly. And applying it inside the tank with a mirror required one more hand than I had. I tried mixing in a cup and then loading a syringe but that was a mess and then it wouldn't come out. Both these ways might have worked if I had taking up the temp. I would have liked that gun but I'm too cheap and I was already spending over $1200.00 plus $700, on a hanger and insurance for a plane I couldn't fly, to fix the gas gauges and remove the Slosh.
 
I am about to hit the "buy it now" button for one of these, but not sure just how it works. Looks like you would spend hours cleaning it up when you are finished. Do you buy the tips separate? Tell me more on how it is used.!

Cleanup is easy. Just let it dry overnight in the tubes and tips (but remove the plunger) and it peels off easily. Takes about 1 minute for cleanup including an MEK wipedown. Only ended up using the tip that's 2 1/2 inches with 1/8 opening. The tubes come in several sizes and I found the 6 inch to be the best for me. Enough volume to work until I was tired of it but not too big to get in the way. Be sure and get one with the air hose included as it is smaller than standard size and might be hard to find. Using it is super easy and the only tip you'll need is to turn the air pressure down to around 40 or so.
 
I tried the plastic bag method after reading about it but I couldn't get it to work. Wouldn't mix well in the bag and then couldn't get it out of the bag evenly. And applying it inside the tank with a mirror required one more hand than I had. I tried mixing in a cup and then loading a syringe but that was a mess and then it wouldn't come out. Both these ways might have worked if I had taking up the temp. I would have liked that gun but I'm too cheap and I was already spending over $1200.00 plus $700, on a hanger and insurance for a plane I couldn't fly, to fix the gas gauges and remove the Slosh.

Hmmm, with all the trouble you had making it flow, it makes me wonder if the stuff you were sold was the wrong consistency. I built 4 tanks with the Flamemaster brand stuff that Van sells in a quart size can, & it worked great for me. (I feel for you, having to dig into a finished tank.)

Charlie
 
Here's what I prefer:

1) carefully weigh the 2 parts into an appropriate container. Use an accurate scale, preferably one that weighs in grams. I use an old Corelle cup to mix in because it's easy to hold and relatively easy to clean out

2) after mixing, I put the ProSeal into a SMALL plastic baggie, clip a 1/4" hole in a corner.

3) spread a bead of ProSeal as required.

4) using a cheap acid brush with the bristles trimmed to about 3/16", work the bead into a smooth layer. Apply a layer to both surfaces to be joined.

5) Assemble the parts and begin riveting. Use the brush to make sure that there is Proseal worked around the bucktails of the set rivets.

6) when done riveting, beautify the ProSeal one last time and then wipe off all ProSeal on the exterior of the tanks using laquer thinner, acetone, etc.

7) and finally, clean up the clecoes by tossing them into some lacquer thinner after wiping the gross amounts off, clean out the cup, and toss everything else.

I prefer to have a fillet of Proseal along the ribs, on both side of the flange, and over all the bucktails. It's not that hard to do a nice job using the acid brush. Nor, does it take very much ProSeal to do a nice job. Certainly, one can is more than enough to do a set of tanks, with plenty left for other uses.

I've yet to have a tank leak.

If you're using ProSeal to seal the canopy plexiglass to the frame, use masking tape to make a nice mask to keep the goo at bay. The apply the Proseal. Use the acid brush as needed. After the plexi is clecoed in place, you can pull the tapes , hopefully leaving a nice, self leveling bead of ProSeal right where you want it. Don't use any solvents on the plexi!

It couldn't be easier.
 
Back
Top