What's new
Van's Air Force

Don't miss anything! Register now for full access to the definitive RV support community.

Bad priming technique? -- too runny

Draker

Well Known Member
Hi, VAF folks who have done this before!

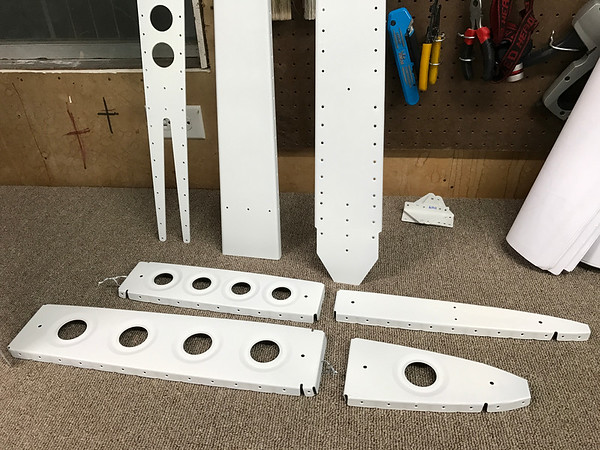
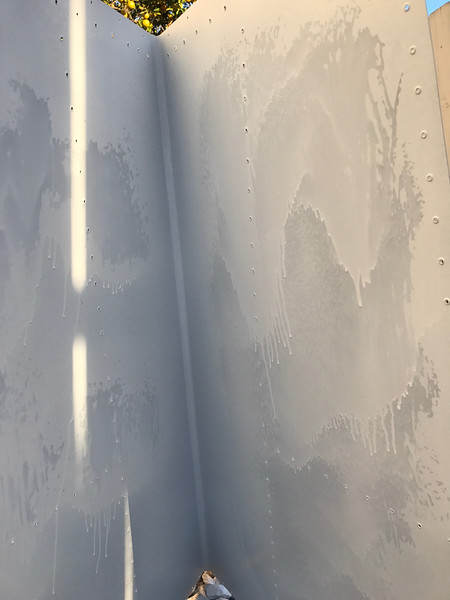
Just started priming my first few parts, and man I am doing something wrong. The primer (Stewart Systems) is running all over the place, coming out very thin and drippy. Followed the mfgr instruction to dilute 10% water, and sprayed (~40psi) as evenly as I could but it's just turning into a mess. Anyone who's gotten good at this have any tips? Is this fix-able later (sand paper or scotchbrite pad)?

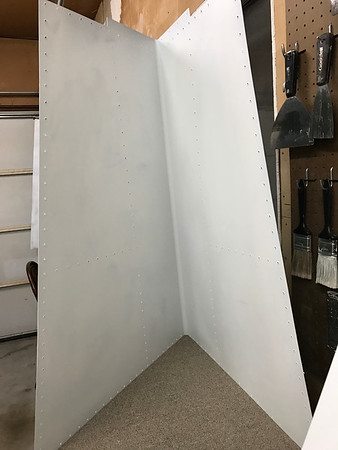
Here's my vertical stabilizer (getting a similar effect on the rest of the parts as well). It's even running through all the holes in the skin to the front side! :eek:

IMG_0822-L.jpg


Ryan
 
I occasionally had the same issues with that primer - using about half the recommended water helped, as well as making sure you spray a thin mist coat, followed by another thin coat a few minutes later. You will find a technique that works for your specific sprayer and environment. And yes, you can wet-sand it and re-spray if you want. Don't get crazy, you'll never see those areas again!

Chris
 
Thanks Chris. Plus side, the goofs are sanding away pretty nicely. I think I'll use a little less water (or none at all) next time. In the mean time I'll sand some of the worst drips, give it another [LIGHT!] coat or two, and chalk this up to experience.

Should I be worried about rivet fit due to primer pooling in the dimpled areas?
 
My priming job looks nearly that bad sometimes; Im using that primer too. I get slightly better results not thinning at all, and find warm sunny days to be better--I put the part out in the sun as soon as it's shot and it dries a lot faster. I haven't had fit problems as long as a large drip isn't sandwiched in between parts, so I never bother sanding unless I need to clear a drip out of the way.

Every now and then I'll get some really nice-looking parts. My wing ribs turned out great. My seat and baggage ribs look absolutely terrible. Unfortunately I can never remember what I did right from the last time so I have to learn all over again....

I was hoping to be moving on to priming the baggage floor and seat pans on a couple weeks, and trying out some new ideas on technique, but the nice big smiley I just put in the web of my aft F-704 bulkhead has derailed that plan and all my other planned work for this weekend :mad:
 
Settings

Start by cranking the paint knob in a turn and if it's HVLP, turn the pressure down to 23 psi or whatever the nanufacturer recommends.
Make a set of passes i one direction with a light coat then another 90 degrees. If it looks good, stop. We all tend to keep spraying when it's fine.
I would sand it down or wipe it off before it sets. Tail section needs to be light.
 
I went down the Stewart Systems path too and feel some of your pain. If you are painting at lower temperatures, it will take some time for the water to crack off, so to limit the chance of runs, not only put it on thinly as the others have mentioned (be sure to get yourself some wet film thickness gauges), but also try to spray surfaces only when they are flat. In the situation like the skin you show, I would spray one inside surface, let it tack dry, then flip it over and spray the other.
Tom.
 
Hi Ryan .. looks like you're spraying way too much primer. It should never be so heavy that it flows through the holes!

I set my gun so that the gun inlet pressure is ~20psi when I pull the trigger before the valve pin engages and lets out the paint. Dial back the flow valve (lower of the two) to just get a very light spray and tune the fan (top valve) to get a reasonable pattern. I always spray into a box or old piece of cardboard to be sure the flow is not too heavy. Look for an even application with no run. Err on the light side; you can always add additional coats. I've the primer thinned 10% in the past and had no problems, as long as I kept the flow light.

What size tip are you using? 1.5mm seems about perfect, though I've been using a 1.8mm recently and have had good results as well. Also, be sure to mix this stuff well, as it tends to settle. I use a el-cheapo mixing wand from Home Depot chucked into my DeWalt:

http://www.homedepot.com/p/Workforce-1-Gallon-Helix-Paint-Mixer-HM1HD/202251542

Runs are less likely if you spray the piece horizontal (let it dry then flip) though that's not a real constraint. Just go lighter on the spray.

Good news: Let it dry and 150 grit paper in a sanding block will clean it up quickly. Sand away and re-prime. No need for a call to Van's. If this happens when wet, just wipe it off with a rag, let dry, sand a bit (or maroon scotchbrite) and shoot again.
 
Thanks everyone. In the future I'll just plan to do multiple coats and not worry about full coverage on the first one. Bill, tip is 1.4mm. I think the big problem was that the fluid control was set up to deliver way too much paint + too few patience on my part.

Got one of these guys coming to do a better job mixing the primer: http://www.rockler.com/mixing-mate-paint-lid-gallon-size-stir-pour-and-store. Also will help me to NOT pour half the can on the floor.

I sanded the worst runs and clumps on the ribs and spars and re-primed and things are looking much more even now. Will fix up the skin tomorrow. :cool:

IMG_0823-M.jpg
 
Last edited:
Stewart primer experience

It is water born with MUCH slower evaporation rate than solvent. If you think you have primer challenges, just wait til you get to finish coats. The primr is merely to bond the 2K to the substrate, it is not a barrier film. Thin is the operative term. The protocol of light tack coats and proper flashing between finish coats is critical, or you will get pinholes in the paint.

To remove primer, just soak a wrag with acetone and wash it off. This characteristic is the negative of Stewart System in my opinion. BECAUSE, if you don't get the primer completely sealed with 2K finish material at the edges of holes and flat sheet, Gas will attack the primer and strip the paint. Locktite 242 on screws will also strip the paint around holes. I can send you pictures. Waterborn is nice. I would use a 2K primer in the future, but I think any waterborn finish will harder for the hobbyist to get consistent results. My next project will use carcenigenic solvent based 2K components and the PTA accessories requred. Just my $.02.
 
Heating paint

I used to shoot epoxy paint from time to time. I always heated the paint in the cup to 140 degrees by setting the cup in very hot water. Heating the epoxy would make it tack much quicker which minimizes runs and also decreases the time between coats.

I don't have a clue whether this would be of any benefit with your paint as I have never shot it, although it might be something to experiment with.
 
Thanks again to everyone. Skin turned out pretty good, too. Not a work of art but better once the setup was corrected. In case anyone else has this problem, root causes ended up being: 1. Paint gun fluid control set way too high and 2. Cheesy "eBay-special" regulator/gauge which failed to deliver consistent pressure.

IMG_0828-M.jpg
 
Thanks again to everyone. Skin turned out pretty good, too. Not a work of art but better once the setup was corrected. In case anyone else has this problem, root causes ended up being: 1. Paint gun fluid control set way too high and 2. Cheesy "eBay-special" regulator/gauge which failed to deliver consistent pressure.

Buy one of these. Never moves fron the set pressure. I like it so much, I bought a second one for my rivet gun.
https://www.amazon.com/RTI-Technologies-MICRO-AIR-REGULATOR/dp/B002GK9Y1S
 
If you don't mind, would you confirm this is Stewart Systems EkoPoxy primer, please?

I have a little experience now with the Stewart EkoPoxy and EkoCrylic and find these finishes have the smallest margin between "orange peel" and "run" of any finish I have ever applied, including some very demanding finishes used in home furnishings. I guess the good part is they don't kill you when you put them on. But, if you are like me, you'll get FAR too much experience sanding the stuff off again, so make sure you have a mask for that purpose.
 
Back
Top