What's new
Van's Air Force

Don't miss anything! Register now for full access to the definitive RV support community.

Prop flange bushing turns

crabandy

Well Known Member
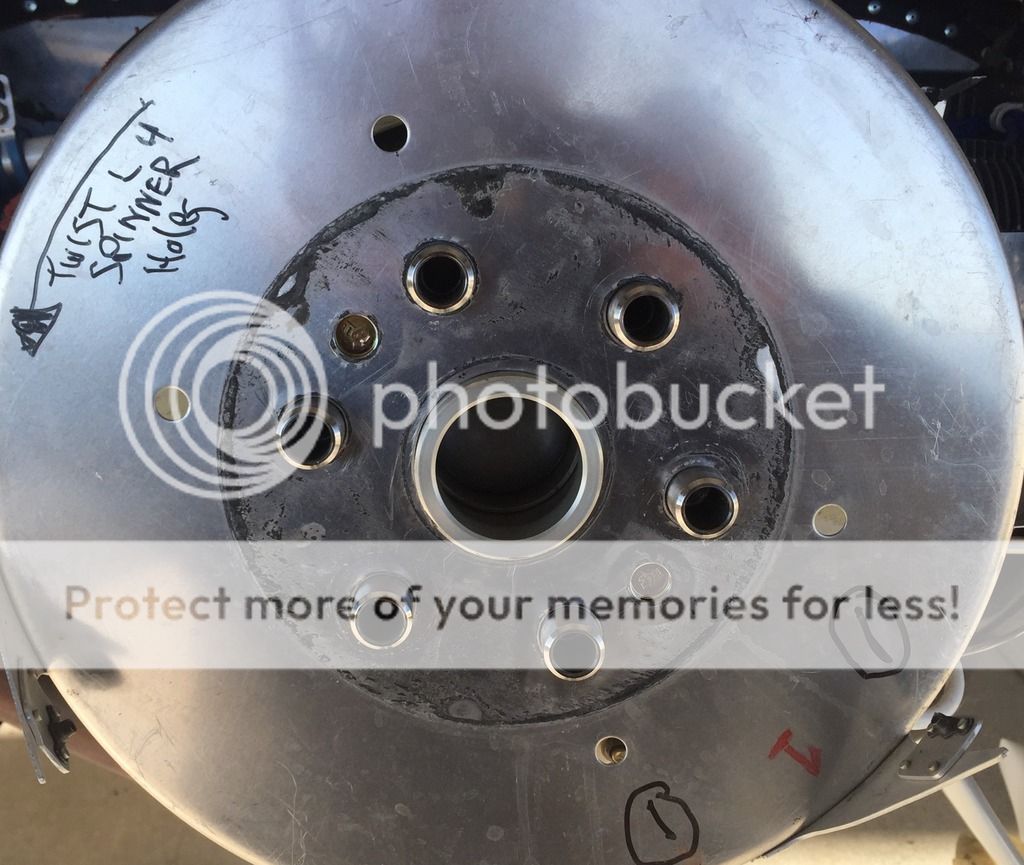
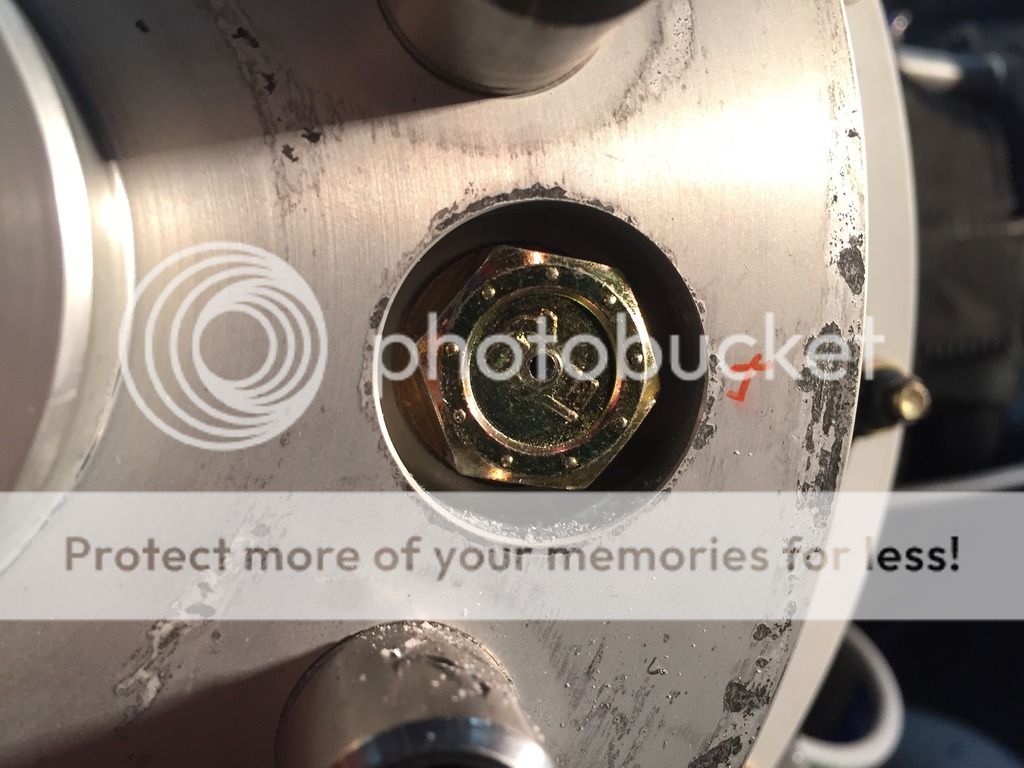
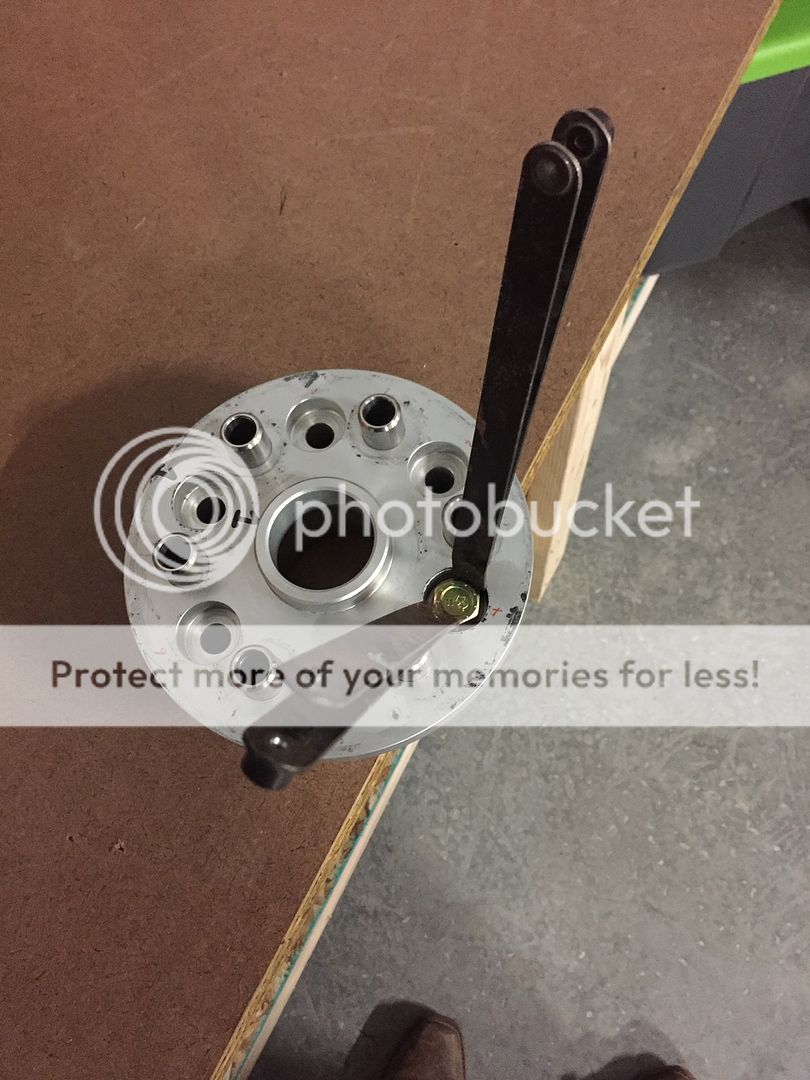
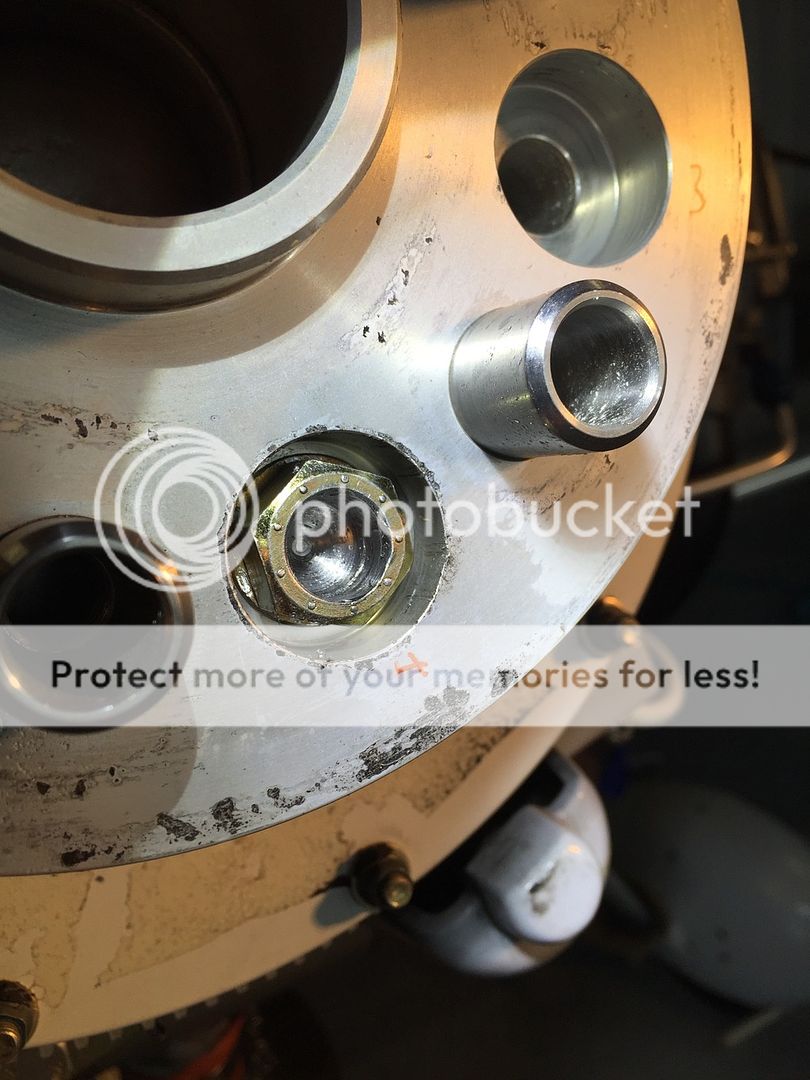
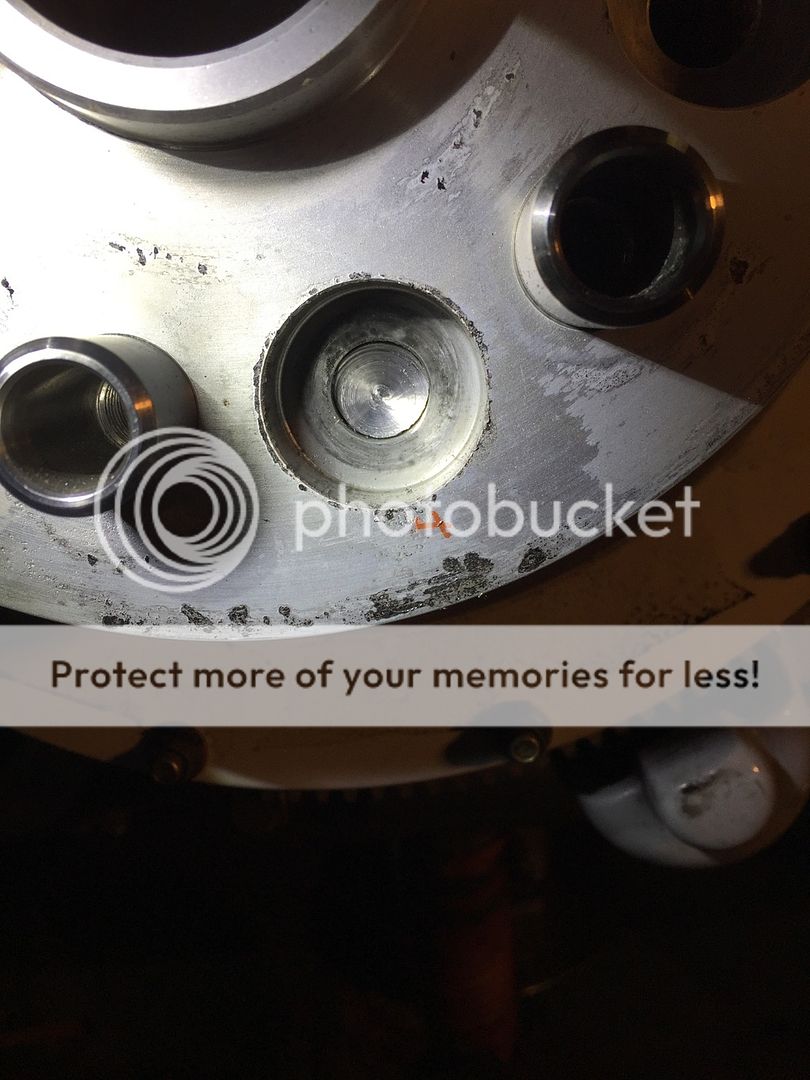
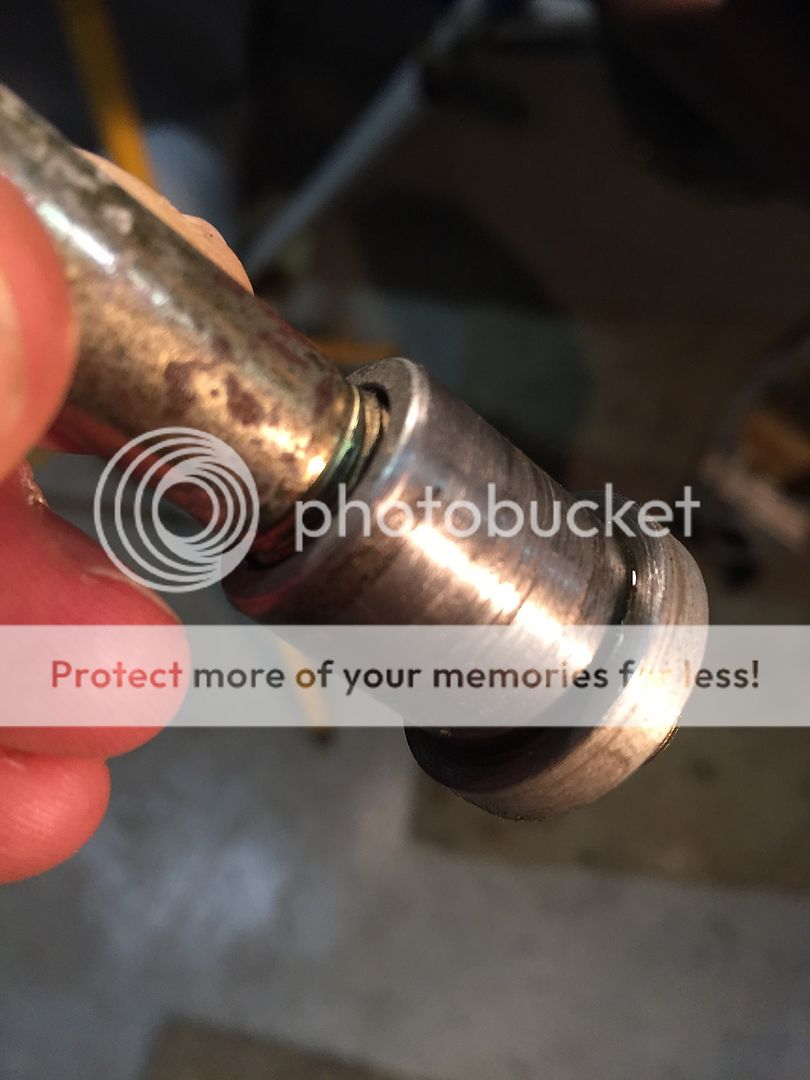
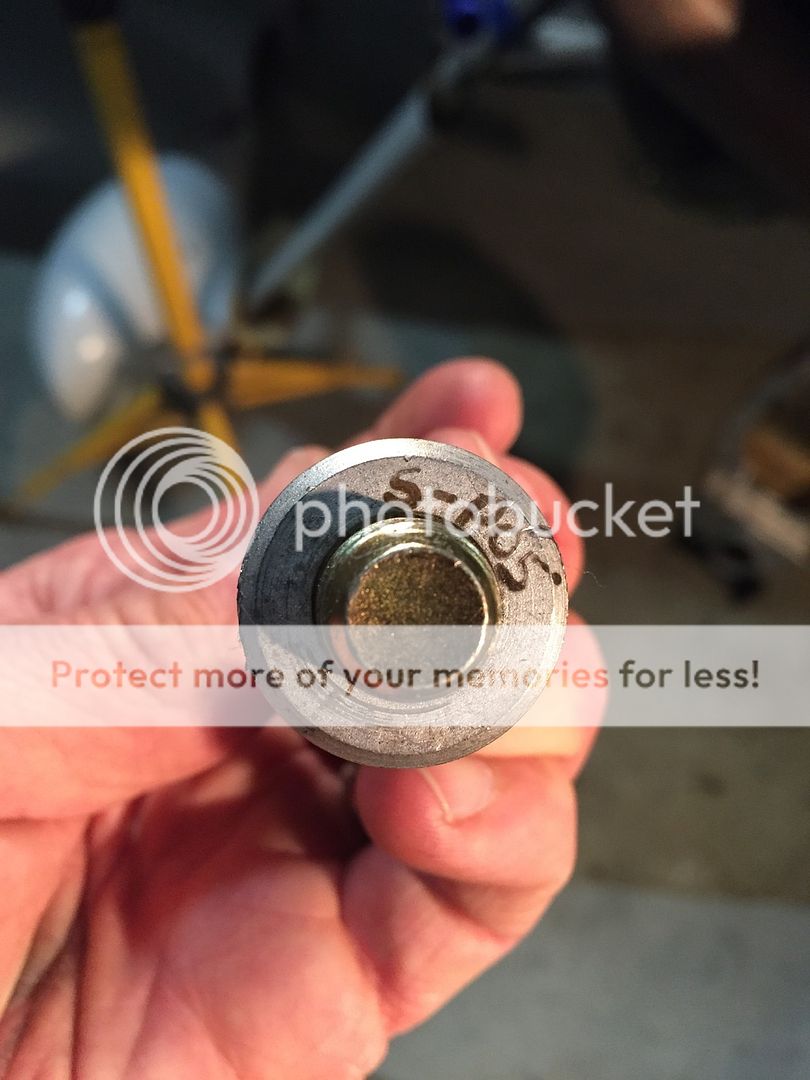
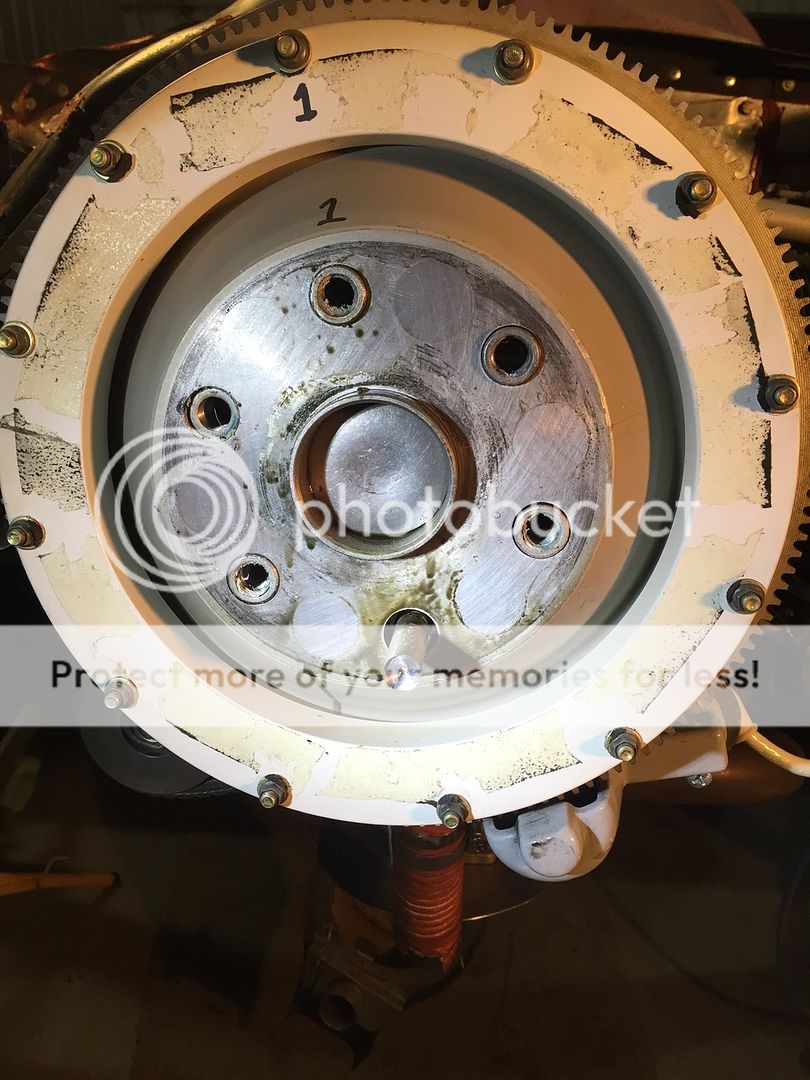
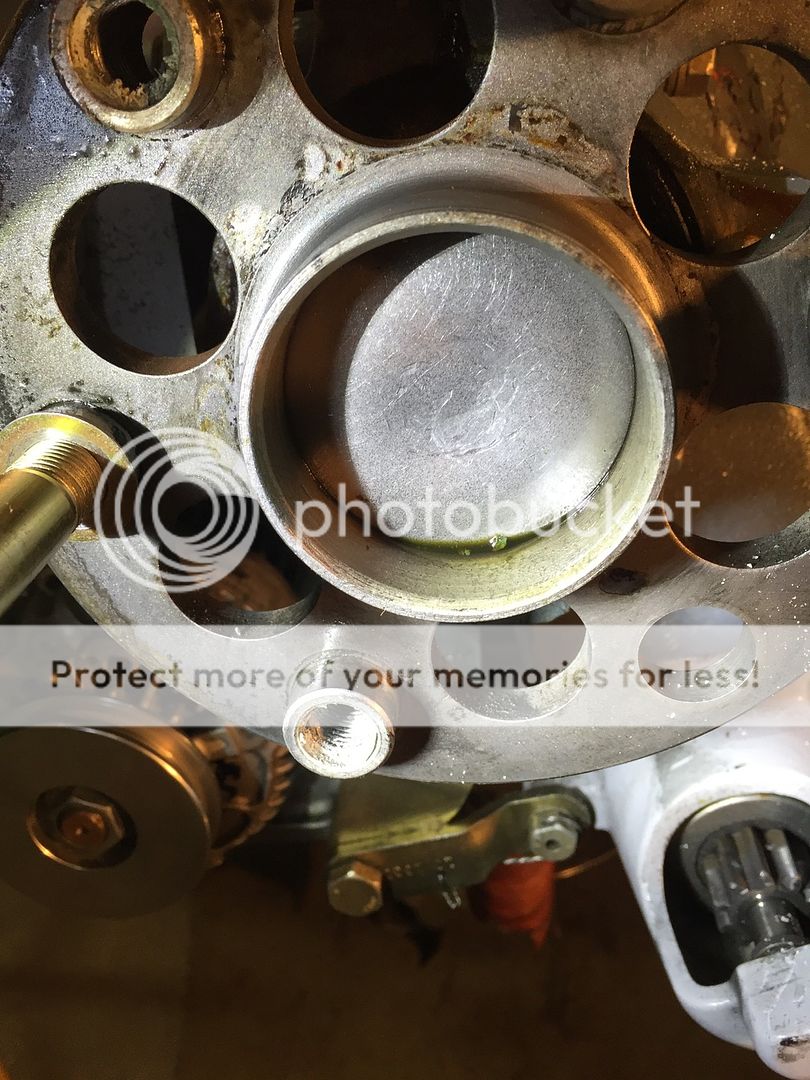
While trying to remove my prop spacer from the crank today I found one of the prop flange bushings spinning. Therefore I cannot remove the prop spacer, ring gear support etc.
Is there a better plan of attack than removing baffling and trying to use vice grips on the prop flange bushing so I can get the last bolt on the prop spacer out?
Thanks,
Andy
 
No. There is no better way. Hope you're lucky and the grips are enough. Use sharp ones. Measure the hole after you pull the bushing. You may need a new bushing or plate up the old one with new cad.
 
You may have to carefully drill the head off of the bolt then you will be able to remove all of the parts over the shank of the bolt. Once everything is off of the flange then you can address the spinning bushing.
 
I've been thinking about your dilemma Andy, and I think Curtis has come up with the beginning of a solution. If the head of the bolt can be removed and all the stuff taken off the engine flange you may be able to tap the bolt gently and the bushing may just move forward and out of the flange hole.
 
Removing the bolt head without diccing up the prop is the challenge. Try the vise grips first, could be a 30 second fix.
 
Holding Nut with Vise Grips

I've never had this problem but in similar situations I have used a pneumatic impact with great success. I would suggest using an impact and turning the air down to a pressure well below a value you would expect to work. After hitting on the bolt head, turn up the pressure in 5 lb. increments. Repeat this process until something gives.

Sometimes the impact will get the job done when a steady pressure won't. Since you have a limited ability to hold the nut, seems to me that you want "just enough" torque on the bolt head.

Just an idea.
 
Removing the bolt head without diccing up the prop is the challenge. Try the vise grips first, could be a 30 second fix.

I think Andy's extension is the 12 hole version, the prop has been removed, its one of the six bolts holding the extension to the flange that has the spinning bushing in the engine flange. And those bolts heads are buried in a recessed hole of the extension. It may be quite a challenge to remove the heads.

The bushings probably are aluminum and as such holding them with a vice grips might work but the material is relatively soft and the grips may put more compression on the bolt. I'd definitely treat the bushing-bolt end with some liquid wrench, it may help.

There must be an A&P lurking who has tackled this problem.
 
Not having seen what he's dealing with on the back side where the bushing is, and still asking the question - is it possible to put something like JB Weld on the bushing to tack it in place long enough to break the nut loose? If you've got access to get a vice-grips on it, this might work also, or in combination.
 
The bushings are steel. Usually cad plated. I've had many spin. Usually older engines or one where someone didn't washer up enough and stuck the bolt grip in the bushing. The back flange usually has an edge chamfer to about half the flange thickness. A pair of sharp vise grips layed flat against the aft face of the prop flange will almost always get a good enough bite. Unless the bolt/threads are really messed up. Then go to plan X.
 
Mine is the 12 hole version Saber spacer, the spinning bushing is on the crank flange with the bolt head flush on the spacer. Pic before I removed the spinner backplate:
053FABD7-AC83-42DB-8201-21B5E059FC62_zpszv00gnld.jpg


Thanks for the tips, I will probably try liquid wrench and impact as suggested by Robert. If I can get the vicegrips on the bushing I will do that as well. I'm not sure how good a grip I'll be able to get with the vice grips with the ring gear/alternator pulley on the crank.

If I have to drill the bolt head off should I start a small pilot hole and and then with a 7/16 or should I slowly or drill several small holes and work up to 1/2 inch?
 
A small pilot exactly on center, then working up, would be the only clean way to drill off the bolt head. Drilling several small pilots will likely just create a mangled mess, and then larger bits will just walk all over the mess instead of cutting metal where you want.

But I'd be surprised if you had to resort to that, given others' apparent success with the vise grip method.

I worded that a little goofy. I didn't mean several small pilots but start with a center punch then 1/8 in drill followed by 1/4 followed by 3/8 etc to get to 7/16 and try to pop the bolt head off with a large punch. I'm worried that the larger drill bit may have a tendency to grab and turn the bolt.
Wondering if It may be better to drill an 1/8 inch pilot hole and go straight to the 7/16.
 
Right Vise Grips...

Remember you can get Vise Grips with curved jaws instead of flat jaws. Ask around. Be sure the jaws are sharp. If the assembly is spinning, the bolt is not that tight. Threads may be the problem. Use WD40 or liquid wrench a bit before trying.

:eek:
 
I worded that a little goofy. I didn't mean several small pilots but start with a center punch then 1/8 in drill followed by 1/4 followed by 3/8 etc to get to 7/16 and try to pop the bolt head off with a large punch. I'm worried that the larger drill bit may have a tendency to grab and turn the bolt.
Wondering if It may be better to drill an 1/8 inch pilot hole and go straight to the 7/16.

Ahh, sorry for the misunderstanding. I thought you were considering trying the swiss cheese route. :D
 
Bushing

I would go with vise grips if you dont have the right size vise grips go and get them then heat the bolt a little to release Loctite and remove.Also take a look at Lycoming SI 1098h for a slightly larger bushing or reinstall with Loctite Bearing Retainer.
Bob
 
Time for a BEER!

long story short, vise grips were a no go. I was hopeful for the impact but even at 50 PSI the bushing just spun.

Turns out the bolts have a great starting point for drilling...
D82690F4-28A9-4673-91F3-90F98F087D35_zpsmlhql8ye.jpg


The bolt started spinning after the first hole, I used the flat end of a couple hole finders to hold the bolt head. I do have to dress out some nicks in the spacer from this.
4C8E2B7F-DACB-43BB-9C6A-8AB2C69BE7D2_zpsalcabybu.jpg


I started with almost new sharp bits mostly odd sizes because I never use them. I was able to keep the 7/64 and 5/16 holes very close to the center using the reflection in he bolt head. I used a 15/32 to give me some wiggle room as I couldn't see the reflection and was harder to keep straight. Unfortunately it left too much material, I inserted a sanded down hitch-pin into the hole in the bolt head and hit it at 90* as hard as I dared with a small hammer with no luck. You can see the hole is a little off.
7B1FC3AD-A16A-4524-8295-E70171A6FC97_zpsluqab7qr.jpg


I had a used once 17/32 drill bit that did the trick, it wasn't perfectly on center but did the trick. I did this over 3 different sessions and I took my time, I don't think I messed anything up. Like Sam at Saber said the washer gave me enough fudge factor, I can't believe it was enough!
DA35CF1E-A287-41DD-822D-E0EFAEF1F859_zpsykfhnqsl.jpg
 
Prop flange hole looks OK.
AD1C1546-B919-4997-A24A-7B6FDBB8AD56_zpsmlqlxcha.jpg


The bushing has some scratches from spinning, best I can tell the bushing and the crank flange hole are both .747 inch. There are some sharpie markings on this bushing.
CB1A4248-0EED-4F15-949D-4EBC2F86B461_zpsazex2odl.jpg

FA9816AF-CC33-4242-B4AA-5C54572DB2C6_zpsfwwjihc4.jpg


I pulled the prop because a scratch from my cone incident at OSH started to open up when prodded. I pulled the spacer because I recently started finding a new oil splatter on the lower right side of the cowling. The oil spatter (it wasn't much, just new) was underneath the right side baffling and collected on the engine mount and left a quarter size spot after 3-4 hours on the lower aft cowling. I suspected my oil drain back tubes and the main crank seal. It didn't appear to be the draw back tubes and now that the spacer is off the crank to case seal looks good. The crank plug on the other hand shows plenty of oil leakage. I'm gonna have to research this some more.
04C6325E-F7EA-40E6-9C0B-2F243EA42DEF_zps8jwzjtnk.jpg

B135DCF2-EEF3-40B1-AC97-49B3DC1D2D94_zpsyt5gdrae.jpg
 
Andy, nice job on the removal, what is that stuff in the threads of the inserts? They should be clean.

i would expect to see sealant on the perimeter of that plug.
 
Last edited:
Andy, nice job on the removal, what is that stuff in the threads of the inserts? They should be clean.

i would expect to see sealant on the perimeter of that plug.

Good job Andy! The stuff in the threads is likely a sort of wax that comes on the Bolts that Saber provides. Mine have a similar waxy substance.
 
Thanks Bill and Kurt, I believe the waxy stuff is the loctite substance Saber Manufacturing puts on the bolts. I couldn't believe how much residue was left in the prop flange threads.
As far as no sealant around the inside crank plug l don't know, I'm looking into it.
Thanks Gil for the lead on the new bushing!
 
....
Thanks Gil for the lead on the new bushing!

When you know the part number you need, try calling a few engine shops for a used bushing.

When they scrap crankshafts they usually remove the bushings so they have a lot lying around... :)
 
Wax??

My adapter bolts are dry and I called Sam (at Saber) to discuss the torque, he did not mention any coating, just clean oiled threads for the torque. You might want to double check with Sam on this. I am thinking the threads either have a clean/dry spec, or clean-light oil torque specified. The details are very important.

I am wondering if this is just a preservative.
 
Bill, as usual I think you are correct with the wax. From the FAQ page of their website:
24735328-36D1-4BD8-A845-D5A7E8D24C7D_zpsd94gxvvz.png


I'll have to dig around and find the instructions that came with my spacer, I followed them exactly.
 
Crank Plug

It appears that the crank plug was not installed properly. It appears that the plug did not expand adequately, possibly a result of not using a large enough diameter punch and or not striking it hard enough. The punch should be relatively large diameter and should have a very slight radius on the end.
Any automotive engine rebuilding shop should have a proper punch, the plugs are very similar to the freeze plugs used in auto engine blocks.

A late reply, but for the archives.

I've seen the ball end of a ball peen hammer used as a good punch substitute.

ball_peen_hammer.jpg


I think keeping the spot hit centered in the plug is probably as important as the rounded tool bit...
 
Back
Top