What's new
Van's Air Force

Don't miss anything! Register now for full access to the definitive RV support community.

Tip: Installing wing bolts

Webb

Well Known Member
Sponsor
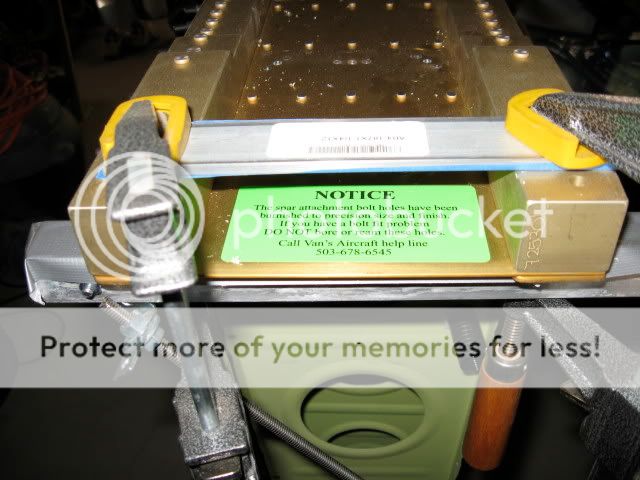
I've been through the threads and here is what I've gathered about installing the wing bolts. Considering my target date is Oct 11th (will have to record all those SEC football games), I'm hoping for the best and expecting the worst and probably will get something in between.

It's a pain, tight fit, worthy of a sailor's tongue, but can be made more bearable.

1 - Bolts need to be cold. Freezer or dry ice to shrink them ever so slightly.
2 - Shaft of the bolt needs lubrication. Do not get on threads.
3 - Top drives easier than bottom.
4 - Do not push through very far, esp on the bottom so you can get the nut on.
5 - Rivet gun is a miracle worker for the bottom bolts.
6 - Super glue and popcycle stick makes a pretty fair nut holder till it starts.
7 - Magnet on a stick is your friend for those escapees.
8 - A slight wiggling of the wing is most helpful. Don't raise too much unless you want to repair the skin.
9 - Beer, lots of it for you and the help.
10 - Learn new cuss words, they help maintain sanity.
11 - Be prepared to set the world record on how long it can take to install a bolt and nut.
12 - An air rachet is helpful for getting most of it done, then your torque wrench.
13 - Don't forget the 2 smaller bolts on each wing.
14 - Tighten from the outboard side to the centerline.
15 - Look at the plans CAREFULLY and make sure you put the washers on the correct side. It is different depending on the bolt location.
16 - Other idiots besides yourself have been able to do this. Use their lessons above so you won't feel like one.

Have I missed anything?
 
You will need to use drift pins. Hardware store bolts with the threads ground off will do the trick. It sounds like you're putting them on for good but, if not, there's no reason to use the NAS bolts. Good luck.
 
wing attach

So, how many times will we have to re and re the wings? Once in the shop to set up control rods, final set up of fuel lines, final electrical? Then once at the airport?
 
Hold off on the beer until the job is done...the warnog makes the job seem like it is going well when it may not be...
I used some wood dowels with rounded nose as starters an just let them serve as "pathfinders" for the bolts that follow them through. Just push out the dowels with the bolts.
 
Drift Pins

You will need to use drift pins. Hardware store bolts with the threads ground off will do the trick. It sounds like you're putting them on for good but, if not, there's no reason to use the NAS bolts. Good luck.

Didn't put the drift pins on the list! I forgot to take them to the airport. It is the last time - can I get an AMEN!!

It's due to come out of the paint shop late next week. Wings are getting shot today but he want's to keep them hanging for a few days until back in craddle for transport. Doesn't want to risk a mark in the paint.

I might look at the wooden dowel ideal. I have a punch that was a tremendous help for getting the holes lined up. It is just a few thousands small and gave me something that I was able to joggle the holes to get alligned and get the test bolts in when I was fitting. Technically, it was what I used for my drift pin. Once I got one test bolt in, the rest just fell into place.

On the beer - there might be one coldie slipped in on the way. However, the bulk is for the victory dance.

As far as the re re the wings, mine was 1 fit and remove. I'm going from memory right now but I don't recall anything penitrating the spar that would interfer with the area of attachment. If I recall correctly, the holes for passage of wires is just inboard and shouldn't interferr. I also don't recall any holes in the wing spare like that either.
 
Yes......

.

.........Have I missed anything?
You mentioned an air ratchet....

....Don't turn the bolts if you can get to the nut. Aircraft practice is to turn the nut because rotating a bolt can scratch it and cause stress risers down the road.

Regards,
 
Add wood blocks (oak) to protect things when banging on them with the rivet gun.

I would also bring a 3 lb sledge hammer, just in case.

Wood dowels work to punch out the "drift pins". Then again, put these in backwards and drive them out with the final bolts.

PS. Don't forget the four AN4-13A bolts you need for the spars, two on each side. Read this thread for details.
 
Last edited:
and

1. You will need 1 cheapo bolt or drift pin per side. This will give the wing something to pivot around when you put in the first NAS bolt.
2. I used 1/4" and 3/8" drive air ratchets.
3. I didn't bother with the frozen bolt. Verify the NAS bolts go through the center section and the wing spar BEFORE you fit the wings.
4. I've a -9A. A large screwdriver wedged below/between the nut and the gear leg weldment keeps the nut from turning. 'Cause ain't no way you're gonna get a socket / standard wrench on those outboard nuts when you torque them.
5. Driving/tapping with the yellow/red plastic hammer should be all you need to get the bolts through. If you're reaching for the 10 pound mallet, there's something wrong.

Steve
 
Need a ground-down wrench...

You mentioned an air ratchet....
....Don't turn the bolts if you can get to the nut. Aircraft practice is to turn the nut because rotating a bolt can scratch it and cause stress risers down the road.
Regards,
All of the angst is over the lower bolts where it's tough to even see the nuts, and you need a ground-down open end wrench to even hold them. Turning those nuts would require violating a few laws of physics...

I didn't see the ground-down wrench on the list of tools :eek:

If you haven't done so yet, be sure to insert the NAS bolts in all of the holes prior to assembly. Sometimes the anodizing inside the holes needs to be polished away a bit.
 
From the sound of it

It sounds like this is one of those moments in a builder's like that may try a man's soul!! I'm not really worried about it, just a bit apprehensive.

Lots of good tips here. Now all I really need are some experienced wing putter oners that want to show me how it's done. Did I ever tell you the story about Tom Sawyer..........
 
You mentioned an air ratchet....

....Don't turn the bolts if you can get to the nut. Aircraft practice is to turn the nut because rotating a bolt can scratch it and cause stress risers down the road.

Regards,

Point well taken. Best I can gather, if you look at DWG11, it shows washers on the lower bolt head side and that is so you can turn the bolt head and not the nut so you won't gall the spar under the bolt head.

Your thoughts?
 
I don't think.....

....that the washers are there for that reason, Webb. You don't want a bunch of extra threads sticking out the other side. The bolts can get galled by rotating inside the attach fittings, is what I meant. I looked at drawing 11 and also the -7A that's being built here. Looks like it might take a ground down socket to get on the nuts of the 8 larger bolts. By all means rotate the bolts if you positively cannot turn the nuts.

Regards,
 
Dry Ice Technique

I might have missed it but I didn't see Dry Ice being mentioned anywhere in the posts. We used this technique on my dad's RV-7A when installing the wings for the final time at the airport. Put them in the freezer the night before and then took them to the airport on ice in a cooler. At the airport put at least 90% pure alcohol into a coffee can and added dry ice. The temp. drops to -109.3 degrees F and dropped the bolts in one at a time for a few minutes and installed...slid in with little fuss at all...no cussing required. :)

Doug Lomheim
90116
OK City, OK
 
On the same page

....that the washers are there for that reason, Webb. You don't want a bunch of extra threads sticking out the other side. The bolts can get galled by rotating inside the attach fittings, is what I meant. I looked at drawing 11 and also the -7A that's being built here. Looks like it might take a ground down socket to get on the nuts of the 8 larger bolts. By all means rotate the bolts if you positively cannot turn the nuts.

Regards,

Pierre - We're on the same page. I'm just gearing up for the big day!!!
 
Boelube.....

....is great stuff, Webb. After it dries, it remains kinda waxy and even assists in getting screws in and out of nutplates. We used it on our spar bolts as well........yeah, a great day when the wings go on!

Regards,
 
The lower nuts are a whole lot easier to install if you use MS21042 nuts (available from ACS) instead of the Vans supplied ones.

Fin
9A
 
Got some

....is great stuff, Webb. After it dries, it remains kinda waxy and even assists in getting screws in and out of nutplates. We used it on our spar bolts as well........yeah, a great day when the wings go on!

Regards,

Got Beolube, got light machine oil, got fuel lube, got WD40, got motor oil, got grease, got lithium grease......only thing I haven't got is which one!!!!

Serioiusly, after what I've read, I'm not sure it makes a difference as long as you keep it off the threads.

Interesting about the MS21042 stop nuts.
 
Regarding my post #16 about MS21042 nuts. If you use these nuts on the lower bolts then think a bit first before doing them up with a ring spanner (wrench). I can recall that on one of the nuts I used a ring spanner to hold the nut while turning the bolt and was unable to remove the spanner once the bolt had protruded through the nut due to interference with the main gear weldment. I ended up having to undo it and then using an open ender instead. :eek:

Fin
9A
 
Whoops

Regarding my post #16 about MS21042 nuts. If you use these nuts on the lower bolts then think a bit first before doing them up with a ring spanner (wrench). I can recall that on one of the nuts I used a ring spanner to hold the nut while turning the bolt and was unable to remove the spanner once the bolt had protruded through the nut due to interference with the main gear weldment. I ended up having to undo it and then using an open ender instead. :eek:

Fin
9A

Ouch - thanks for the heads up. If not the best tip - best word of warnnig.
 
Bottom Wing Bolts

Has anyone ever tried to put the bottom wing bolt nut that is in the corner just behind the row of 5 bolts that are along the landing gear mount, with those 5 AN3 bolts removed? I was looking at the this the other night and thought that it could perhaps make getting that one bottom nut tighten a little easier. Of course putting those 5 bolts back in with the wing on may not be a piece of cake either.....

Just curious.

Paul
 
Reaming out the holes?

I ran into a guy (can't remember his name) at Sun n Fun last April who I struck up a conversation with about wing mounting, etc. When I complained to him about how tight the fit on the bolts were he gave me a "tip", which I haven't tried yet and want to know your take on it. Although I can't remember which model he was building he said he used a 7/16" drill bit to ever so slightly ream the bigger holes to ease the installation and de-installation of the large spar bolts. He indicated a nice tight fit yet but didn't have to hammer them in and out. He's flying and says things are fine. Thoughts?
 
I ran into a guy (can't remember his name) at Sun n Fun last April who I struck up a conversation with about wing mounting, etc. When I complained to him about how tight the fit on the bolts were he gave me a "tip", which I haven't tried yet and want to know your take on it. Although I can't remember which model he was building he said he used a 7/16" drill bit to ever so slightly ream the bigger holes to ease the installation and de-installation of the large spar bolts. He indicated a nice tight fit yet but didn't have to hammer them in and out. He's flying and says things are fine. Thoughts?

that would be a worst case scenario..you shouldnt have to ream the holes on the phlogiston spars. (factory mmade) but i imagine there may be a need occasionally. Even then i would'nt use a drill bit i would use a reamer.
 
Well My RV-6A book says it's OK to ream

"The Book" says it is OK to ream holes to proper size if all of the other techniques fail to get a bolt in. I used a good plastic mallet, lubricant, tools made by grinding points and flats on sacrificial bolts and I got them in. In some cases I spent hours on a single bolt. It was a tremendously difficult task although it was completely offset by the elation experienced when the first indication of movement into the hole was sensed. As I recall there are over 60 of these in the RV-6A tying wing spar, fuselage, steel splice plates and main landing gear mounts together. My final assembly hangar mate Ken Knowles used the proper sized reamer and did not get to share the exhilaration of accomplishment - it was just another assembly job requiring the right tools to this tremendously experienced builder.

Bob Axsom
 
Did this yesterday

RV-9 wings went on last night - final assembly (we hope!) A little grease and a bigger hammer!

MUUUUUUCH easier than Taylorcraft wings / struts. We walked away thinking - is that it?
 
Wing bolts in

I pray that I never have to remove the bottom 2 large bolts. The 1/4 inchers were not bad, neither were the top, but the bottom 2 big ones on each side.....I have words for those that are unprintable.

Quite frankly, I'm not sure how to get them out if I had to remove. I ended up using a rivet gun to drive them in.

As far as lubing up. Spray some WD40 in the hole and grease the bolts up. I learned a bit too late and only managed this on the smaller bottom bolts and they turned so easy compared to the others.

So here's the question. How does one get a bolt like that out? One thought I had was to weld something on top and use a hydraulic jack or an impact hammer.
 
Yes, the -6's had an order option for the fancy spar. You could either fabricate / assemble the spar yourself, or get the anodized / assembled version for more $$. I don't remember if the assembled one w/o the anodizing was an option.

I also had some initial difficulty installing the bolts in the -6A. But I quickly learned that I needed to install the large close tolerance bolts FIRST, followed by the smaller close tolerance bolts, and finally the AN series of bolts.

While doing this, I used large C-clamps ( yes, use pads to prevent marring the Al) to compress the sandwich of aluminum and steel plates and multiple spar strips together. This compression prevented the individual pieces from expanding apart, and this allowed the bolts to be taped in...with a hammer, yes...but they were really just gentile taps. All in all, it took 10 guys two hours to lift the a/c, insert the wings, get all the splice plates, gear mounts, and all the bolts installed on the a/c. I spent the next 8 hours going back over the install, checking bolt lengths, changing to longer bolts where required, nut torque, and general QA work.
 
I don't know about reaming the holes.
IMG_0274.jpg
 
Dry ice and brittle fracture

I might have missed it but I didn't see Dry Ice being mentioned anywhere in the posts. We used this technique on my dad's RV-7A when installing the wings for the final time at the airport. Put them in the freezer the night before and then took them to the airport on ice in a cooler. At the airport put at least 90% pure alcohol into a coffee can and added dry ice. The temp. drops to -109.3 degrees F and dropped the bolts in one at a time for a few minutes and installed...slid in with little fuss at all...no cussing required. :)

Doug Lomheim
90116
OK City, OK

YIPES!! Be darn careful not to torque these until they've reached "room temp". Don't know what the brittle fracture temp for these bolts would be, but I wouldn't want to be "testing" the limits of stressing these until they have warmed back up!!
 
Bolt length

Gang, I'm trying to set or equal the record for the longest-running RV-6A project in my area :rolleyes:. Consequently, my wings were completed many many years ago and I don't seem to have all of the AN3 wing bolts I'm supposed to have (52). Luckily, I still have all my close-tolerance bolts. Drawing 15 mentions the bolt size (AN3), but doesn't mention the grip length. Is there any reliable way to determine what lengths I will need? I'm assuming some will need to be a bit longer because of the gear clusters.

Thanks.

Jim
 
....... Is there any reliable way to determine what lengths I will need?......
Jim,

The easiest way to determine any bolt grip length "on the fly" is to simply tape over one end of a spar hole. Then insert a pencil or a dowel through the spar (and any other part such as a weldment) until it stops at the tape. Then mark or notch the opposite end of the dowel flush with the spar surface. This mark will give you an indication of the total length through the material. Now remove the freshly marked dowel and place it alongside an AN bolt comparing its marked "grip length" with that of an AN bolt minus its bolt head and the threads. This will get you in the ballpark without knowing in advance the precise length bolt needed.
 
Back
Top