What's new
Van's Air Force

Don't miss anything! Register now for full access to the definitive RV support community.

Empennage Fairing Attachment

flickroll

Well Known Member
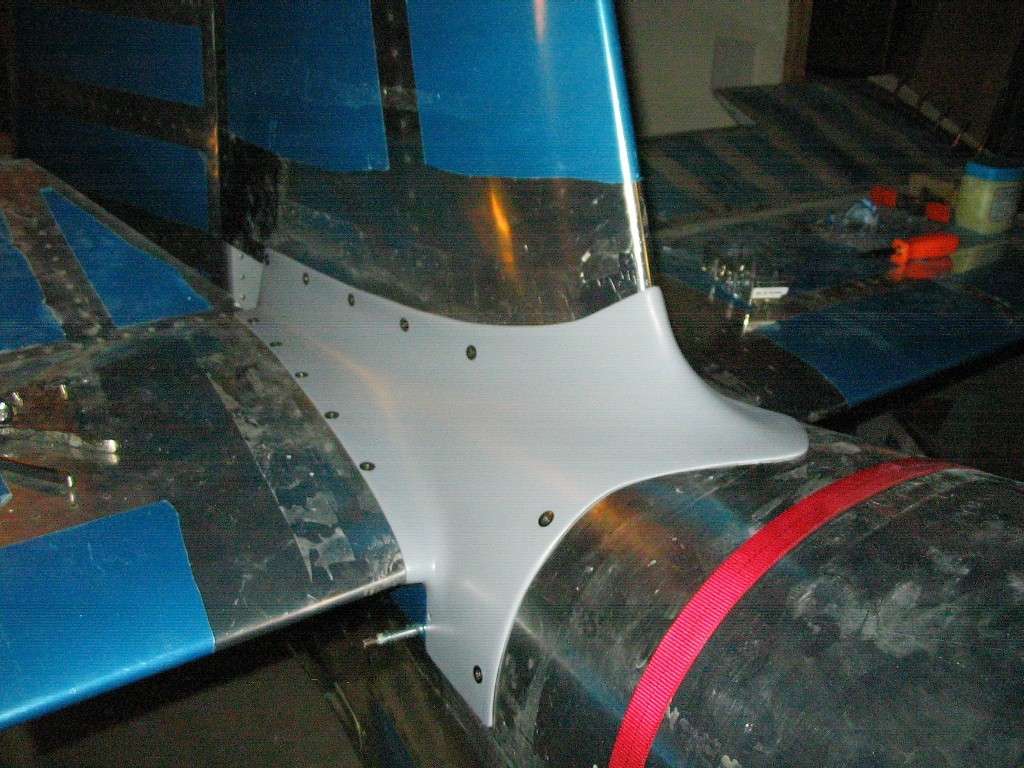
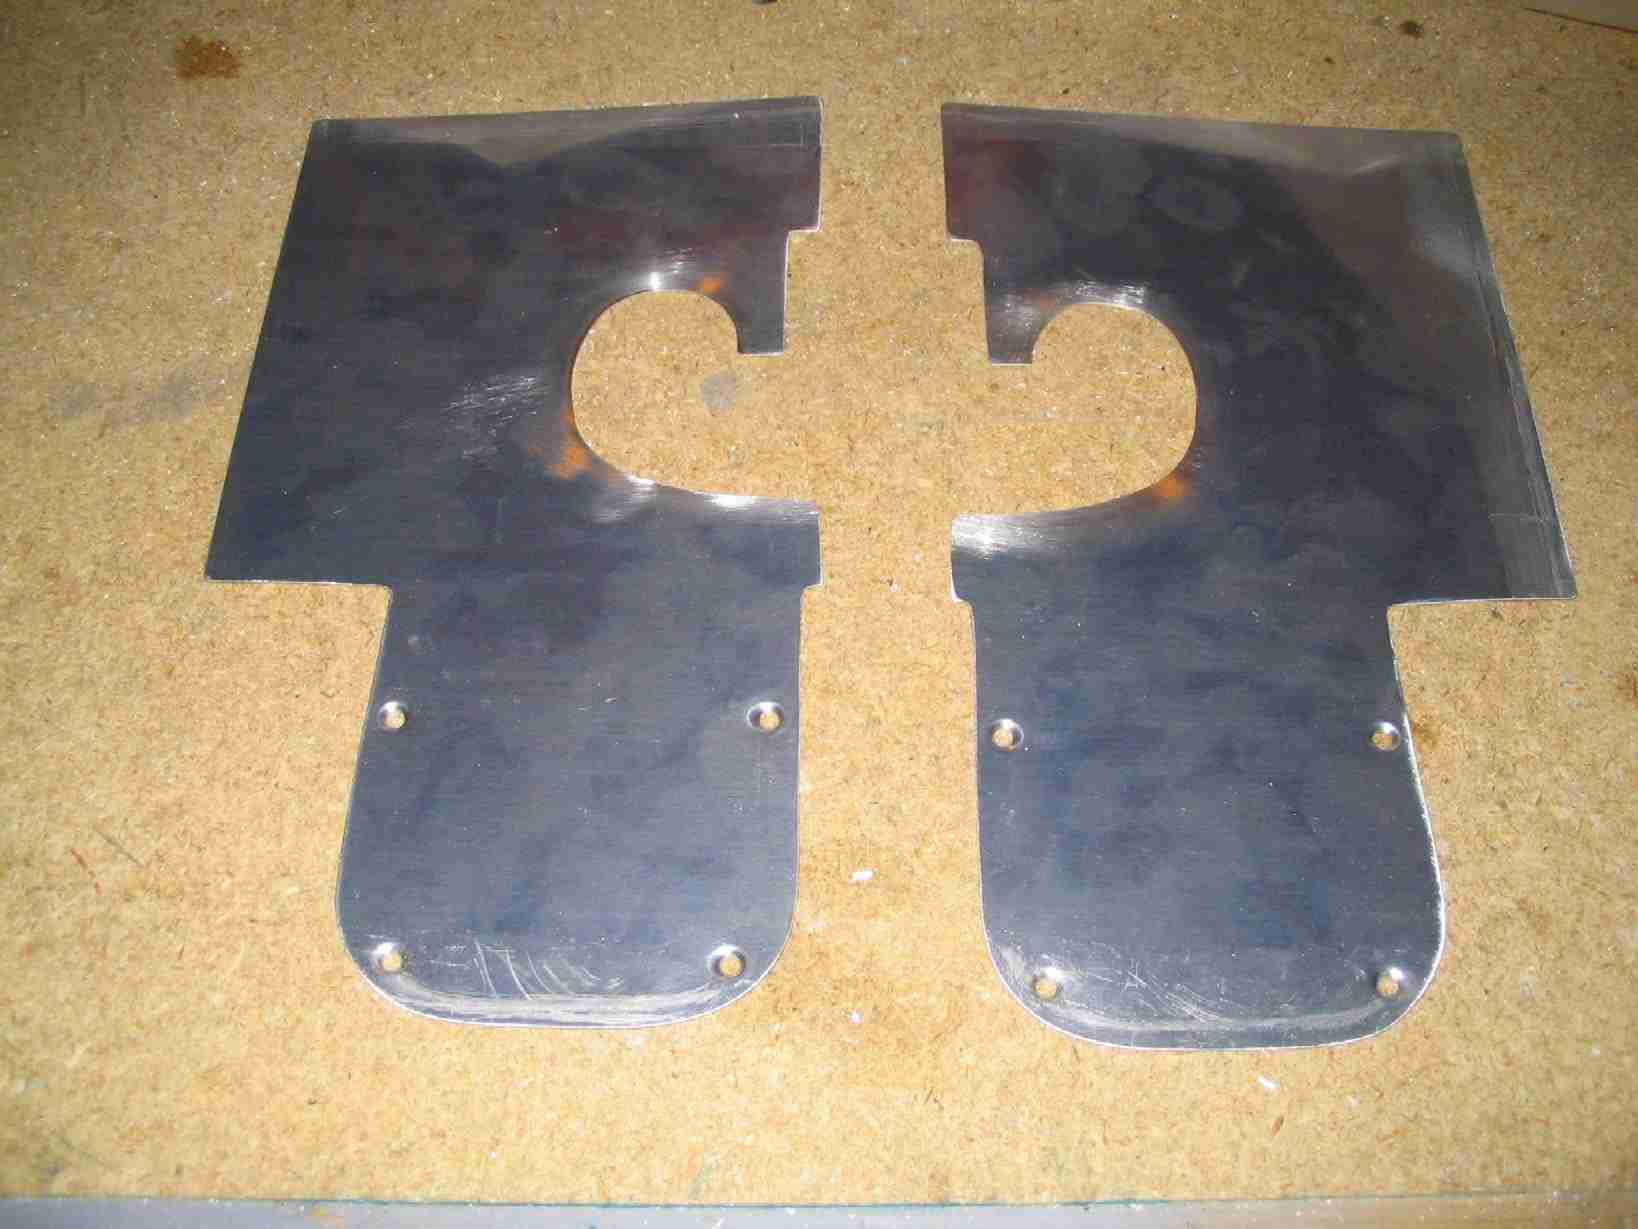
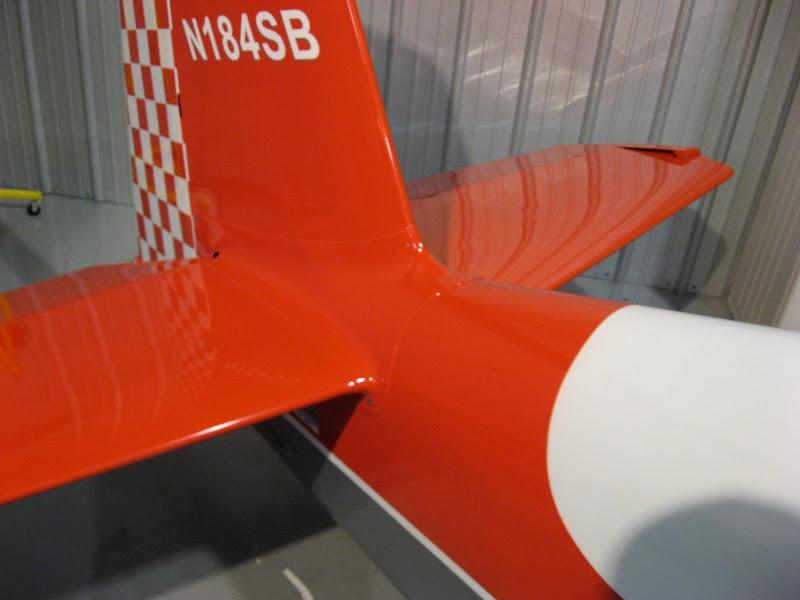
Last summer at Oshkosh I looked at a large number of RV's and noticed that the ones that had the best looking empennage fairings used very few screws to attach them to the airplane. Typically 3 screws on the forward part that screws to the turtledeck, and just one each on either side of the VS at the aft end, for a total of 5. Some guys used 7, with an additional screw of each side of the HS, at the aft end. Particularly with dark paint when using a lot of screws, that seems to cause the fairing to warp a little as a result of the sun heating it up. So my plan is to use as few screws as possible. For those that have used the 'few screws method', what has been your long term experience? Any issues to be aware of? The fairing that I have is a newer Van's fairing (just bought it) that appears to be epoxy, in other words, no gel coat. I also have a Fairings Etc fairing, but there seems to be little difference in the fit between that one and the Van's fairing, and my fuselage is already drilled and nut plated for a Van's fairing, so I'll probably use the Van's fairing and sell the FE fairing. Thanks
 
Jim, Way back when the earth was still cooling, the tail fairings that Van sent were terrible. We had to cut and rebuild to get it even close. Mine has been on for 16 years with 5 screws total (none in the stabilizers). It still fits and looks good today.
 
......the ones that had the best looking empennage fairings used very few screws to attach.......
Your observation is quite correct. A sure sign of an ill-fitting empennage fairing is when the builder elects to install one right out of the box and then has to use screws every few inches to work out the gaps.

Reworking the empennnage fairing to achieve a true custom fit is no big deal. Really. This particular task has been given a bad rap and simply need not be the case. Taking the proper steps in a logical order, you will spend more time in airframe prep work and waiting for epoxy to set than physically working on the fairing itself. In the end, the payoff will be fewer fasteners. An aircraft restorer I once knew was fond of telling his customers "Beauty costs. How pretty do you want it?" Since you are the builder AND the customer, it is up to you to decide how much a time investment (2-6 hours?) you are willing to put forth towards making YOUR empennage fairing fit a little or even a lot better.

This is a recent photo of the empennage fairing fitted to my -6A. It has been in operational service since 2005. Granted, though no fasteners were needed along the upper edge, it does contain more fasteners than some works of art crafted by builders more skilled than I. Still, you be the judge if it fits well enough or not.

jax3f5.jpg
 
I am quite certain that I have more fasteners in my fairing than I need - but of course, I didn't really know that until I started flying my RV to fly-ins where I saw other guy's work. If the VAF forums can help others avoid extra screws - that's great!

If the fairing fits nicely (not hard, as Rick pointed out), it's easy to get by with few screws. Heck, my wingtip light covers only have two screws each, and they stay on just fine!

Paul
 
Reworking the empennnage fairing to achieve a true custom fit is no big deal. Really. This particular task has been given a bad rap and simply need not be the case. Taking the proper steps in a logical order, you will spend more time in airframe prep work and waiting for epoxy to set than physically working on the fairing itself.
jax3f5.jpg

Rick -

Yesterday I started fitting my new Van's fairing on my -8. The left side fits nicely as is and all the remains on that side is to apply a slurry of epoxy/micro to seal the gap between the fairing and the VS/HS. The right side is a different story. It will take a LOT of micro to seal that side and that will not look right. Can one apply some heat to the fairing to soften it and help shape it? I am not very experienced with glass work, so my question is what did you do to make your fit so nicely? It really looks great. One other question, is there a screw on the VS at the aft end? I suspect there is but cannot tell from the picture. Thanks
 
6?

think I used 6 total, not certain. 70 hours- - not really long term assessment, but it hasn't departed the plane yet. fairings, etc. great fit.
 
I guess I'm the odd man...

.....out, because I have screws and nutplates every 5 inches, like most fast airplanes do. I don't know why some folks are so put off by having to have screws anyway. I'd bet with no screws on the fin the fairings bulge outward from lift near 200 MPH.

DSCN0305.jpg


Regards,
 
.....out, because I have screws and nutplates every 5 inches, like most fast airplanes do. I don't know why some folks are so put off by having to have screws anyway. I'd bet with no screws on the fin the fairings bulge outward from lift near 200 MPH.

Metal airplanes are SUPPOSE to have screws. Only plastic airplanes don't! :D

Besides we need more screws on the wing tips anyway, so what's a few more in the back? :)

L.Adamson --- RV6A
 
Go fast on the ground

Just a personal preference Pierre. That's what makes our airplanes so special....a lot of personality in each. Your fairing looks fantastic.

Some people want their planes to look like they are going fast on the ground!
I have seen some very speedy looking planes at Oshkosh!!! :rolleyes:

and Pierre......nice looking fairing there.......I love RED too. What screws?? :D
 
Whatever Van's called for

Is what I did; however...

Here is a picture of the front of my fairing


I didn't like the way the fiberglass wrapped around the back so I made these:

If you turn them upside down, they kind of look like Marge Simpson.

And here is where they go:

The fiberglass is cut off and only picks up one screw in the top of the aluminum fairing.
 
Last edited:
Rick -

Yesterday I started fitting my new Van's fairing on my -8.....It will take a LOT of micro to seal that side and that will not look right. Can one apply some heat to the fairing to soften it and help shape it?....One other question, is there a screw on the VS at the aft end? I suspect there is but cannot tell from the picture. Thanks
Jim,

I never had much luck shaping 'glass with a heat gun and yes, as you suspect there is a screw attaching the fairing at the aft end. I am no expert working with fiberglass. I know just enough to "get by." Others on this forum are far more skilled working with it than I am. Still, when a fellow builder recently asked me to help with his ill-fitting -6A empennage fairing, I felt I knew enough to get him into the ballpark. The first picture does not begin to show how bad that fairing initially fit. No big deal. The first thing I did was cut away the hopelessly warped sections of the fairing located on the leading edge. Then I added multiple layers of cloth to conform to the airframe. Clear packing tape was the only "parting agent" I used. If a gap was too large to fill with a slurry of microballoons such as was the case with this fairing, I simply added multiple layers of cloth. Later, it was all sanded down to a more or less uniform thickness anyway so the severity of the gap didn't matter much. The time investment was a few short dedicated work sessions spread out over a few days.

98x7rb.jpg


I did my own -8 empennage fairing the same way but added this small difference.

By adding layers of cloth to the fairing, it also serves to cover the gap underneath the horizontal stab. I used modeling clay stuffed and molded to shape in the local area and when the epoxy set up the empennage fairing was popped loose and sanded to final shape. As I mentioned in the previous post, more time was taken preparing (and then removing the clay) from the airframe than physically working on the empennage fairing itself.

30kyvma.jpg
 
When I make a tail faring I have two goals. Number one is that it must fit well without any gaps and number two is that it must be easily removable for inspections.
To accomplish a good fit I almost always make a new faring from scratch. To make removal easy I make the faring in three pieces. The first piece is the main faring and the other two small pieces are for the rear area aft of the main horizontal stab, HS.
The main part is held on by only four screws on the aft end. The forward part of the faring is held in place by making a “hook of glass” that goes around the forward part of the HS. This faring has been on the airplane for three years and there are no gaps.
The smaller aft pieces are easily fabricated from metal as there are no compound curves in this area. Four screws hold each aft cover in place. This makes inspection of the main elevator centre attach bolt very easy as just one small cover needs to be removed for a quick look.
Building it in pieces like this not only makes removal, and fabrication, easier but you are much less likely to scratch paint during removal. Anything that makes a faring like this difficult to remove provides an excuse to not perform regular inspections of this critical area.

 
Last edited:
Well, on my second iteration of fitting the empennage fairing (yes I bought two) I finally got it right. The epoxy fairing from Vans is pretty good quality.....however it does not fit my airplane worth a hoot. So out came the cutoff wheel and I sliced and I diced and I cut... On the left side two slits, one of which completely cut off the horizontal flange about an inch up from the HS. The right side the same cut for the horizontal flange as for the left, plus two other cuts. Then I used flox with peel ply (and LOTS of packing tape) to SORT OF hold all together while the flox set up. Then I gingerly removed the fairing and ground off the excess hardened spooge (great term Dan H) with a dremel, then reapplied MORE flox and used MORE packing tape until I had it fairly rigid. Then started applying 3.16 oz. cloth on the exterior w/peel ply. Then after it set the same on the inside. Kept working it like this and today, finally, I have a fairing that fits like a glove. I didn't take any pictures cuz I didn't want to coat my camera with epoxy :D

It is held in place by 7 screws, 3 on the front of the fairing, and at the aft end one L&R on both the HS and VS. Took a fair of epoxy/micro plus a LOT of hand sanding (elbow grease) to smooth it up, but it looks really good. I used a tip from Dan H on sanding forms...Dan uses various sizes of PVC water pipe wrapped in sandpaper to sand the inside curves. I used a variant of this idea and bought several PVC water pipe tees of various sizes. The tee portion is a good handle to hold the 'sander' while sanding. I hope to shoot some primer (K36) tomorrow, and sometime soon I'll post a picture. Thanks to everyone on VAF who has given me excellent advice on fiberglass work. This chore is not my favorite, but it certainly is rewarding when the piece turns out nice.
 
Last edited:
Empennage fairing

My preference is less screws. It's a lot of work, though.

2874174.htm
 
Last edited:
Those all look really nice.

How does one go about getting a perfectly uniform rounded (almost half of a teardrop shaped) edge?

My guess is that you trim the edges of the fairing back from a 90 degree cut to a 45 degree (or so) angle to maximize surface. Then apply some Micro Balloons and sand.

Is that pretty much the process? If so, how well do the balloons adhere? Do they eventually chip off?

Phil
 
Okay,

getting ready to fit the empennage fairing. YIKES! Stock fairing is not even close. Is this about what other builders faced? The RH side lays pretty well against the VS, but the left side would need a screw every inch. Looks like I will have to cut-off the VS flange and lay up a new one? I guess I expected this, but it seems that there must be a better way for Van's to make these.

21m96oh.jpg
[/IMG]
 
If you chose the minimal screws route (I have), it may pay to install some 1" tape at the fairing/fin join to prevent any water getting inside if you ever have to leave the airplane outside. This is about the only time its useful to have a white airplane!

Pete
 
I'm one of the 'few screws' guys. I don't think you need all those screws. Pierre, I'll take that bet. I think mine would stay in place if I forgot to put the screws in. If it was lifting off the surface in flight, it would eventually get a little loose. You still can't get a finger nail under the edge of my fairing. Mine started out as a Van's issue RV-8 tail fairing. I have a fastback and had to modify it to fit - to a greater extent than usual. My leading edge wraps around the horizontal stab and fits so tight, I don't think it would move without the screws. If you put in a lot of screws, you'll get bulges. It probably won't slow you down any, but if you want a cusom look, this is one small way to achieve a measure of it without too much work. The fact that you're asking about it makes me think you notice and will probably try to make it look as good as you can. I wish you luck. Fiberglass is a trial and error thing that is easy to fix with a grinder, sandpaper, and more glass if you don't like the look.

TailFairing


Scott
RV-8 FB
 
Looks like I've forgotten how to attach photos.... again... it's much more difficult than actually making a tail fairing.....

Tried again... no joy. This is way too difficult.....

S
 
Last edited:
Old style empennage fairings

Jim, Way back when the earth was still cooling, the tail fairings that Van sent were terrible. We had to cut and rebuild to get it even close. Mine has been on for 16 years with 5 screws total (none in the stabilizers). It still fits and looks good today.

Mel,

I have just started fitting the tail fairings on my RV4 - the old style with gelcoat on - and I am progressing slowly and with little success. I will have to add glass to them so I have have to grind or sand off part of the gelcoat. After reading about the old fairings I was thinking of ordering a set of the new style fairings which obviously fit better. The chance of ending up with good looking fairings is greater. Does it sound like giving up or is it worth while?
 
I want to use screws on my 9, and am still working on the horizontal stab... How did those of you who use screws lay out the pattern that far in advance? Not clear to me where the line of nutplates needs to go.
 
Mike,

I'm in the same spot on my 7. I left the plans-indicated holes open on both my HS and VS. (It was 5 or 6 open holes on each side.)

When I get to the fairing attachment part after the tail is mounted to the fuselage, I'll use as few nutplates as I have to, and then squeeze rivets back into the holes I didn't need.

Hope that helps (and makes sense).
 
im fitting my fairing, which i received in the finish kit just recently. Im getting a maximum of 4/32 gap at the leading edge on both sides of the HS, which becomes flush about 6 inches aft of the leqding edge. no matter how i try to tweak it i cant rid of the gap. i intend to just screw them on but am concerned I will need to add filler. Any suggestions are welcome. keep on keepin on, gary
 
Back
Top