-POSTING RULES

-Advertise in here!
-
Today's Posts
|
Insert Pics
Keep VAF
Going
Donate methods

Point your
camera app here
to donate fast.
|

08-09-2019, 01:11 AM
|
 |
|
|
Join Date: Mar 2008
Location: Ramona, CA
Posts: 2,411
|
|
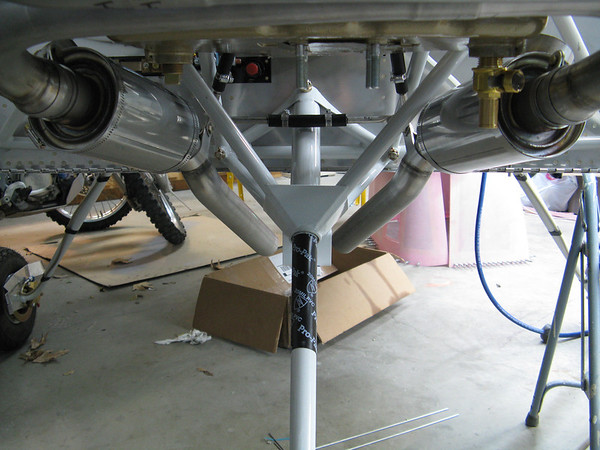
My only concern regarding the new nose gear is that the exhaust hanger attachments run pretty much right through the rubber donut area.
Maybe Vetterman has a solution already for mounting the exhaust with the new nose gear?
|

08-09-2019, 06:54 PM
|
|
|
Join Date: Jan 2016
Location: Southwest
Posts: 1,233
|
|
Fire wall pics
I will be using an IO320, so no facet pump on bottom of firewall. Still would like to know the best place to put the fuel line thru the firewall, since I am working on plumbing the forward fuselage now. Anybody? Bueller? Anyone?
If anyone got good picks of the RV9A firewall I would really appreciate those so I can figure where everything goes thru.
__________________
John S
WARNING! Information presented in this post is my opinion. All users of info have sole responsibility for determining accuracy or suitability for their use.
Dues paid 2021, worth every penny
RV9A- Status:
Tail 98% done
Wings 98% done
Fuselage Kit 98% done
Finishing Kit 35% canopy done for now
Electrical 35% in work
Firewall Forward 5% in work
Fiberglass 0%, thought i was building in metal?
www.pilotjohnsrv9.blogspot.com
|

09-15-2019, 09:32 PM
|
|
|
Join Date: Jan 2016
Location: Southwest
Posts: 1,233
|
|
Fuse Details
__________________
John S
WARNING! Information presented in this post is my opinion. All users of info have sole responsibility for determining accuracy or suitability for their use.
Dues paid 2021, worth every penny
RV9A- Status:
Tail 98% done
Wings 98% done
Fuselage Kit 98% done
Finishing Kit 35% canopy done for now
Electrical 35% in work
Firewall Forward 5% in work
Fiberglass 0%, thought i was building in metal?
www.pilotjohnsrv9.blogspot.com
Last edited by PilotjohnS : 09-21-2019 at 08:18 PM.
|

12-08-2019, 07:53 PM
|
|
|
Join Date: Jan 2016
Location: Southwest
Posts: 1,233
|
|
Fuse progress
It has been a while since I posted; its been a fun summer, not much building thou.
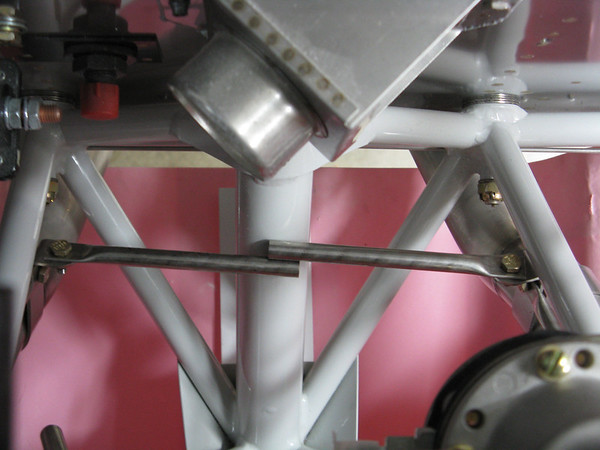
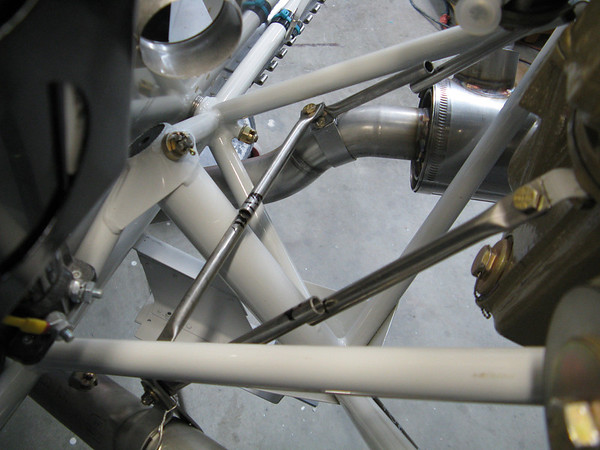
Brakes are in as shown below. Still have a question if I will stay with the plastic, or move towards the AN lines. I guess the first fill tests will determine if there are any leaks. I used the solid stainless rods for the brake pivots. The brakes are very nice with good return force. I have a set of helper springs which I do not plan on installing; the pivot rods worked out so well, I don't see a need for helpers.
I am now installing the tail. The horizontal stab is on. For drilling those AN3 bolts, one really needs a 6" long drill bit.
On the vertical fin, my 90 degree drill attachment died, so I am waiting for the new one to arrive. I could drill without it, but after the experience with the horizontal stab, I would rather wait for the tool to make it easy.
Like most things, I was worried about getting the tail on right. But by taking it slow, it all worked out.
This picture shows much of the progress, tail on, engine in house, new upgraded motor mount, and sponge bob guarding it all.
I haven't decided if my next chapter will be the canopy or engine / electrical; it is pretty cold now, I might save the canopy for the warmer months.
__________________
John S
WARNING! Information presented in this post is my opinion. All users of info have sole responsibility for determining accuracy or suitability for their use.
Dues paid 2021, worth every penny
RV9A- Status:
Tail 98% done
Wings 98% done
Fuselage Kit 98% done
Finishing Kit 35% canopy done for now
Electrical 35% in work
Firewall Forward 5% in work
Fiberglass 0%, thought i was building in metal?
www.pilotjohnsrv9.blogspot.com
|

01-24-2020, 11:19 PM
|
|
|
Join Date: Jan 2016
Location: Southwest
Posts: 1,233
|
|
Quick Fuse Update
So I have been working on the tail fairing now that the tail mechanical attach is done. I figured I would get it done before the tail comes off. The stock fairing fits really nice; much better than older posters have led me to believe. I used the cut lines, but these were too severe in the rear, so next time, I would leave a little extra there and trim, fit, trim, fit, etc. Nothing major for mounting, just takes time to find the underlying holes in the fuse. I measure the location of the holes in the fuse without the fairing; added the fairing, marked the hole locations on the fairing, then drilled a #50, then a 3/32 hole in the fairing, cleco'd and moved on to the next. Next I will enlarge the holes to #40, countersink the fiberglass for the #6 flathead screws, then enlarge the holes to #6, remove the fairing, and install the riv nuts.
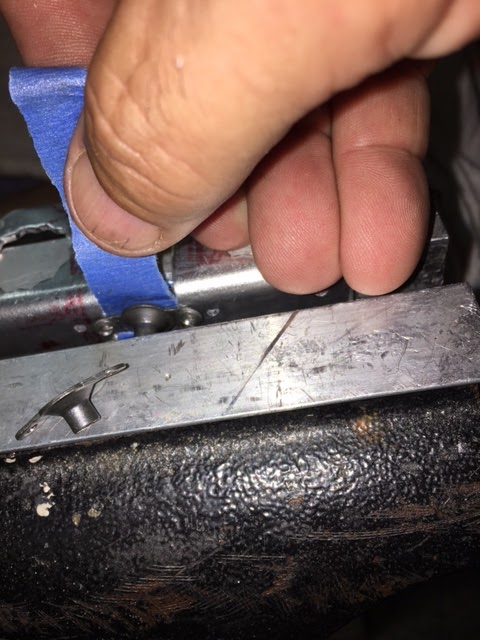
After the tail fairing, I finished the inspection plates for the elevator. I did not dimple the holes for the nut plates when I built the fuse. My squeezer was too big to fit for all the holes. I had to get creative and use some blocks of wood to hold the dimple dies and a large c clamp.
After the tail is done, i will probably build a proper fuse stand; it is getting pretty heavy and I think the saw horses are being over burdened.
__________________
John S
WARNING! Information presented in this post is my opinion. All users of info have sole responsibility for determining accuracy or suitability for their use.
Dues paid 2021, worth every penny
RV9A- Status:
Tail 98% done
Wings 98% done
Fuselage Kit 98% done
Finishing Kit 35% canopy done for now
Electrical 35% in work
Firewall Forward 5% in work
Fiberglass 0%, thought i was building in metal?
www.pilotjohnsrv9.blogspot.com
Last edited by PilotjohnS : 02-02-2020 at 10:25 AM.
|

01-24-2020, 11:39 PM
|
 |
|
|
Join Date: Jul 2016
Location: Worland, Wyoming
Posts: 1,468
|
|
Wow John you dodged a big bullet there!  My gap fairing fit was terrible (had to make my own). Yours looks pretty good though! Have you made any more progress towards getting that exhaust hanger figured out?
__________________
Jereme Carne
PPL
RV-7A Emp. done
Wings done
Fuselage done
Finish kit almost done
Exempt but gladly paying!
|

01-25-2020, 10:24 AM
|
|
|
Join Date: Jan 2016
Location: Southwest
Posts: 1,233
|
|
Plan
So my plan is to finish the tail fairing and tail wiring then move to canopy frame then to firewall forward. I figure by mid march I will be there. By that time I am confident others would have figured it out by then, if they havent already. It is wonderful that others have gone before. I am forever grateful for you and others sharing your wisdom. Thank you.
__________________
John S
WARNING! Information presented in this post is my opinion. All users of info have sole responsibility for determining accuracy or suitability for their use.
Dues paid 2021, worth every penny
RV9A- Status:
Tail 98% done
Wings 98% done
Fuselage Kit 98% done
Finishing Kit 35% canopy done for now
Electrical 35% in work
Firewall Forward 5% in work
Fiberglass 0%, thought i was building in metal?
www.pilotjohnsrv9.blogspot.com
|

01-26-2020, 07:12 PM
|
 |
|
|
Join Date: Jul 2016
Location: Worland, Wyoming
Posts: 1,468
|
|
Quote:
Originally Posted by PilotjohnS
So my plan is to finish the tail fairing and tail wiring then move to canopy frame then to firewall forward. I figure by mid march I will be there. By that time I am confident others would have figured it out by then, if they havent already. It is wonderful that others have gone before. I am forever grateful for you and others sharing your wisdom. Thank you.
|
No problem at all! Glad to see your project is still banging away!
__________________
Jereme Carne
PPL
RV-7A Emp. done
Wings done
Fuselage done
Finish kit almost done
Exempt but gladly paying!
|

02-21-2020, 10:51 PM
|
|
|
Join Date: Jan 2016
Location: Southwest
Posts: 1,233
|
|
Forward fuse top
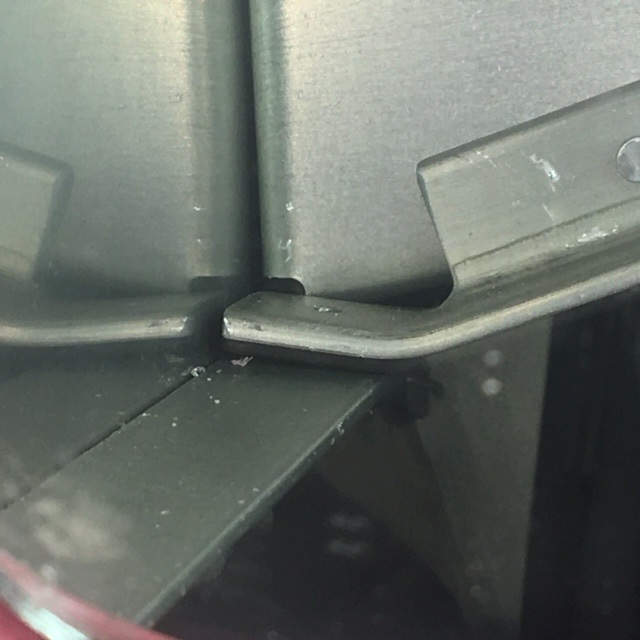
The forward fuselage of my slider is a little tricky.
There is a slight bend in the sub panel near the bottom; without this, the fit is terrible. I marked the bend, used an 18" brake on the outside, and a block of wood clamped to the table for the center section's bend.

.
The center web does not have prepunched holes in either the firewall, nor the web.
There are many ways others have installed this part. Here is what I did:
I first built up the web per the plans. Then I assembled it all together but put the forward skin on one hole back, so I can see to mark the location of the web on the firewall.
I made the holes in the same vertical location as the outside ribs
Then I put the skin on properly, drilled the top hole and clecoed.
I then removed the skin, aligned the rib to be vertical, and drilled the remaining holes.
Unfortunately, the center brace is now no longer sitting on the firewall angle, so I will make a spacer. I had aligned the angle to the web based on a center line drawn on the angle. I probably should have drilled the rib to firewall first before drilling the angle to the web.

__________________
John S
WARNING! Information presented in this post is my opinion. All users of info have sole responsibility for determining accuracy or suitability for their use.
Dues paid 2021, worth every penny
RV9A- Status:
Tail 98% done
Wings 98% done
Fuselage Kit 98% done
Finishing Kit 35% canopy done for now
Electrical 35% in work
Firewall Forward 5% in work
Fiberglass 0%, thought i was building in metal?
www.pilotjohnsrv9.blogspot.com
|

03-28-2020, 10:27 PM
|
|
|
Join Date: Jan 2016
Location: Southwest
Posts: 1,233
|
|
Tail Wiring
So I am trying real hard to get the turtle deck on the tail. But first I decided I would install the wiring to the tail and the ELT mount; basically as much as I could before covering up the tail section. I really dread the thought of having to crawl in the tail to do systems installation.
So the pitch autopilot servo is in and wired, and the Canbus to the tail mounted GMU11 magnetometer is installed. I also installed a DTM connector in the tail for the electric elevator trim.
Lastly I installed the ELT mount kit from Vans. Of course there was a slight mod so that the mounting hole pattern would fit both of the most popular ELTs.
All that's left is the ELT wiring, and the doubler for the ELT antenna, then I think I can install the tail's top skin, or turtle deck.
Helpful hint: If you are using printed shrink sleeve as wire labels, dont use white, use some color other than the wire color. I spent a lot of time looking for the white labels on white wire.

__________________
John S
WARNING! Information presented in this post is my opinion. All users of info have sole responsibility for determining accuracy or suitability for their use.
Dues paid 2021, worth every penny
RV9A- Status:
Tail 98% done
Wings 98% done
Fuselage Kit 98% done
Finishing Kit 35% canopy done for now
Electrical 35% in work
Firewall Forward 5% in work
Fiberglass 0%, thought i was building in metal?
www.pilotjohnsrv9.blogspot.com
Last edited by PilotjohnS : 03-29-2020 at 06:00 PM.
|
Thread Tools |
Search this Thread |
|
|
Display Modes |
Linear Mode
|
Posting Rules
|
You may not post new threads
You may not post replies
You may not post attachments
You may not edit your posts
HTML code is Off
|
|
|
All times are GMT -6. The time now is 06:38 AM.
|