-POSTING RULES

-Advertise in here!
-
Today's Posts
|
Insert Pics
Keep VAF
Going
w/a Donation
VAF on Twitter:
@VansAirForceNet
|

03-12-2023, 01:05 PM
|
|
|
Join Date: Jan 2022
Location: West Jordan, UT
Posts: 2
|
|
Rivets Expanding Between Sheets
I’m working on the Emp kit for the 10, I’m attaching the bottom rib to the rear spar on my vertical stab. For some reason the top of the rib sits flush after riveting but the bottom doesn’t, and it appears the rivet may have expanded between the rib and spar. My first attempt I used the squeezer, I drilled it out and on my second attempt I used the river gun and clamps for a tighter hold, but I ended up with similar results.
Any ideas/ suggestions on what I'm doing wrong?
__________________
Greg Baser
RV-10 Builder
|

03-12-2023, 01:44 PM
|
|
|
Join Date: Dec 2009
Location: Boulder, CO
Posts: 5,639
|
|
I use a short length of fuel hose, 1/8" ID for the -4 rivets. The hose goes on the stem of the rivet just before riveting. As you rivet, and that's not impeded by the hose, the hose squeezes the sheets together and prevents that bulge.
It's a sometimes problem that doesn't occur with the -3 rivets.
Dave
|

03-12-2023, 04:10 PM
|
|
|
Join Date: Dec 2011
Location: Livermore, CA
Posts: 8,791
|
|
Yep. Several tricks help, such as the fuel hose trick above. Others use O rings. External clamps to squeeze pieces together. Enough pressure on the gun to force them together. Whenever possible, factory head on the thinner piece. If using a pneumatic squeezer it’s pretty ease to apply pressure on the factory head before squeezing; somewhat more difficult with a hand squeezer.
|

03-12-2023, 05:16 PM
|
 |
|
|
Join Date: Mar 2006
Location: Newport, TN
Posts: 7,595
|
|
Good advice on how to solve this issue.
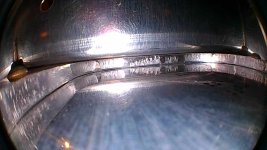
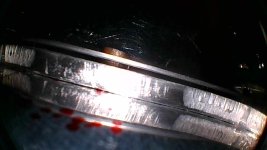
I will bring up the art of deburring though. Sometimes cameras magnify defects and make them look worse than they are but it does not appear that you are deburring enough. The edges of the doubler do not appear to be rounded and those shear marks on the cutouts need to be blended out. Each one of those creates a stress riser or two that can be the catalyst for a crack to start.
Deburring is critical to long life of these airplanes. The latest flood of SB's addressing cracks confirm this fact. Areas like spars and spare doublers are even more critical.
It is a crappy part of building but must be done if you want the best success over time....
Last edited by Brantel : 03-12-2023 at 05:19 PM.
|

03-12-2023, 05:19 PM
|
 |
Senior Curmudgeon
|
|
Join Date: Sep 2005
Location: Dayton Airpark, NV A34
Posts: 16,659
|
|
Welcome to VAF
Greg---welcome aboard the good ship VAF 
__________________
Mike Starkey
VAF 909
Rv-10, N210LM.
Flying as of 12/4/2010
Phase 1 done, 2/4/2011 
Sold after 240+ wonderful hours of flight.
"Flying the airplane is more important than radioing your plight to a person on the ground incapable of understanding or doing anything about it."
|

03-12-2023, 06:20 PM
|
|
|
Join Date: Jan 2005
Location: Arrowtown, New Zealand
Posts: 129
|
|
The advice provided above gives you some good techniques to ensure the elements being riveted together do not separate however as you might have guessed, the original problem is the fact the materials are not clamped together well enough to start with. This could be due to a number of reasons:
1. because you have not used enough clecos in the adjacent holes
2. burrs or pieces of metal are sitting between the parts preventing then from mating correctly
3. The holes are undersize and the rivets are pushing the material apart when you push the rivet into place before setting.
There are other reasons as well that others might like to offer, but these are the most common mistakes I see. Before riveting make sure your edges are deburred, including not only the edges of the material but also the holes you're about to rivet. After setting things up in a preliminary state to confirm alignment I will always pull the structure apart again and make sure all surfaces are clean (primed if required) and no contamination is present between the layers. Good clamping helps - use skin pins instead of cleocs where necessary. Not all clecos have the same clamping force. Finally - if the hole is tight and you have to tap the rivet into position, use a "draw" to bring the skins together before setting the rivet. If you're not familiar with the terminology - this is where you place the dolly flat beside the rivet to be set and you use the rivet gun to tap the manufactured head of the rivet, "drawing" the material together. Do not remove the rivet gun at this point, then set. I know you indicated you were using a pneumatic gun so you can't really use this method, but it might be a good time to move to a 3x if you're having issues.
Hope that helps.
__________________
Mike
Licensed Aircraft Mechanical Engineer
PPL-A
RV-6, ZK-XTC - Superior IO-360, Sensenich FP, GRT EFIS, Surefly SIM
Bolkow 209-160RV, ZK-MON - IO-320, MT Prop, Retract Nosewheel, Folding Wings
Trustee and Technical Councillor for the MBSAT RV-12 builds in Whitianga
|

03-12-2023, 07:37 PM
|
|
|
Join Date: Jan 2022
Location: West Jordan, UT
Posts: 2
|
|
Thanks for the advice that’s all great and much appreciated. I am using a 3x gun (used pneumatic squeezer on the first go), and I’ll check my deburring. When I ran my finger over everything it was smooth with no edges catching thus thought it was fine. I know deburring too much can also be problematic and was probably overthinking.
Thanks again.
__________________
Greg Baser
RV-10 Builder
|

03-12-2023, 08:04 PM
|
|
|
Join Date: Mar 2007
Location: Sonoma County
Posts: 4,884
|
|
Quote:
Originally Posted by gbaser47
Thanks for the advice that’s all great and much appreciated. I am using a 3x gun (used pneumatic squeezer on the first go), and I’ll check my deburring. When I ran my finger over everything it was smooth with no edges catching thus thought it was fine. I know deburring too much can also be problematic and was probably overthinking.
Thanks again.
|
Deburring.......
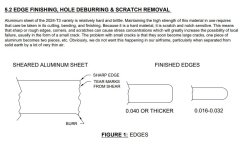
Van's does offer some guidance in section 5. Study 5.2....

__________________
VAF #897 Warren Moretti
2022 =VAF= Dues PAID
Last edited by gasman : 03-13-2023 at 12:50 PM.
|

03-12-2023, 08:17 PM
|
 |
|
|
Join Date: Sep 2005
Location: Ottertail, MN
Posts: 2,578
|
|
This can happen if one presses the bucking bar too hard against the rivet. You want the impact from the gun to push the stack tightly together as the shop head end of the rivet hits the bucking bar. The bucking bar should be only held with enough pressure to keep it in position for the short burst.
__________________
Alex Peterson
RV6A N66AP 1800+ hours
KADC, Wadena, MN
|

03-12-2023, 08:27 PM
|
|
|
Join Date: Apr 2009
Location: Stockton, California
Posts: 414
|
|
More on the "draw" technique.
I learned from fellows who worked for the Lockheed Vega Prototype shop to "draw" skins by first lightly hitting the rivet with the gun, swelling the shaft.
Then, using a specially adapted bucking bar with an oversized hole (#28-29) which was countersinked you draw the separated skins together.
The slightly greater diameter of the rivet shank provided enough friction to keep the skins together allowing you to proceed with completely forming the shop head.
|
Thread Tools |
Search this Thread |
|
|
Display Modes |
Linear Mode
|
Posting Rules
|
You may not post new threads
You may not post replies
You may not post attachments
You may not edit your posts
HTML code is Off
|
|
|
All times are GMT -6. The time now is 02:06 AM.
|