What's new
Van's Air Force

Don't miss anything! Register now for full access to the definitive RV support community.

Looking for Dimpling Advice

RVGator

Member
My dad and I recently attended the EAA RV builder's course. Basic Sheet Metal construction would be a better title but the course was exactly what we needed!

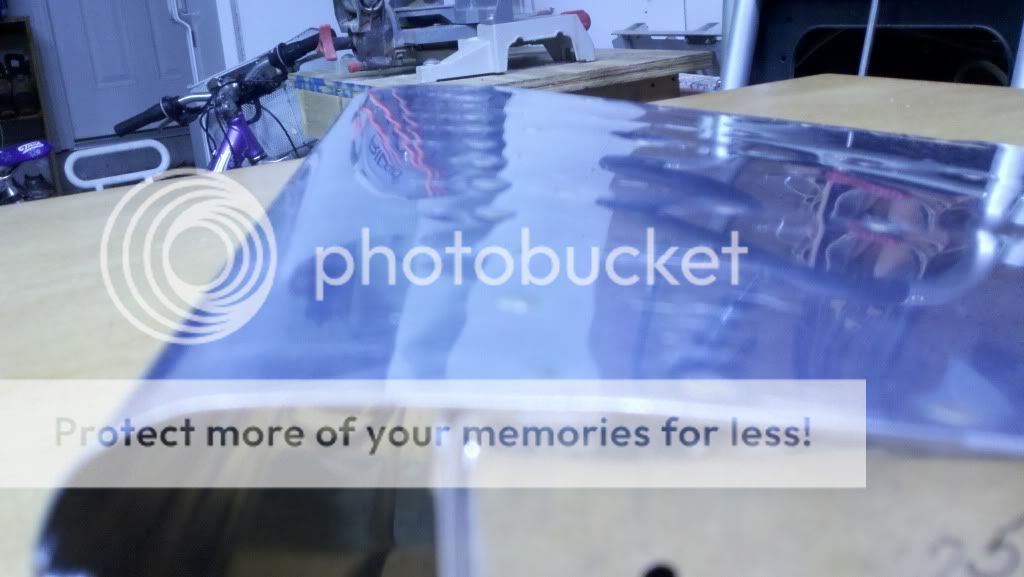
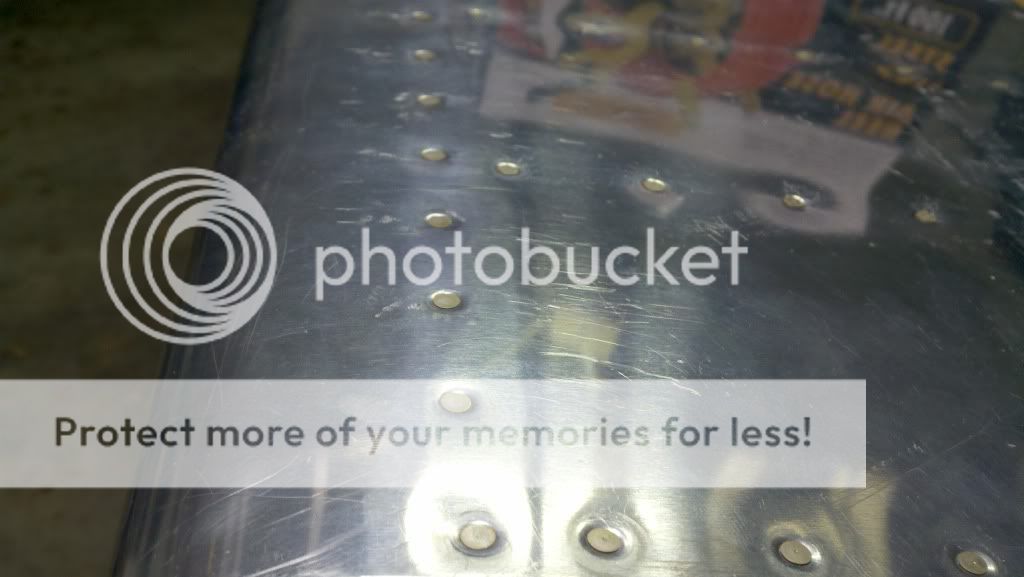
Below are photos of our project. (Don't laugh...it's our first try! Ok...laugh a little.) We never really felt comfortable with dimpling. It seemed there was always a little cup around the rivet. We were able to compare our results with some RVs out on the line. We noticed they all had nice flat rivet lines. We tried using less force when we hit the dimpler. Usually this resulted in a dimple that left the un-squeezed rivet above the skin. We tried using a squeezer with the same result. We were never able to create a dimple that was exactly the diameter of a 426 rivet.

So my questions are:

1. Had we squeezed a rivet that did not sit flush before squeezing, would it have shaped the dimple the rest of the way?

2. Has anyone discovered a good, consistent technique for dimpling?

3. How much will paint hide? :)

2010-11-08_22-01-38_851.jpg


2010-11-08_22-01-06_787.jpg


2010-11-08_22-03-53_8.jpg


Thanks for the advice!
 
So my questions are:

1. Had we squeezed a rivet that did not sit flush before squeezing, would it have shaped the dimple the rest of the way?

2. Has anyone discovered a good, consistent technique for dimpling?

3. How much will paint hide? :)

Thanks for the advice!


looks alright to me, as long as you are not using tank dies (they produce a little bit deeper dimple) i'd say to stick with using the dies to fully form the dimples and move on with building

if you are using a cframe to dimple you just whack the die holder with the hammer and move on to the next hole. tons of builders have used this method, or using a DRDT2 or a squeezer. adjust them so the dies just barely touch before full closing and you should get great dimples.

no, if you put a rivet in a partially dimpled hole the dimple will not change as you squeeze the rivet. all the force goes to squeezing the rivet and the rivet deforms under the pressure, so it won't transfer any force to the dimple shape. besides, you'd then have to have a force vector going inward on the dimple and that would mess up your rivet

hope this helps, i don't have any paint experience so don't have much to say there.
 
Last edited:
...
So my questions are:

1. Had we squeezed a rivet that did not sit flush before squeezing, would it have shaped the dimple the rest of the way?
No. It will sit proud of the surface. Dimple the hole again.

2. Has anyone discovered a good, consistent technique for dimpling?
Practice. Simple as that. Build some tables to hold the aluminum flush with the top of the female die. (See this picture. Those two small "tables" can be moved around as needed.) Bring the male part down and stick it in the hole with one hand. Use the plastic head on a heavy rubber-plastic double headed hammer, like this. Hit the C-Frame once and hit it hard. No tap-tap-tap...

3. How much will paint hide? :)
A lot. When you are finished, get some Aerodynamic dent filler and fill the holes.
 
Last edited:
Those look like under-dimpled rivet holes. There is no particular finesse required for dimpling. You just have to hit them hard enough for the dies to come together completely. Smack the **** out of the c-frame, or, if using a squeezer, sqeeze as hard as you can.
 
A couple of things to check. I'm no expert, just finishing tail kit and slow build wings well looked over by Tech Counselor and A&P.

Make sure they're not tank dimple dies. They dimple about 7/1000ths deeper.

If you're using a c-frame (I am), check that the bottom die is level with the surrounding surface when you're dimpling otherwise it can deform the skin a little.
 
Primer will hide a "slight" cup around the dimple. All dimple dies are not created equal. Inspect yours carefully, you may want to modify the rim slightly with a file or something. As stated, keep practicing until your dimple quality is as good as your dies will allow.
 
As long as you're getting the dimple dies closed all of the way down, whether by squeezer or c-frame and hammer or whatever, the final conformation and appearance of the resulting dimple is mostly a function of the dies themselves. While all of the major Van's tool suppliers have good quality dies, I've found that the Cleaveland dies give me the best looking results. In any case, don't be bashful about giving it a good whack in the c-frame, or adjusting the squeezer so that the dies touch and close fully.
 
I gotta go along with Randall here. It is almost impossible (almost!) to over-dimple. Dimple a few holes in some scrap and look at the reflection in the metal. It should appear flat just outside the dimple with no wavy reflections. Everyone has there own way of hitting the C-frame. I like a light tap, then a good smack, if you are hand-holding a piece (not supported by a table.) The tap gives you a good idea whether the part is exactly square with the die. One problem that can happen with squeezing dimples is using a sprung head in the squeezer. I saw one 3" head that had been sprung open by about 0.020" and it would not give a good dimple--it was dimpled well on one side and showed wavy reflections on the other. The C-frame is the best!

I like tank dies for ribs and bulkheads, but that is another story...

Bob Kelly
 
Under Dimpled

These rivet holes look under-dimpled to me. Make sure you have good dimpling dies either from Avery or Cleaveland. Also make sure as others have noted that you are not using tank dies (have a -T in the stamped number). If using a C-frame make sure the material is perpendicular to the dies (I use a carpet covered table that is flush with the bottom die) and hit it with a dead blow hammer. I usually hit it twice to make sure. If using a squeezer adjust so the dimple is fully formed.

Note that top surface of the skin (where the rivet head sits) will have a radius so it is not going to look the same as if it was a countersunk hole, but the skin should be flat outside the die diameter.
 
You will get a crisper dimple if you support your C-frame

The more support the C-frame has the better strike you get. Take a look at any punch press and you will see how important the base, which takes the strike load is. Now, we are not talking about ton's of force here, but I have found that securing the C-frame to a very solid table does much better than putting it loosely on the table and allowing it to move.
If you are using a squeezer, use the smallest yolk for the job. The smaller the yoke, the less deflection and better the dimple.
Your dimples look under dimpled to me. The dimple dies are called "spring back" dies for a reason. The metal has to go past the point you want it so it will "spring" back into position.
 
Thanks for all the advice. There was one c-frame simpler for the class of 16 (8 pairs) and it was passed around like kindergarten cold. It was set up with the male on the base and the female on the post. Sounds like that is incorrect. Also, there was no support table for the skin. Perhaps that combination rolled the skin over the die creating a cup? You can see a circular scar around some dimples.

The instructor said we were hitting it too hard so we were quite impressed with anyone who could dimple perfectly every whack. We have another kit to try it again.
 
Sounds like you need to find someone with a DRDT2, and give it a try.

There is a reason, a very good reason, they cost as much as they do, and that they re-sell as fast as they do.
 
Last edited:
Inconsistent Dimples

Dave,
I found that with the traditional "C" frame I was getting some inconsistencies from what I presumed to be inconsistent blows of the dead blow hammer. I just bought a "front end" kit for a DRDT-2 and built the frame for it myself. It solved all my problems. I have only the top forward skin left to dimple, so it will probably be available soon.
 
Dave,

I almost always put the male die on the bottom and don't have any problem with dimples. I do make sure it's level with the support surface, though.

You might do some searching on the forums but I'm sure I remember a thread about how it's almost impossible to hit the c-frame hard enough to damage the metal between the dies.
 
Spring Back Dies

The dimple dies that EAA has may be the old style dies. Most tool vendors have adopted a spring back dimple die that produces a better dimple. As a voluntee at the sheetmetal workshop during Airventure, I will tell you that the dies get all mixed together, so you may have had a male and female from two different manufactures or eras, which can also affect the dimple slightly.
 
I've used a C-frame for my plane, no trouble and the dimples are just fine. We used the same one on my buddy's -8 (which is how I inherited it :) ). Along with inheriting the C-frame, he had built a nice "tabletop" for it, thusly:

attached several 2x4s that had been ripped to the correct height, to a piece of plywood. Two 2x's in the middle, just wide enough to hold the C-frame, and the height exactly matched the height of the die on the bottom. A few more 2x's about 8-10" on either side (3 per side, IIRC), to support the workpiece.

Now, the piece of sheet metal can usually be supported so that it stays nice and square to the direction of impact of the die, the C-frame is solid, not moving, and the process is repeatable.

Make sure you have the right dies, and whack away! Enough so that you get the "witness mark" very light circle around the dimple, from the edge of the die.
 
What Steve said....

If in doubt, put the c-frame on the concrete floor. If you've got the skin square to the die, it's doubtful you can hit the c-frame too hard unless you're using a sledge. I used an elcheapo big fat rubber mallet; a medium tap like starting a nail, then a good *hard* whack like driving a big nail. Maybe even a followup for good measure. Just don't let anything move during the process. :)

For the actual riveting process:
Did anyone mention making sure that the rivet stays fully seated & the skin/rib are pulled up tight while the rivet is squeezed or driven? Otherwise, the rivet can stand proud of the skin even with a perfect dimple. Also, if good balance between gun & bucking bar isn't maintained you can cause larger depressions around the dimple itself, as can be seen in the pics. (BTW, those can usually be fixed (if they aren't actual 'smileys') by lightly bumping the area with a 'special tool' from inside.) By balance, I mean that the the gun shouldn't hit the skin if the bar isn't on the shop head. If you have too much 'bounce' with the bar, it won't make it back to the shop head in time for the next hit from the gun & you might get the 'bowl' around the dimple. If the 1st hit from the gun is too light or the set (gun) bounces off the skin, the bar may push the rivet out slightly for the next hit, locking the rivet 'proud' of the surface, as described above.

Way too many words; it's much easier to demonstrate....

Charlie

Oh yeah, one more thing. When you start with real live a/c parts, sometimes the rivet will seem to be cocked slightly in the hole prior to riveting. Usually caused by slight mis-alignment of the skin & rib dimples. Sometimes, this is unavoidable. It can sometimes be cured by inserting the rivet in the hole & instead of a regular bucking bar in back, drill a .187" hole near the edge of some steel scrap, put a female dimple die in the hole, & then back up the rivet with the dimple die. Now 'drive' the rivet with a few *light* taps of your gun. This will reform the dimples slightly so that they nest properly. (I wish I'd discovered this much earlier in the build....)
 
Last edited:
Another "trick" that worked for me. I don't like dead blow hammers and believe they aren't consistent. You have to hit harder than you should to get consistent results, IMHO. I took a 1" brass bar about 1 1/4" long and drilled (actually used an end mill, but a drill would work) a hole about half way through its length. I put this on the top of the striker in the "C" frame. It gives a larger target, and you can use a steel hammer without damaging the striker. It is noisy, however. Male-up or male-down makes little difference. A table is great (and almost necessary) for large parts and skins, but small parts work well hand-held, especially if there are flanges, etc.

Bob
 
Male-up or male-down makes little difference.

Male on top, female underneath. Now when you slide the skin around, you will not scratch the surface, (and the one you scratch will be the outside surface:mad:)

A table is great (and almost necessary) for large parts and skins---

Bob

Yep.

In fact, I am not sure if "almost necessary" is quite strong enough of a term.
 
Thanks for all the advice. There was one c-frame simpler for the class of 16 (8 pairs) and it was passed around like kindergarten cold. It was set up with the male on the base and the female on the post. Sounds like that is incorrect. Also, there was no support table for the skin. Perhaps that combination rolled the skin over the die creating a cup? You can see a circular scar around some dimples.

The instructor said we were hitting it too hard so we were quite impressed with anyone who could dimple perfectly every whack. We have another kit to try it again.

This statement in it self is the biggest clue to the problem.


Unless someone is an experienced builder and as taking steps to prevent the accent mark on the skin,the absence of the mark is positive evidence that the dimple wasn't set fully.

A lot of great tips have already been posted, here is what I generally pass on to beginners who ask me for help.

- The C frame tool when used properly produces the best dimples of all of the different methods available.
- It actually doesn't matter which way the dies are oriented. I think it is best with the piloted one on the top to prevent scratching the skins when sliding them around, but in some instances it works better the other way around. Go with what works best for you.
- How solid the work surface the tool is resting on has a major effect on how much force is required for a fully set dimple (try the difference between a concrete floor and a thin topped table).
- I usually suggest that beginners use two hits for each dimple until they get some experience. The first hit mostly forms (sometimes entirely depending on the force of the hit and how thick the material is) the dimple, and the second one finishes it. On the one you will generally hear a higher pitch ping sound as the indicator that the dimple formed fully.

- It is important to keep the material square to the dies. The reflection of the arbor in the skin can be used as a reference just as it can with a drill bit.

- The amount of energy required to properly form a dimple is dependent on the size dimple you are making and the thickness o material you are dimpling. Learning to deal with these factors comes with experience.

- Specific experience (and because of that, advice from others) can vary widely because of there being so many factors...type of surface the tool is sitting on, thickness of the material, type of hammer being used, etc.

If beginners evaluate the dimples by looking for a well defined scuff ring around the dimple and verifying that it appears to be uniform all the way around the dimple, they will generally have a good finish quality. The great thing about this is that if you find a dimple that is not fully formed (using the above criteria) just dimple it again.


- If you are trying to get a good looking finish.... never use a hand squeezer to dimple where it will be visible. Structure that will be covered with a skin, such as a rib flange it self, is ok.

The best dimple is done with the impact forming of a c-frame tool and some good quality dies ( I guarantee that the less expensive dies that can be bought from the lesser known tool company's make inferior dimples).

Next in line (my opinion) is the DRDT2. It may be a good choice for someone that never develops a good skill with the c-frame tool)

Third best - a pneumatic rivet squeezer. Does pretty good as long as the yolk isn't old and spread apart slightly. Also, if you use deep yolks (such as 4 ") the yolk will flex open enough to degrade the dimple quality. This is not a factor when setting rivets, but it does show up when dimpling.

Worst - Hand rivet squeezer. same problems as a pneumatic squeezer but also has a big reduction in squeeze power (unless you have arms like Popeye ;))
 
Never had a problem

I'm surprised that the introductory class didn't get dimpling and countersinking questions answered for you. I bought dimple dies, hand squeezer and "C" frame from Avery after attending a builder's class at Van's in 1996. Dimpling on my RV-6A was done with the hand squeezer for holes close to the edge and the "C" frame when not close to the edge in general. There are some places where I installed doublers for mounting strobe boxes etc. on the fuselage bottom skin where I had to get creative. In those cases my wife or I would hold the female die in a shaft from the "C" frame backed with a bucking bar on the inside and the other member of the team would hold the male die in a shaft on the outside and hit it three times with a plastic mallet. With the hand squeezer I set it with the dies in full contact with the handles closed at the start of the dimpling session (as opposed to some appropriate gap for rivet squeezing). With the "C" frame I hit every hole three times with the plastic mallet. There have been no problems after 6 years and 600 hours of operation. I did debur every hole on both sides after drilling before conducting any other building operations. I registered the plane for "beauty judging" at Sun 'n' Fun and Oshkosh in 2005. It selected for a second look at Sun 'n' Fun so it isn't ugly. I say that because it seems to be a priority in your original post. The object is to get a strong mechanical connection between two or more layers of mating metal with the rivet manufactured head not sticking up in the airstream. Check the second requirement before squeezing or driving the rivet by putting a rivet in the hole and checking it until your builder's eye is calibrated and the process is producing consistently good dimples. If your plane is like mine there will be many #8 screw dimples that have to be made. For almost all of those I used the die supplied by the pitot mount supplier (Getz I think is his name - in Littleton, CO). This tool consists of a male die, a socket head #8 screw and a dimpled platenut - works fine but the screw recessed hex wears out and the screw has to be replaced occasionally.

Bob Axsom
 
You can't hurt the striker.

Another "trick" that worked for me. I don't like dead blow hammers and believe they aren't consistent. You have to hit harder than you should to get consistent results, IMHO. I took a 1" brass bar about 1 1/4" long and drilled (actually used an end mill, but a drill would work) a hole about half way through its length. I put this on the top of the striker in the "C" frame. It gives a larger target, and you can use a steel hammer without damaging the striker. It is noisy, however. Male-up or male-down makes little difference. A table is great (and almost necessary) for large parts and skins, but small parts work well hand-held, especially if there are flanges, etc.

Bob

I used my Cleveland C-frame to set my spar rivets. This was not uncommon in the day. You literally beat those rivets into submission and it took quite a whallop from a large hammer. Yes, the top of the "stiker" gets a bit mushroomed out, but does not damage or affect the tool.
Absolutley dont use a dead blow for the reasons you stated. You also don't get a good positive feedback, or "ping" like Scott mentioned. That audible sound tells you when you have correctly set the final strike and a metal faced hammer provides part of that feedback.
PS - I dont recommend you set spar rivets this way. It is a LOT of hard, hard work....
 
I believe it is a 16 oz...CONFIRMED

What weight hammer do you recommend?

...but let me check the hammer I like best when I get back in my shop tonight and let you know.

16OZ IS WHAT I NORMALLY USE
 
Last edited:
Back
Top