
Van's Air Force
You are using an out of date browser. It may not display this or other websites correctly.
You should upgrade or use an alternative browser.
You should upgrade or use an alternative browser.
Removing the seats
- Thread starter Phil
- Start date

rleffler
Well Known Member
Has anyone devised a modification that will allow the seats to be installed and removed without having to unbolt the T-handle every time?
I haven't heard that you had to unbolt the t-handle before. So I'm in for a surprize when I install my seats after the holidays?
I am planning to install a t-handle mod designed by Greg, but it's waiting for my seats to get back from Geoff at the moment. This solves the problem that Pierre acurately described in another thread about having fat fingers.

No nut plates!
Phil,
Spare yourself the trouble of installing nutplates.
I did install them and after having extreme difficulty getting a bolt started
into a nut plate I removed them again.
Once all your sidepanels are in you only have about an inch and a half in a very awkward place to get that bolt started and it is much easier if you can stick the bolt through and start the nut on the inside of the seat.
Now, if you could install nut plates on the outside that would make things easier. Having the extended handle helps as this allows you to partially insert the bolts and lower the assembly into place then push all the bolts in and
thread the nuts on on the inside.
Phil
Well Known Member
Yeah Bob.
If you look at your rails (the side that the T-handle travels on) you will see there are forward and aft safety stops to keep the seat from sliding off the front or rear of the rail.
The frame of the T-Handle hits those stops. So you have to remove the T-handle, install the seat, then re-install the T-handle when it's between the stops. It's not that big of a deal, just a little annoying.
Rick S...... LONG TIME NO HEAR!!
I hadn't heard of interference with the flap rod covers. That's good to know.
Mike S
Senior Curmudgeon
I hadn't heard of interference with the flap rod covers. That's good to know.
It is in the archives, bout a year and a half ago, maybe a bit longer.
Good thread, includes good photos.
I have the T handle extension that Bob pictured and really like them, but it is still necessary to remove the T handle plate to remove the seat. I tapped threads in the plate so that I could eliminate the nuts. That way the bolts go in from inside the seat frame. As Pierre would say, easy peasy.
Jim Berry
RV-10
Off to GLO in 10 days for a slick paint job, finally
Jim Berry
RV-10
Off to GLO in 10 days for a slick paint job, finally
Wayne Gillispie
Well Known Member
No need to install seat, t-handle or flap tube cover until ready for first flight. I just sat on cushions for avionics setup. I will be removing them once a year. The std t-handle is fine unless you have an interior or 1"> fingers.
seat removal
I removed the aft stop on my seat rails to allow the seat to come off with out having to remove the seat adjustment pin. I have not had any problems of the seat sliding off the rail moving the seat aft. The front stop is still in place. Please don't tell Van.
Greg...
I removed the aft stop on my seat rails to allow the seat to come off with out having to remove the seat adjustment pin. I have not had any problems of the seat sliding off the rail moving the seat aft. The front stop is still in place. Please don't tell Van.
Greg...
pierre smith
Well Known Member
Lol!
Greg, your sense of humor is appreciated, as is your wise advice. Pray tell what you did to your door latching pins to ensure that your doors don't fly off in flight....even if Van is reading this .
.
I spent quite bit of time yesterday, making a new, longer left, forward pin to that end, for further penetration into the structure.
Thanks,
I removed the aft stop on my seat rails to allow the seat to come off with out having to remove the seat adjustment pin. I have not had any problems of the seat sliding off the rail moving the seat aft. The front stop is still in place. Please don't tell Van.
Greg...
Greg, your sense of humor is appreciated, as is your wise advice. Pray tell what you did to your door latching pins to ensure that your doors don't fly off in flight....even if Van is reading this
.I spent quite bit of time yesterday, making a new, longer left, forward pin to that end, for further penetration into the structure.
Thanks,
Here is another idea - I have cut the flap tube covers at the first bend from the bottom and installed a hinge there. Then added a small latch on the top part. Almost like the lid and latch on the Vans practice toolbox. So now I unlatch and hinge forward the flap tube covers when I need to take out the seats.
I have also cut and fitted a cover plate in the tunnel (left hand side about 2x5 inches) opposite the fuel filter position.
These two small mods saves one hours eventually. Remember that during your annual inspection you will have to remove both fornt seats and open up the tunnel if you want to do a thorough job.
A Simple Solution!
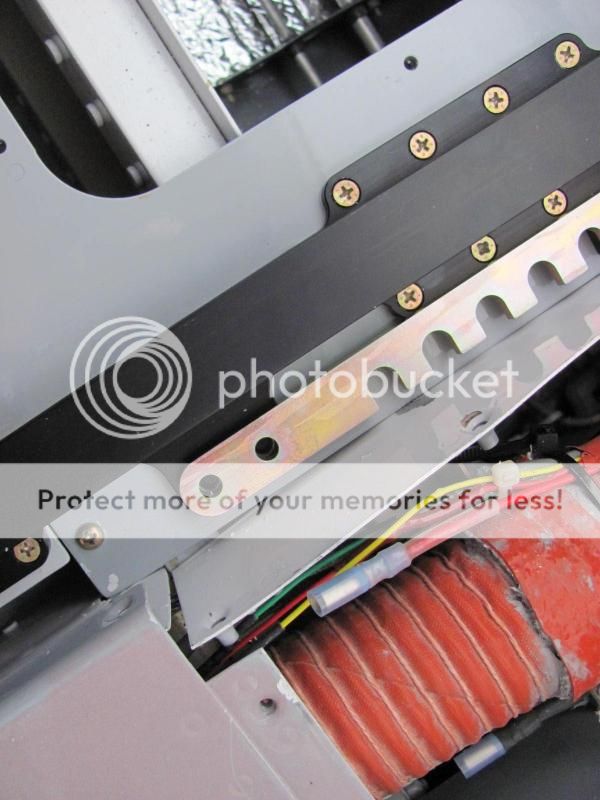
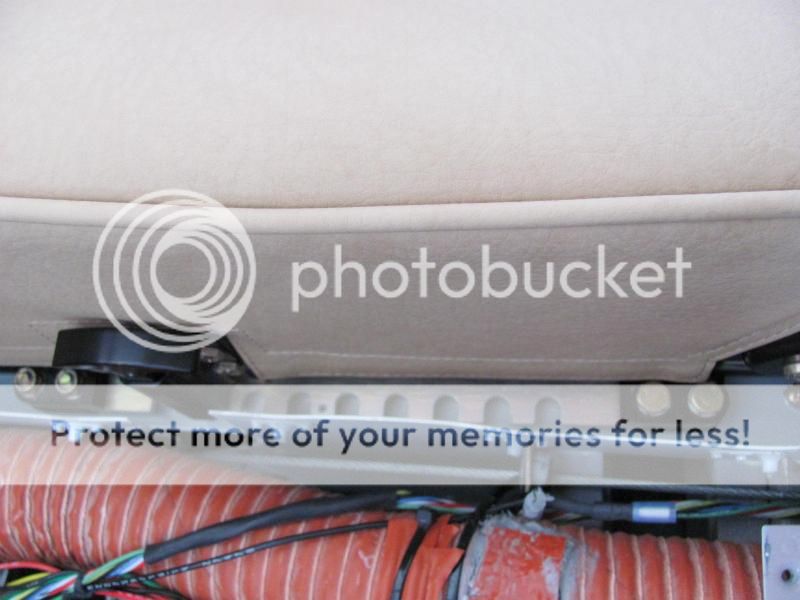
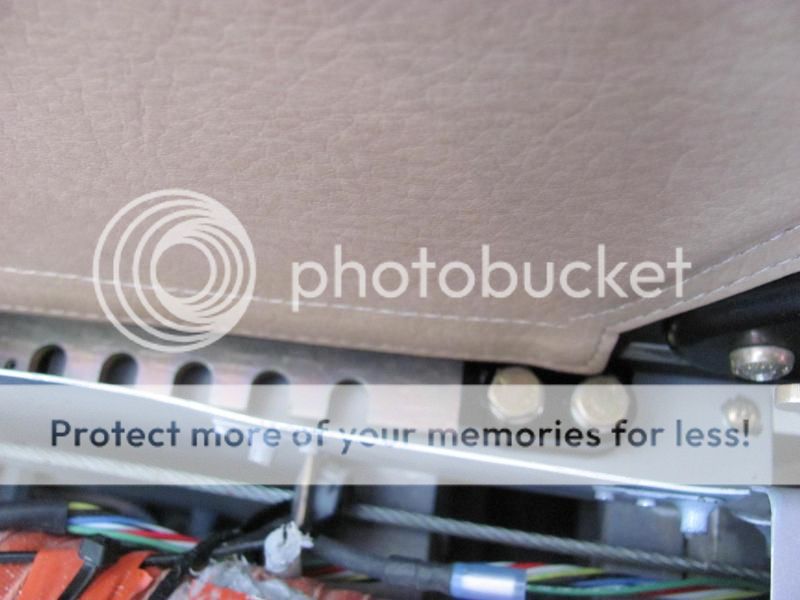
I rearranged the seat rails so that the rails with the stops are next to the tunnel. Then switched the seats so that the adjustment handles are also next to the tunnel. Removed the aft seat rail stop and filled the countersink on the underside with JB Weld and let it cure. Filed it flush with the bottom of the rail mount and drilled the hole back out. Temporarily installed the seat rails and use the empty aft stop mounting holes as a drill guide to drill the two 1/4" bolt hole's through the F1067A seat floors. Disassembled everything and installed K 1000-4 nut plates on the underside of the seat floors. I used the smaller ones and they fit fine between the fore and aft spars. Put everything back together leaving the aft stops off. Then I removed the nylon rail glide inserts from the seat tracks. Cut 1/2" off the forward ends and then added a 45* bevel to them and reinstalled. The seats are now able to angle down and onto the seat rails with no interference and then pushed forward all the way forward. No need to modify or cut the rail at all. Now use two AN4-11A bolts and one AN960-416L washer per bolt and bolt on the the aft seat stops. Access to the stops and bolts are very easy next to the tunnel and there is no need to remove the stop handle to get the seats on and off. Her are a couple photos of my installation:
I rearranged the seat rails so that the rails with the stops are next to the tunnel. Then switched the seats so that the adjustment handles are also next to the tunnel. Removed the aft seat rail stop and filled the countersink on the underside with JB Weld and let it cure. Filed it flush with the bottom of the rail mount and drilled the hole back out. Temporarily installed the seat rails and use the empty aft stop mounting holes as a drill guide to drill the two 1/4" bolt hole's through the F1067A seat floors. Disassembled everything and installed K 1000-4 nut plates on the underside of the seat floors. I used the smaller ones and they fit fine between the fore and aft spars. Put everything back together leaving the aft stops off. Then I removed the nylon rail glide inserts from the seat tracks. Cut 1/2" off the forward ends and then added a 45* bevel to them and reinstalled. The seats are now able to angle down and onto the seat rails with no interference and then pushed forward all the way forward. No need to modify or cut the rail at all. Now use two AN4-11A bolts and one AN960-416L washer per bolt and bolt on the the aft seat stops. Access to the stops and bolts are very easy next to the tunnel and there is no need to remove the stop handle to get the seats on and off. Her are a couple photos of my installation:
You only need to remove 3 of the bolts; loosen a top one and pivot around it. Makes re installation slightly easier.
Two easily accessible bolts and no nuts to deal with is a whole lot easier and the modification took about 1/2 hour.
CharlieWaffles
Well Known Member
No need to cut the seat rail. There is another thread that describes a better approach. In the rail on the seat, there is a white UMHW plastic "bushing" that reduces friction for sliding the seat. If you taper the plastic bushing, the sit can be angled and removed with the flap tube cover still installed.
Auburntsts
Well Known Member
No need to cut the seat rail. There is another thread that describes a better approach. In the rail on the seat, there is a white UMHW plastic "bushing" that reduces friction for sliding the seat. If you taper the plastic bushing, the sit can be angled and removed with the flap tube cover still installed.
+1 on this approach. I believe this is the thread Mark is referring to:
http://www.vansairforce.com/community/showthread.php?t=57756&highlight=rail
johngoodman
Well Known Member
I did Vic Syracuse's mod of shaving about an inch off the back "ears" of the seat rails so that you can clear the flap tube cover - works great!
On the issue of removing the seat handle, I did something like Greg Hale did - I removed the rear stop. I then drilled through the bottom. There is nothing underneath, so I was going to put some nutplates for the bolts that hold the rear stop; but I found an easier way. Long clevis pins. Now I can just wiggle the rear stop up and off. I'm sure some safety guru will argue with this, but it's only the rear stops, not the front ones. They are still not that easy to wiggle off, but it's definitely easier than removing the handle.
John
Auburntsts
Well Known Member
Just curious, but for those that did all these seat mods, how often are you yanking your seats out? I mean for an operation that seemingly would happen only once a year it seems like a non-issue to begin with to me.
rleffler
Well Known Member
On the issue of removing the seat handle, I did something like Greg Hale did - I removed the rear stop. I then drilled through the bottom. There is nothing underneath, so I was going to put some nutplates for the bolts that hold the rear stop; but I found an easier way. Long clevis pins. Now I can just wiggle the rear stop up and off. I'm sure some safety guru will argue with this, but it's only the rear stops, not the front ones. They are still not that easy to wiggle off, but it's definitely easier than removing the handle.
John
I put nutplates on the handle bracket and put bolts through from the seat side of the frame to give a little extra room. Just another option to thow in the mix.......
bob
rleffler
Well Known Member
Just curious, but for those that did all these seat mods, how often are you yanking your seats out? I mean for an operation that seemingly would happen only once a year it seems like a non-issue to begin with to me.
I agree, I would suspect that it will mostly be once a year. But with that said, I've probably had my seats in and out a dozen times in the last six months during the last months of the build.
bob
Wayne Gillispie
Well Known Member
I installed seats before first flight on 12/1/2011. They have been out once since then. I have no additional interior panels, so no problems with factory t-handles.
dmaib
Well Known Member
+1 on this approach. I believe this is the thread Mark is referring to:
http://www.vansairforce.com/community/showthread.php?t=57756&highlight=rail
+2 on this approach. Taking off a bit of the UHMW on the seat is much nicer than grinding off some of the aluminum seat rail IMHO. It seems like my seats come out two or three times a year. Once for the condition inspection and every year it seems like once or twice more for various reasons.
FWIW, I had the seat handle extensions designed and sold by Greg Hale a few years ago, and one of them broke last year. I think the metal was just a bit too light for the application. Steve Dineri has some very nice robust machined handles at iflyrv10.com and he also has a very simple T-handle extender that simply raises the T-handle up where you can easily grab it. The T handle extenders are what I have installed now, and am very happy with them. Steve has been great to work with and I have several of his products on my airplane.

