What's new
Van's Air Force

Don't miss anything! Register now for full access to the definitive RV support community.

Installing Wheel Pants

Mark Henderson

Well Known Member
I am just finishing installing the wheel pants on my 12. I thought I would add my impressions of the kit. As with the rest of the 12, it is well made. There are a couple of things that I did not especially like. I did not want to have to take the pants off to check or fill the tires. I decided to drill a 3/4" hole in the main pants and use the Cleveland stem extension as others have suggested. Tony T noted that the 3/4" holes in the brackets line up with the valve stem. After I had drilled the 13/16 holes in the nose wheel pant I realized that these do not line up with valve stem. These holes are 4" from the center of the axle, but the valve stem is only 2". Had I thout about this I would have drilled new holes in the nose wheel bracket at 2" and corresponding holes in the nose wheel pant. This way I would not have to take the pants apart, or drill a second hole.
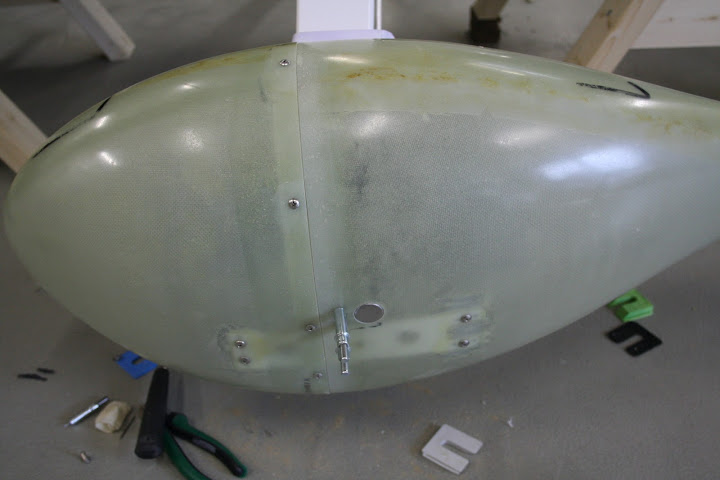
The plans call for you to countersunk the 6-32 screws to connect the main wheel fore and aft sections together.The glass is pretty thin, and I was concerned about cracking down the road. There was a Cirrus SR-22 parked across the Tarmac from my hanger, so I looked at their fairings. They used pan head screws to hold the 2 halves together. It is a 185 kt cruiser, but they did not try to counter sink these fittings. I decided not to either. After all, with 12,000 pop rivets, would 18 pan head screws make a difference? The other thing of note is how The Cirrus secured the fairing on the nose wheel leg. Vans wants us to secure it to the leg with 2 8-32 screws, and then hold it together with a piano hinge. The Cirrus only seems to use a single screw to hold it close. After trial fitting the fairing on the nose leg, I can't imagine at out cruise speeds that the piano hinge is necessary. Since I have flown off my phase 1, I do not need to follow the plans or risk being out of compliance with ELSA. I think I will copy some of the SR-22 details.
 
Wheel Pants

I agree that the material is too thin to be countersinking. I got some pan head torx screws from MicroFasteners and used them on all the wheel pants, and also replaced the darn Phillips head screws around the cowling. The Phillips tend to 'grind out' if they stick a bit and then its awkward at best to get the stubs out. The torx screws are a vast improvement IMHO
 
Nose wheel pant valve access

Mark, I am not following you on how you drilled the nose wheel pant for valve stem access.
I used a laser set up to align with the valve stem with the pant off and then put the pant on without disturbing the laser. This locates where to drill the 3/4 hole. Credit to ArlingtonRV for the method :D:
1231988048_nGh5n-L.jpg


Tony
 
Main wheel pant vs. Air valve

For those of you who have installed wheel pants, .... I'm at the point of determining how to add air to the main tires with the wheel pants on. I've checked the alignment of the holes in the mounting bracket on the main wheel and they don't line up (close but not good enough). Should I enlarge one of the holes in the bracket to align with the air valve and then drill a matching hole in the pant cover? If not, how did you guys do it? I've read this thread but I'm not sure what the conclusion was. Thanks.
 
I have put the hole just above the brackets and used the spring loaded type doors:


Last edited:
Great!

Thank you Joeri, that is exactly what I needed. A picture is worth a thousand words. Steve :)
 
Pictures of one method...

I found the valve stem lines up quite well with the hole in the brackets on the main gear. Could there be tubes with different stem alignment?
1182895931_yVDYQ-M.jpg

1182896228_6Pg2o-M.jpg

If you make the hole to match the hole in the bracket, like I did, then the spring door shown in Joeri's post above won't work. I used nickel plated caps from Cleavland tool. I bought a couple of extra caps, but haven't lost one yet, nearly 100 hours.

Tony
 
Valve stem

Tony, my valve stems are about 2 inches long and point inwards toward the axel slightly and I don't see a way to prevent this. This angle prevents threading on the valve extension through the hole in the bracket.
 
Could be a gotchya...

Well, I'll be darned...then there ARE tubes with different stem alignments. My valve stems definitely do not point toward the axle.

That could be a problem for anyone who has to replace a tube in the future and has cut holes in the fairing :(.

Tony
 
Tony, my valve stems are about 2 inches long and point inwards toward the axel slightly and I don't see a way to prevent this. This angle prevents threading on the valve extension through the hole in the bracket.
Bend the stem.
 
Valve stems...

From Rdog's post then, it is OK to bend the valve stems? If so, mystery solved. That was easy :).

It's great learning new stuff.

Tony
 
I have my wheel pants sitting on the table 95% complete for several months now ( I said earlier I wasn't real anxious to bother with them), and I will use all the good ideas put forth here. Thanks for the info. The only anxious part is how much additional airspeed will they produce? No, I am not doing the main gear legs and upper and lower fairings and all that. I really think the 12 looks good w/o all that stuff hanging on it (plus I don't have to pull it off to do condition inspections).
Dick Seiders 120093
 
Bend it?

How does one bend rubber?? I can bend it, but for some strange reason it bounces right back into the position it was to begin with. :D
 
How does one bend rubber?? I can bend it, but for some strange reason it bounces right back into the position it was to begin with. :D
It should be a 90 degree bend tube valve made of brass with a nut threaded on to hold the stem in place to the hub.
 
Done

Mute point now. :p I drilled a hole just below axel and it works great. Will install access spring doors when I get them.
 
Is the brass tube threaded down by the rubber tube? It should be threaded exactly the same as the threads where the valve cap goes.
 
Kinda, sorta, a little bit maybe. Here is a photo of mine. Faced with a choice, I think I will probably use the little flippy things that I can't lose:
5vyemo.jpg
[/IMG]
 
Ha ha, not THIS time, that was back when I drilled a hole in my finger, remember?
That is the "special" synthetic wheel bearing grease I wasted two weeks tracknig down and getting it here. Probably should have just used ordinary wheel bearing grease. It is so precious I have not had the heart to wipe the excess off yet.
 
As i said yesterday I am finally finishing wheel pants. I don't see a problem with ctsking #6 screws as the glas is about same as my RV6A and I didn't have a problem in 500 plus hours of flying, and they look better.

Don, wipe of the excess grease or it will be all over the place first time you fly.
Dick Seiders
 
Back
Top