rmartingt
Well Known Member
I'm starting to see the light at the end of the tunnel, and therefore thinking about paint options before final assembly so I don't have to take the airplane down later.
I'm planning a simple paint job (or perhaps even all-white, with vinyl trim). Not worried about a showplane finish and I don't have loads of money to spend on it. Some might suggest "well then polish it!" but I've polished an RV before and never want to do that again
I have not yet spoken to any local paint shops (I will, before committing to something) but I'm also looking into what it will take to paint myself.
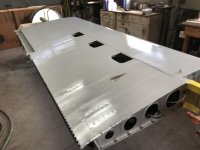
Trick is, I am absolutely terrible with a spraygun. For every one good-looking part I've shot with primer (Stewart Ekoprime), I got probably eight with runs, drips, spots, and just general nastiness. At least with rattlecans it's more like a 1:2 ratio.
Given that, does anyone have a suggestion for a forgiving, idiot-resistant paint system? Something that doesn't require loads of new equipment, magic incantations, and robotic repeatability?
On a different approach, I've really looked hard into rolling with marine paint (e.g. Alexseal 501) since it can be rolled or sprayed, and can be applied outdoors. Rolling sounds attractive and I've spoken to a couple guys who have done it on metal airplanes (a Sonex and some others) with reasonably good results.
I'm planning a simple paint job (or perhaps even all-white, with vinyl trim). Not worried about a showplane finish and I don't have loads of money to spend on it. Some might suggest "well then polish it!" but I've polished an RV before and never want to do that again
I have not yet spoken to any local paint shops (I will, before committing to something) but I'm also looking into what it will take to paint myself.
Trick is, I am absolutely terrible with a spraygun. For every one good-looking part I've shot with primer (Stewart Ekoprime), I got probably eight with runs, drips, spots, and just general nastiness. At least with rattlecans it's more like a 1:2 ratio.
Given that, does anyone have a suggestion for a forgiving, idiot-resistant paint system? Something that doesn't require loads of new equipment, magic incantations, and robotic repeatability?
On a different approach, I've really looked hard into rolling with marine paint (e.g. Alexseal 501) since it can be rolled or sprayed, and can be applied outdoors. Rolling sounds attractive and I've spoken to a couple guys who have done it on metal airplanes (a Sonex and some others) with reasonably good results.