What's new
Van's Air Force

Don't miss anything! Register now for full access to the definitive RV support community.

Fitting nose ribs to leading edge skin

Jeff R

Well Known Member
Are there any tips to fitting the nose ribs to the leading edge skin on the wings? I am really struggling to get them clecoed in. I managed to get the outer most rib installed, and all but one tab on one side of the adjacent rib, but that is all. I am afraid to put too much forward pressure on the ribs - I don't want to bend it, nor do I want to ding the skins, plus I can see myself slipping and slicing myself open on the edges of the skin. Yikes!

Thanks.
 
Jeff:

It has been about six years since I played with my wings but I do remember them being a tight fit and that I ended up sacrificing a few clecos in the process of taking them apart and putting them back together. I believe I had to start in the middle and work my way forward hole by hole installing clecos as I went to get them in place for match drilling. I also remember having to make sure the rib end flanges were a true 90 degree angle since all of them came initially under bent by a bit. It will ultimately fit in there but it does take some pressure since it is pretty tight...

Doug
90116; Really Slowwwwwwwwwww building this 9A!
 
Jeff,
As I recall, I clecoed the upper rib to skin holes first (easy), then pushed the assembly down in the saddle (saddle centered near rib with enough room to place cleco) and started toward the back (rear) for the bottom holes. The first hole was a bitch - I helped it along toward alignment by using the 3/32" punch as a drift. The skin would be away from the rib bottom - the punch was placed in the skin, then into the corresponding rib hole. I would then start pushing the skin toward the rib while I pryed as gently as possible with the punch until the holes were nearly matched, then would place a cleco into the next hole. After that, clecoing is easier - clecoes may go in a little askew initially, but as more are added, it aligns nicely. The caveat with this technique is that you will deform a little (ovalize) the skin hole that you pry with the punch. BUT, after drilling and then dimpling, it looked fine. It's also why I did the top first - if any holes were deformed, at least they would be on the bottom.
Now, after dimpling and for final assembly, you have to re-cleco, but it was a little easier. However, some light prying was done again with the punch, but be even more careful, as you don't want to deform the now dimpled hole.
cp
 
Attention to detail

A prime area of conflict is the nose of the ribs.

The plans mention it almost in passing but is a very important step. Make sure you blend the areas noted to a smooth transition as circled in the photo. I simply ground any bumps off using a 6" scotchbrite wheel mounted in a bench grinder. If you don't do this, you may very well have to "force" the ribs into place then later on may notice undesirable bumps protruding through the leading edge skin opposite these areas when you final rivet the rib in place.

fueltanks16830mm0.jpg
 
Last edited:
Besides what has been mentioned already, I also tried a light coat of boelube on the inside of the skin to help ease the ribs into place. Don't forget to clean it off before proseal or primer, though.

Experiment -- you'll eventually find a way. Some scuffing of the inside of the skin may be unavoidable.
 
Here's how I did it

060820h.jpg

Van even featured my tip in the RVator... Hope this helps.
 
Last edited:
cnpeters said:
Jeff,
As I recall, I clecoed the upper rib to skin holes first (easy), then pushed the assembly down in the saddle (saddle centered near rib with enough room to place cleco) and started toward the back (rear) for the bottom holes. The first hole was a bitch -
The forward holes are the hardest. Cleco the most forward holes, top and bottom before sliding the skin into the cradle. The wide angle in the natural bend of the skin makes clecoing the forward holes easier.
 
I like all of the ideas above, I might just add that I found it easier once I removed the Blue Plastic coating. I ended up having to sand out a couple of scratches, but it was easier then getting the edge of a rib stuck in the plastic. Yes, it's very tight!
 
While its been a couple of years, I found that the parallel (all at once) approach was superior to the serial (one at a time) was much easier. I mean that before i put the skin in the jig, I put in rib 1 and clecoed only the first and second most forward holes, the did the same for rib 2...3...4 etc. Then I would go back and cleco hole 3 (top and bottom) and work my through each rib and hole until it was completely clecoed. I must that that after deburring and dimpling I had to be careful which cleco (Cleco brand vs Kwik-Loc) I used as the Cleco brand is just a hair thinner than the Kwik-loc's and will not hold as well in a dimpled hole.
 
Thanks for all the suggestions. I managed to get both sides done today, but my hands are going to be feeling the pain tomorrow! Pressing down on the ribs, twisting and pressing in on the cleco pliers, etc. in heck on the hands.

A key to making it easier (not easy, just easier) is to spend the extra time on rib preparation. The rib forming process really distorts the ribs and simple fluting doesn't get the holes straight and, if the holes aren't straight, it is a lot harder to get the clecos in. I have to admit I made use of a rubber mallet more than I would have liked.

But, everything turned out ok.

It was hot and humid today and basically miserable being out in the shop, and I am exhausted, but I have two structures that really look neat so even though I am in pain, it is a good pain. I guess only an airplane builder can understand that.....

Thanks for all the suggestions - they really helped.
 
the tanks were even harder!

Yeah, those tank ribs were a double bear to get in. Sheesh. I am a little upset at Van's for making ribs that need so much flutting. I was measuring like 1/2" of variance over the length of a rib. The end ribs are made of thicker metal, and they were pushing the limits of flutability.

But, those tasks are done! Of course, I am assume that when it is time to put it all back together for the final assembly that things won't be quite so hard, but I am sure it will still be a chore.

My final advice is:

1. Flute so as to get the holes to align as closely as possible. Well, MORE closely than you think is possible!
2. Use some lubricant (Boelube) on the ribs to help the metal slide better.
3. Start clecoing on the top, forward side and work your way back. Then, start on the bottom at the aft end, using your rivet punch-out tool to help bring the mating holes into rough alighment, and then start using clecos. At first, they won't close shut, but after you put in a few and as you push and prod the ribs, they will finally push the rib down into place and will clamp tight.
4. Be sure to keep the holes lined up straight. If the rib gets off center, it will be harder. Use a rubber mallet and small piece of wood to gently tap the rib into position to make the holes line up. Resist the temptation to beat the living daylights of the thing to make it fit!
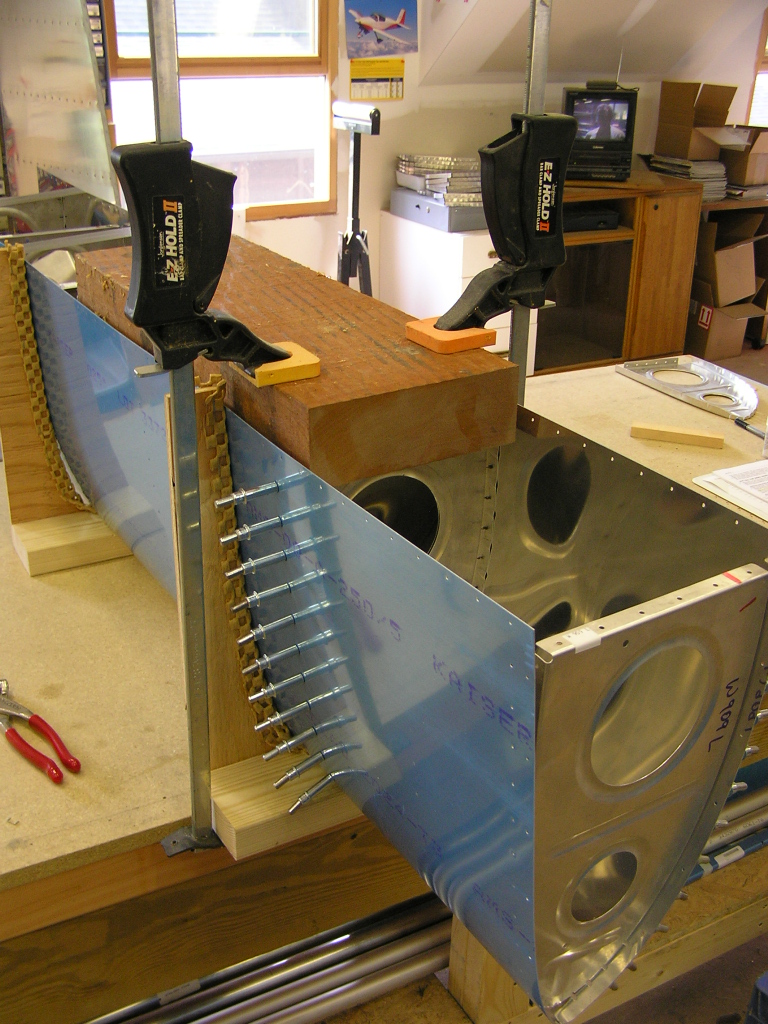
5. Don't get impatient and use too much brute force! If things get really hard, break out the clamps as pictured in a previous post. But, if you do that, be careful that you don't bend the flanges of the rib, and that you don't dent the skins.
 
Back
Top