What's new
Van's Air Force

Don't miss anything! Register now for full access to the definitive RV support community.

Alternate Air Problem

JSOliveira

Active Member
I just did my first annual condition inspection at 76 hours. While most went as expected, I did have one issue that was a surprise.

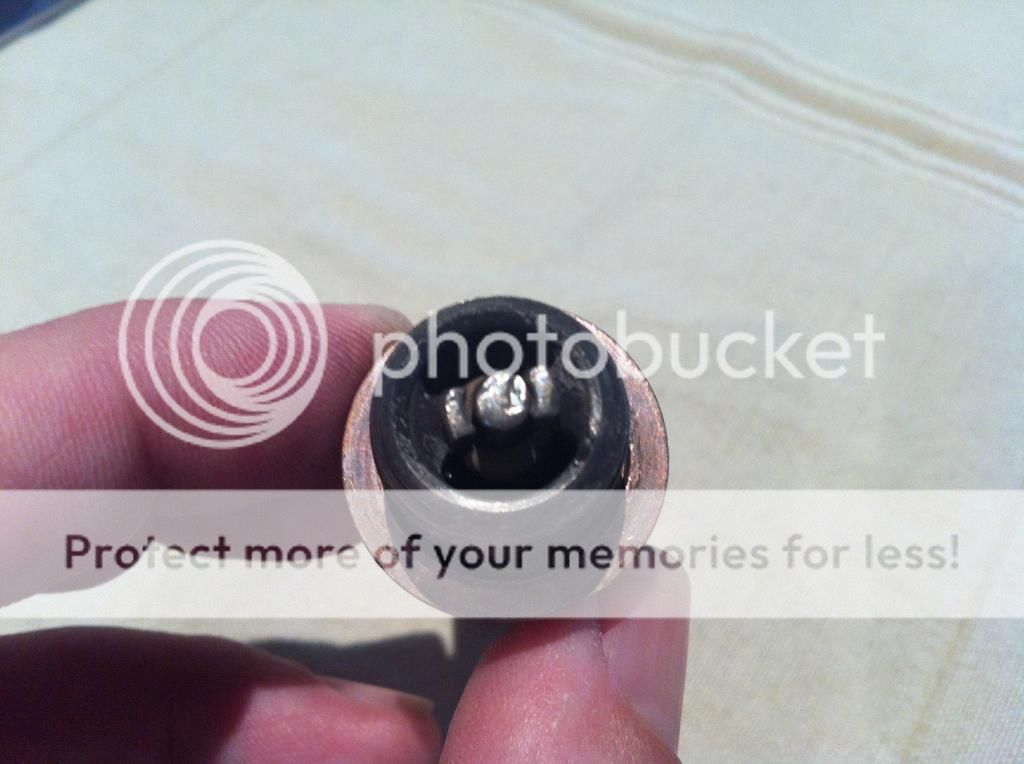
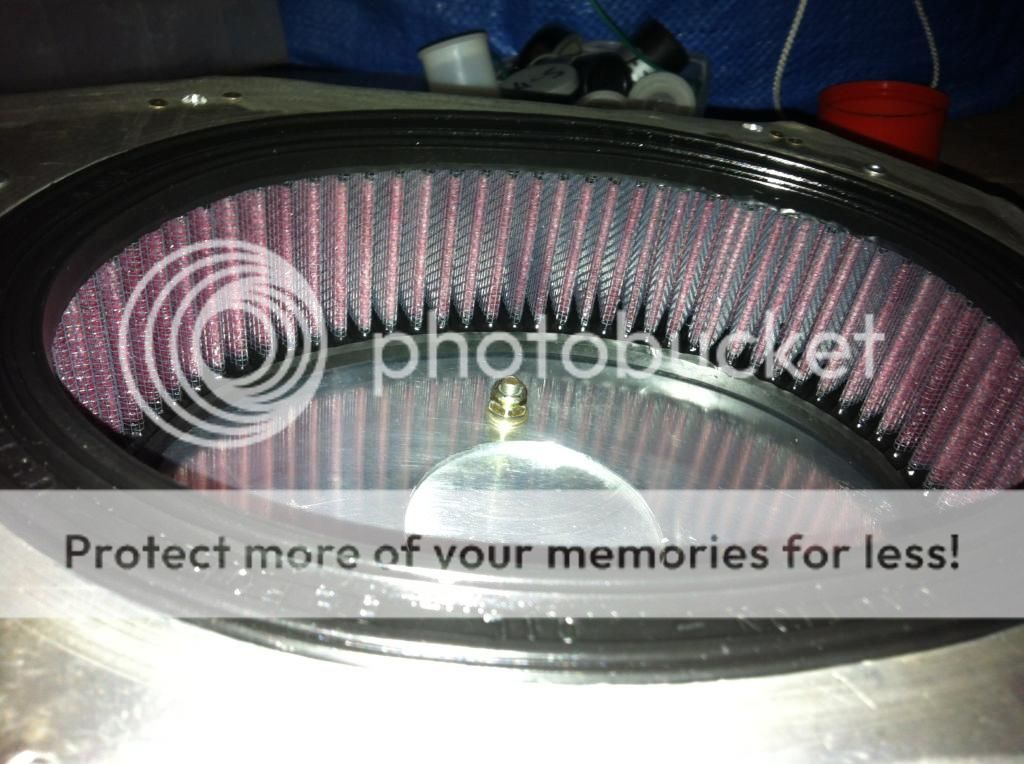
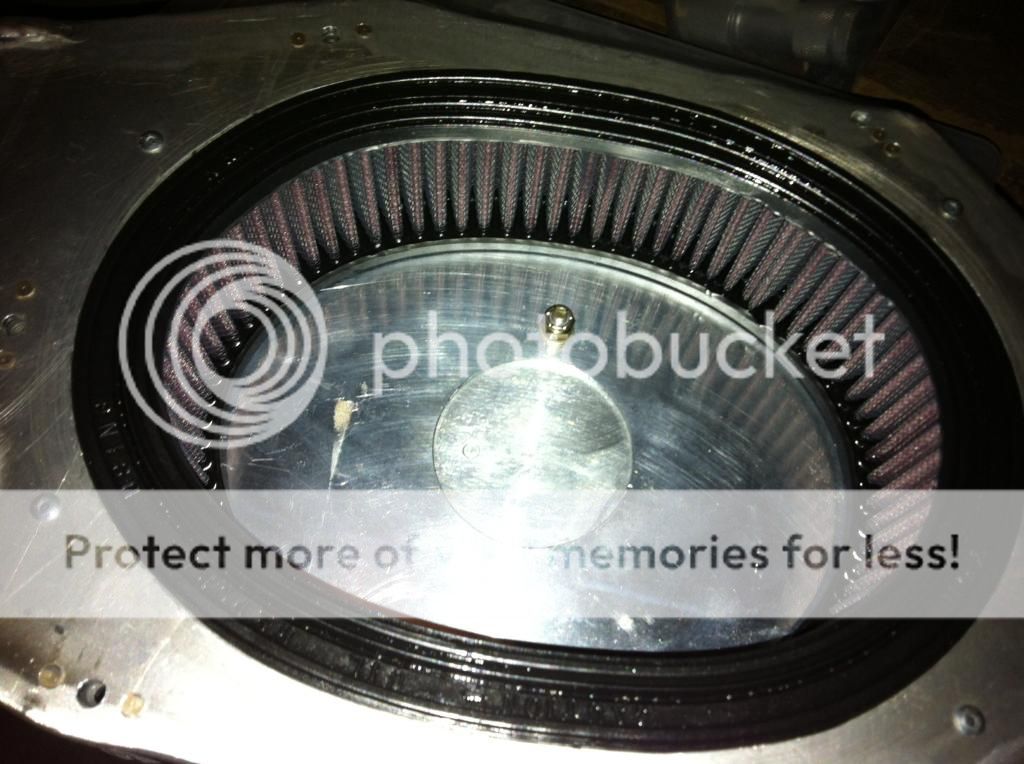
The ring for alternate air that is riveted to the air box on my updraft IO 320 had come loose. The blind rivets that hold the ring that mounts the door in place had all worn through the fiberglass lay up. Most were missing. The door ring was being held on by the sealant and the two solid rivets that hold the nut plate for the hinge.

The fix was to go to number 4 solid rivets, backed up by 1/8 inch inside diameter washers.

If the instructions specified some sort of washer back up, then I missed it. A better solution would be a back up aluminum ring on the inside of the opening.

So when you are looking under the cowl, check it out.
 
I don't think you are the first with this problem. I seem to recal adding the backing plate during the build of our RV-10 due to people having your problem back then.
 
This is a known issue... some engines have sucked up the rivets. Screws, washers and STEEL lock nuts, and red loctite seems to be the best solution. Since, I've seen no futher issues. :) Washers on the back of the rivet will not help, the will work their way thru.! AND.. do not put any kind of sealant in this area please. Seen two planes down do to this.
 
Last edited:
Thanks, that looks like good advice. I noticed from looking through the old threads that you had the same failure that I did and removed the alternate air door assembly, glassing over the opening. Are you still flying like that?

The repair I discribed used AN426AD4-5 driven rivets backed by 1/8 inch ID stainless washers. Are you concerned about those pulling through? There is a lot of material on the inside. Are you concerned with the head pulling through to the inside? The pulled rivets failed and pulled through toward the outside. None had failed inward. The FG had enlarged allowing them to pull through.

All sealant has been removed.

I did reinstall as described in my earlier post. Positive lock makes me feel much better. With fuel, oil and FG in the same area, no more rivets of any type for me in this area. :)
 
Last edited:
I'm not flying yet, but glassing in a flat plate with slider rails was relatively easy.
16A5E1F9-4479-4573-856F-AF7CB695DE5C-7993-0000046C0E446612.jpg
 
FAB issues

Be careful putting a plate inside the fab for a backplate. I did this with AN rivets and made the plate large enough that it couldn't be sucked into the engine. Since the outside door plate is steel the vibration caused the outside plate to shear the rivet shop heads off.

Now for the dangerous part! Once the rivet heads sheared the entire plate was sucked up and covered most of the intake in flight. Not good. A power adjustment to 1/2 throttle was enough for the plate to drop or at least corrected the air/fuel mixture enough to return to the airport.

My new aluminum plate inside the FAB is the size of the entire bottom bowl so in addition to the proseal and rivets the plate is much larger than the filter so it can't move up.

Andy
 
AND.. do not put any kind of sealant in this area please. Seen two planes down do to this.

Please explain your reasoning for this statement.

I figured that I would put a glob of ProSeal over the nut plate and the rivet heads to hold things in place if they should work loose.
Do you feel that this is a bad idea?

Thanks,
 
Sucked up fasteners...........ohh yeah
1298436835907_zps8a53e023.png


yep.....even hit these
photo-7_zps300c7987.jpg


Solution is to fabricate a aluminium airbox and do a proper job of it.

IMG_1047_zps910a2f39.jpg


IMG_1046_zpsca8a0cfd.jpg


IMG_1045_zps40fb610a.jpg


All is really good, the filter seals 100% top and bottom......

Vans NEED to change this and up the price of the kit by $200
 
Walt, you have a keen eye ;)

And that was the intent I can tell you....but out of hundreds of fasteners the day we assembled it, what do you think we could find? So a nyloc it was. :(
 
AND.. do not put any kind of sealant in this area please. Seen two planes down do to this.

Please explain your reasoning for this statement.

I figured that I would put a glob of ProSeal over the nut plate and the rivet heads to hold things in place if they should work loose.
Do you feel that this is a bad idea?

Thanks,


I'd like to hear the answer to this as well.

Sounds like either way, the stock FAB is a poor design and needs some sort of mod to withstand its environment.

Now if that means fabricating an all aluminum FAB, so be it, but does anyone have a simple solution? I'm currently working on mine.

Thanks
 
Here is what I did:

I cut a piece of 0.032 aluminum sheet large enough to cover the entire bottom of the fiberglass air box. I then "glued" it to the bottom of the air box with a layer of ProSeal. The aluminum plate sits on the inside of the air box so that the filter sits right on the aluminum sheet. I then went ahead and completed the alternate air system as per the directions in the supplied kit.

I am planning to use some ProSeal to put over the nut plate and rivet heads just in case they still break loose.
 
Back
Top