First I'd like to publicly thank Derrell Brooks for loaning me his hole punch all the way from Georgia to California for only the cost of shipping. Today I used it to punch all the round holes in my panel and gotta say that this tool is about as great as a tool can be. Perfect holes in about 30 seconds each with (almost) no chance of screw up. I'm attaching a pic of the tools I used and a quick outline of how I went about it.
First thing is to locate the intended centers of all instruments. This part took a long time but is really the only place things could get fouled up. Drill small pilot holes through each center and follow up with 5/8 inch unibit. Now comes the homemade part.
I made a little jig out of some scrap with a 5/8 inch hole in the middle and 1/8 inch holes where the mountings for instruments go. The dimensions were taken very carefully from actual parts, taking care that at least one of the long sides of the jig was parallel with a line through two of the mounting holes. Now just bolt the jig to the panel and use a square placed along the bottom edge of the panel to make sure it's vertical.
Next use a 1/8 inch bit in a hand drill to mark the panel for drilling later. It's not a great idea to drill through, since eventually this will tear up the jig. Repeat this for each instrument.
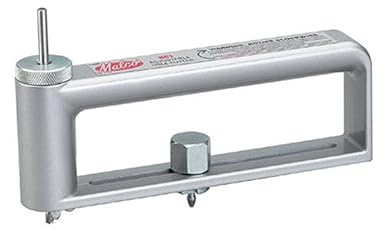
Next use the punch to poke all the holes. This thing works perfectly and allowed me to punch all the holes in about 10 minutes. Screw that fly-cutter B.S! The punch cuts the hole a hair on the small size so I used a little drum sander in my drill press to size them to perfection. A couple of laps around with a coarse grit followed by a clean up with a little scotch brite flap wheel and they were perfect. Making the cutout for the altimeter knob is still a pain, but what the heck.
Beg, borrow or steal one of these punches and you'll throw the fly-cutter in the trash (or at least the bottom of the tool drawer. Thanks again Derrell. I'll get it in the mail to ya this week.
Steve Zicree

First thing is to locate the intended centers of all instruments. This part took a long time but is really the only place things could get fouled up. Drill small pilot holes through each center and follow up with 5/8 inch unibit. Now comes the homemade part.
I made a little jig out of some scrap with a 5/8 inch hole in the middle and 1/8 inch holes where the mountings for instruments go. The dimensions were taken very carefully from actual parts, taking care that at least one of the long sides of the jig was parallel with a line through two of the mounting holes. Now just bolt the jig to the panel and use a square placed along the bottom edge of the panel to make sure it's vertical.
Next use a 1/8 inch bit in a hand drill to mark the panel for drilling later. It's not a great idea to drill through, since eventually this will tear up the jig. Repeat this for each instrument.
Next use the punch to poke all the holes. This thing works perfectly and allowed me to punch all the holes in about 10 minutes. Screw that fly-cutter B.S! The punch cuts the hole a hair on the small size so I used a little drum sander in my drill press to size them to perfection. A couple of laps around with a coarse grit followed by a clean up with a little scotch brite flap wheel and they were perfect. Making the cutout for the altimeter knob is still a pain, but what the heck.
Beg, borrow or steal one of these punches and you'll throw the fly-cutter in the trash (or at least the bottom of the tool drawer. Thanks again Derrell. I'll get it in the mail to ya this week.
Steve Zicree
Last edited:
") Mine were from the DIY store. The center drill wobbled like mad so a bit of skill was required.
Mine were from the DIY store. The center drill wobbled like mad so a bit of skill was required.