What's new
Van's Air Force

Don't miss anything! Register now for full access to the definitive RV support community.

Starting tail tomorrow....BUT problem

Jwputnam

Well Known Member
I have read til dead and watched MANY videos on building my new RV-9A, but just as I am about to start my build tomorrow (with inventory), it occurs to me (while examining the preview plans) that I need to be making allowances for navigation light wires, etc. NOWHERE have I seen instructions in this regard, unless I have glossed over them in my reading (hope not).

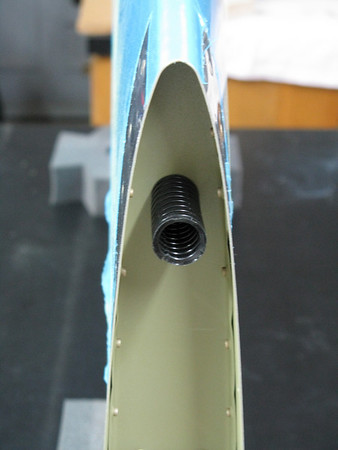
I am guessing that I am making a stupid assumption here and asking a really dumb question, but.................you can't go cutting holes for grommets in ribs for various optional systems AFTER the surfaces have been assembled, right? Soooooo...........how does one plan and prepare for this?

I MUST have missed this in my plan reading. (Go ahead....laugh.....I deserve it!)
 
Build on... you are a long way from any wiring or lights. :) It is also helps as a first time builder to visit builder websites for tricks, tips and cool new stuff on the market.
 
Last edited:
You can stop looking for Vans wire routing information within their standard plans, there are very few. :)
But fortunately, you are logged on to the most informative site for building and wiring Vans aircraft on the web!
You can start you search here.
 
Last edited:
But my point is that if I intend to put lights on the wing tips and tail, etc., I won't be able to run the wires AFTER I close up the surfaces. I will knock out tail pretty quickly probably. If I close it up, I'll never get wires to a strobe on top as an example.

What am I missing here? (Assembling the wings would be a better example.) Souldn't I be cutting holes in the ribs, deburring, etc. as I start out?
 
Easy to do Late in the build

Don't worry about it now, the provide some guidance in the finishing kit, but you can definitely do the entire tail kit without thinking about electrical at all. Before you put fuselage floors down you will want to consider if any wires are to go under the floors.
 
tail lights go in the bottom rudder cap, no holes necessary in ribs. The wing plans will show you locations for holes if you are installing lights. :)
 
As everybody else mentioned it really isn't worth worrying about yet. Even after you have buttoned up the HS and the VS you can still run wires where you need them. For example if you want a strobe on your rudder you will run the wires inside the lower fiberglass fairing. If you want a strobe/beacon on top of your VS then you can run the wires down the VS pretty easily.

I had to smile when I read your post because I (and probably most everybody here) had the same concerns when we first started out. However, Van's does a pretty good job of letting you know when you need to worry about things like wiring. When you get to the wings the plans will make reference to wiring and give you some ideas. There are a lot of blogs that you can reference as you build along to see how somebody else did something.

I found that it wasn't until I got to the later part of the fuselage that I had to really start being careful about doing something that might restrict my access.
 
But my point is that if I intend to put lights on the wing tips and tail, etc., I won't be able to run the wires AFTER I close up the surfaces. I will knock out tail pretty quickly probably. If I close it up, I'll never get wires to a strobe on top as an example.
/QUOTE]

Few people put a strobe on top of the vertical stabilizer. If you fly at night that light will reflect off the wings and drive you crazy. Most people install wingtip strobes. Better coverage and no visibility problems.
The only light you will need on the empennage is a rudder tail light, and that can be installed without drilling any ribs.
 
tail lights go in the bottom rudder cap, no holes necessary in ribs.

And, I suggest you mount it with nutplates/screws, not rivets.

That way you can not only get to the light/wiring, but you can easily replace the part if you happen to damage it.
 
Wiring

Welcome.
Running wire should not a problem after it's skinned. You could drill and install snap bushings and run a pull string but probably not necessary. By the time you get to wings you will have a good plan on where you want conduit and snap bushings. Vans plans do show placement for those in the wing ribs. Don't stress. Plenty of places for that later. As others mentioned, read some builder blogs on how others did it. Build on.
 
Thank you all. I built a Cobra a few years ago and I worried like heck before I started it. I read EVERYTHING and looked at all the builder's sites, but I was still constantly befuddled as I started a new section of that build. Now that I look back on it, I could build it today in my sleep!

Thanks for being kind enough to get me going!
 
And, I suggest you mount it with nutplates/screws, not rivets.

That way you can not only get to the light/wiring, but you can easily replace the part if you happen to damage it.

Nutplates work... a little tight fit though. We always pop an aluminum rivet and drive out the center pin. A little dab of proseal on the back side, then tap to a #4 screw. Works GREAT! ;)
 
Nutplates work... a little tight fit though. We always pop an aluminum rivet and drive out the center pin. A little dab of proseal on the back side, then tap to a #4 screw. Works GREAT! ;)

That is a great idea, I will remember that!! You never know when you will learn something new, and clever!

To the OP, you got some great advice here.
 
And, I suggest you mount it with nutplates/screws, not rivets.

That way you can not only get to the light/wiring, but you can easily replace the part if you happen to damage it.

Nutplates work... a little tight fit though. We always pop an aluminum rivet and drive out the center pin. A little dab of proseal on the back side, then tap to a #4 screw. Works GREAT! ;)
My first rudder bottom was riveted on but its replacement was put on with #6 screws and platenuts.

After you mount the tail to fuselage, you can drill a hole to pass the tail light wires through the aft bulkheads. Nothing to worry about now.

One suggestion, start on the Vertical Stabilizer and do the Horizontal Stabilizer second. There is more access for riveting on the VS, which makes it easier to develop your riveting skills on with less risk.

Good luck with your journey!
 
Hey Bill... I think Mike is referencing nutplates for mounting the rudder cap itself while I'm just mounting the light fixture itself with the tapped rivet method. :)
 
Hey Bill... I think Mike is referencing nutplates for mounting the rudder cap itself while I'm just mounting the light fixture itself with the tapped rivet method. :)

Got it!

Someone gave me a milled aluminum plate that was treaded for the two light holes. I epoxied that on the inside of the tail cut out and it made installing the light very simple.

One thing I don't recommend is fiberglassing in the caps on all the tail pieces. There are two reasons, first, I've seen a bunch of RV's with fine cracks where fiberglass buts up against the aluminum and second, there is good chance those parts will suffer hangar rash at some point and it makes it easier to replace them.
 
Hey Bill... I think Mike is referencing nutplates for mounting the rudder cap itself while I'm just mounting the light fixture itself with the tapped rivet method. :)

Yes, I was wondering as there is good width there, but it is still a great solution to have for tight areas. I am working on my FWF, but have stopped fitting the lower rudder cap to allow better fitting for tailwheel clearance. I can certainly use this on the aft light. I assume a countersunk rivet for flush fit.

haha - two Bills :)
 
Last edited:
I was in the same place when I started. I figured I might need to get a wire up to the top of the VS for something like a light or camera. Now with the plane done, the conduit is still there, but empty. When I started, there was no such thing as a GoPro! Especially one with wifi connection to your smart phone. :)

IMG_7107-M.jpg


If you want a place for wiring up the front of the VS, then enlarge the tooling holes and put some plastic conduit in place. Chances are you won't need it either!
 
It was briefly mentioned earlier, but I wanted to stress the benefit of looking at other builders sites. Those sites really helped me anticipate things ahead of time in my build. Even though I am on my second airplane, I still learned so much from these sites. I want to thank those who take the time to document their builds for others. The 7 and 9 are so similar, that either build site can be helpful.

Here are a few of my favorite sites:

Jason Beaver
http://www.jasonbeaver.com/rv7/

John Harrell
http://johnsrv7a.wordpress.com/

Matt Burch
http://www.n709mb.com/

Mike Bullock
http://www.rvplane.com/?categoryid=1

Bruce Hill
http://www.overthehills.com/RV-9A-Project/

Sid Mayeux
http://www.mykitlog.com/users/category.php?user=ScrollF4&project=879&category=0

If you study these sites, a lot of your questions will be answered.
 
One suggestion, start on the Vertical Stabilizer and do the Horizontal Stabilizer second. There is more access for riveting on the VS, which makes it easier to develop your riveting skills on with!
This is very good advice that floats out there from time to time. Its so obvious that I can't understand why Vans hasn't adopted it. There are, relatively, so many places where things can go wrong on the HS that aren't a problem on the VS. Successfully completing the VS would then give the builder the confidence to move on to the HS where the riveting, parts manufacturing, hole drilling, and edge distances are so much more challenging.
 
Rudder Tail Light

I made a rudder tail/strobe light mounting plate, but you can buy the same thing from Cleaveland. Easy to mount and easier to service in the future.
http://www.cleavelandtool.com/Tail-Light-Adapter-Ring/productinfo/RVTLR/#.VIvil5V0xaQ

I mounted my bottom rudder fiberglass cap with screws and platenuts. Time consuming but I was planning ahead for easier service in the future. Also mounted some platenuts on the rudder bottom close out rib so I could screw some cable tie mounts to it to secure the tail/strobe light wiring
http://www.panduit.com/wcs/Satellit...m_id=TA1S8-C&locale=en_us&pagename=PG_Wrapper
Or these
http://www.panduit.com/wcs/Satellit...m_id=TM2R6-C&locale=en_us&pagename=PG_Wrapper
 
Last edited:
This is very good advice that floats out there from time to time. Its so obvious that I can't understand why Vans hasn't adopted it. There are, relatively, so many places where things can go wrong on the HS that aren't a problem on the VS. Successfully completing the VS would then give the builder the confidence to move on to the HS where the riveting, parts manufacturing, hole drilling, and edge distances are so much more challenging.

Tail part sales was a real cash cow for Vans for a long time... I'm sure that the internet and builder websites has taken a big bite out of the profits now.
 
I have read til dead and watched MANY videos on building my new RV-9A, but just as I am about to start my build tomorrow (with inventory), it occurs to me (while examining the preview plans) that I need to be making allowances for navigation light wires, etc. NOWHERE have I seen instructions in this regard, unless I have glossed over them in my reading (hope not).

If you have not done so, get the Vans plans CD. It has ALL the plans, including the OP (optional plans) which include a basic wiring diagram. It will give you more to read, but may answer some of your questions about how everything goes together.
 
Back
Top