What's new
Van's Air Force

Don't miss anything! Register now for full access to the definitive RV support community.

Can I remove fuel sender/float without removing tank?

flyboy1963

Well Known Member
Had to start a new thread, the old ones seem DOA.

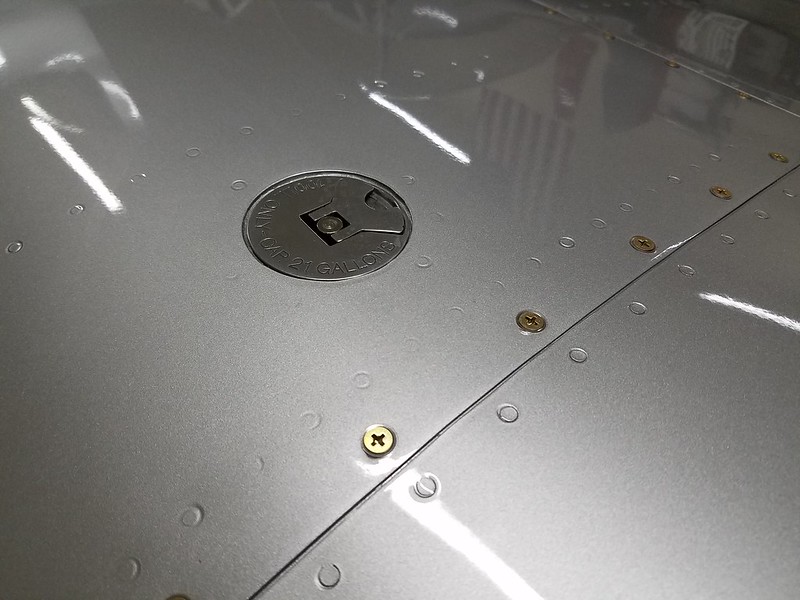
problem: RV-9 with left gauge not reading correctly.

there seem to be numerous references to pulling the fuel sender for inspection/repair, and the larger cover plate for various reasons ( leaks) ...but I can't see how you'd do this with the tank in place?

please educate me....can it be done, or not worth it, as I can see it being hard to re-install correctly, and seal etc.

thanks to all who read and/or advise!
 
Last edited:
easy-peasy

What Sam said!

After external troubleshooting of sender/gauge issues on a 9a, with no obvious cause, I removed the fuel tank cover plate to investigate further.

As it turns out, the sender float arm didn't have the final bend (which would have prevented rotation.) As Sam noted, I used a ratcheting drive in order to apply more force when removing the screws, and replaced with hex heads at final installation.

When I opened and inspected the opposite side sender, it was also un-bent. Second remove & replace was much faster than the first!

I have done this 3 times. It is a bit of a tight spot, but is still pretty easy. My plate was Pro-Sealed, so I used the heat gun to warm it up a bit prior to removing the screws. I also had failed to put in the lower arm bend. The last time I bent the lower arm and gave it a dab of pro-seal to help keep the float arm in place. Waited 48 hours and put it all back together. Now it has been working fine for the last year.
 
awesome!!!!!!....uh....I think????

thanks guys, that's all I needed to hear. I am expecting a sore neck already, but I've resealed some of the big cover screws that seeped a bit, and I will keep an eye out for the 'keeper' bend in the arm when I remove it!
.....now if only I could find someone with tiny hands to get in there for me!??!?? :rolleyes:
 
Once you have removed the plate, replace the screws with allen head screws. Much easier to take out and/or tighten.
 
thanks guys, that's all I needed to hear. I am expecting a sore neck already, but I've resealed some of the big cover screws that seeped a bit, and I will keep an eye out for the 'keeper' bend in the arm when I remove it!
.....now if only I could find someone with tiny hands to get in there for me!??!?? :rolleyes:
Trump? :):):) Sorry, took the bait and clearly afoul of forum rules.
 
I've got skinny hands and I found it easier to take the tank off than working in that confined space. Much less chance of making a mistake upon re-installation. I use Proseal for the mating surfaces so removal and the messy installation makes it mucho easier on the bench. I can have a tank off in less than 30 minutes.
 
welcome anytime!!!

I've got skinny hands ...... I can have a tank off in less than 30 minutes.

Well Anthony, what kind of beer do you like? I'll be at the field next weekend, and will have all the tools, and a full cooler, ready for you!
;).....you're ONLY 3,067 Rv miles away!!!! :D
 
I've got skinny hands and I found it easier to take the tank off than working in that confined space. Much less chance of making a mistake upon re-installation. I use Proseal for the mating surfaces so removal and the messy installation makes it mucho easier on the bench. I can have a tank off in less than 30 minutes.

Removing a tank might not be an ideal solution depending on how paint was applied. On my plane it would result in the tank looking like somebody had taken it off the plane (broken paint lines, paint removed from screws, etc...). :)
 
point taken.....but not a big deal

Thanks for that tip Sam, but I think all those screws had their paint chipped many years ago!...so they've been replaced with nice shiny new ones!
How does a person avoid that with any socket screw anyway? Phillips, Robertson, they just ain't made to hold paint, are they!?!?
.... best to avoid the wear n' tear of taking on and off if possible!:rolleyes:
 
Last edited:
Replacing Fuel Sending Unit Rubber Gasket

Just replaced the fuel float rubber gasket on my 2007 RV-9a with Flamemaster (Proseal). I purchased one pint of 1/2 hour work-life, which was way more than is required, so I will store it in the freezer until I need it again. It was a fairly easy process with the tank attached, especially if you have medium or smaller size hands, and use a 1/4 inch ratchet wrench to loosen and tighten the screws. The rubber gasket had swelled up and split resulting in a fairly severe seeping problem which caused dark blue staining under the tank and nasty fumes in the cabin. The cork gasket showed some blue around a few of the screws and the unused capacitive BNC connector showed some evidence of blue stains. I don't think that a BNC connector is leak tight and not sure why they are used in this application. I did not replace the cork gasket because it appeared to be good shape and was installed with proseal on both surfaces. Also, I didn't want to go through the process of removing the fuel line connected to the cover plate. The float resistance measured 30-240 ohms full range from full to empty. I coated both sealing surfaces with Proseal, and I also used 8-32 x 1/2 in. NAS 1096 hex head screws from Aircraft Spruce and covered the threads and hex head with proseal. Unfortunately while feeding the float through the hole in the cover I accidentally got a tiny amount of Proseal right on the bottom of the float. This was enough to attach the float to the tank floor and caused an empty reading with fuel in the tank. The rework was fairly easy and took much less time to break through the Proseal, remove the screws, remove the float, and re-seal it again. This time I used less proseal and was successful. I also replaced and covered the leaky screws on the accessory plate and the BNC connector with proseal. One hint, be sure to have plenty of vinyl gloves handy, the proseal rapidly travels everywhere.
 
Last edited:
I'm going to have to R&R the right Fuel Sender on my RV7 and going to try to do it on the plane.

Question: I see where you bend the end of the float wire and it goes in the hole of the sender arm and then snaps into the two plastic keepers, where are people putting the dab of proseal to secure that and make sure it doesn't come out of the sender end? Or am I misreading it and you should put a dab where the wire wraps around the float end?

Second question: I ordered the Quart and the instructions for curing say: 3-7 days to cure and will remain soft for up to 30 days in cool weather...be patient.

So if I put a DAB on the arms, how long should I wait before I can put it in the tank and then how long should I wait before I fill it with fuel? And, yeah, I know my hanger is probably around 30-50? this time of year. :-(

Thanks in advance.
(PS: I had pulled this tank off 2 years ago to fix the access panel that was linking and did the SB on the fuel nut, wish I would have just thrown a new sending unit at it when I had it off.)
 
I'm in the same boat with regards to the left sending unit. Has anyone just removed the sender WITHOUT removing the inspection plate with it?
 
I'm in the same boat with regards to the left sending unit. Has anyone just removed the sender WITHOUT removing the inspection plate with it?

Yes - it will come out without removing the access plate. Locate the sender for correct orientation and mark the cover plate and the access plate with a match line. Practice putting it in before you goop it up with pro seal. It takes a bit of awkward movements.

Proseal cure times vary a lot depending on temperature. At low temps, like below 50, it may never cure, or certainly will take a long time.
As soon as it forms a skin coat, it is impervious to fuel. However, until it is fully cured, it will not have its full mechanical strength.
 
Thanks for that tip Sam, but I think all those screws had their paint chipped many years ago!...so they've been replaced with nice shiny new ones!
How does a person avoid that with any socket screw anyway? Phillips, Robertson, they just ain't made to hold paint, are they!?!?
.... best to avoid the wear n' tear of taking on and off if possible!:rolleyes:

I just repainted my RV after 12 years and 2200 hours of abuse. Knowing that I would remove the tanks at some point I painted the tanks separately from the wings and used shiny new screws and flush washers to install. Sure enough, I have had to remove a tank already to chase a leak!

 
Back
Top