What's new
Van's Air Force

Don't miss anything! Register now for full access to the definitive RV support community.

Question for someone running the older Electroair system

Jbon

Active Member
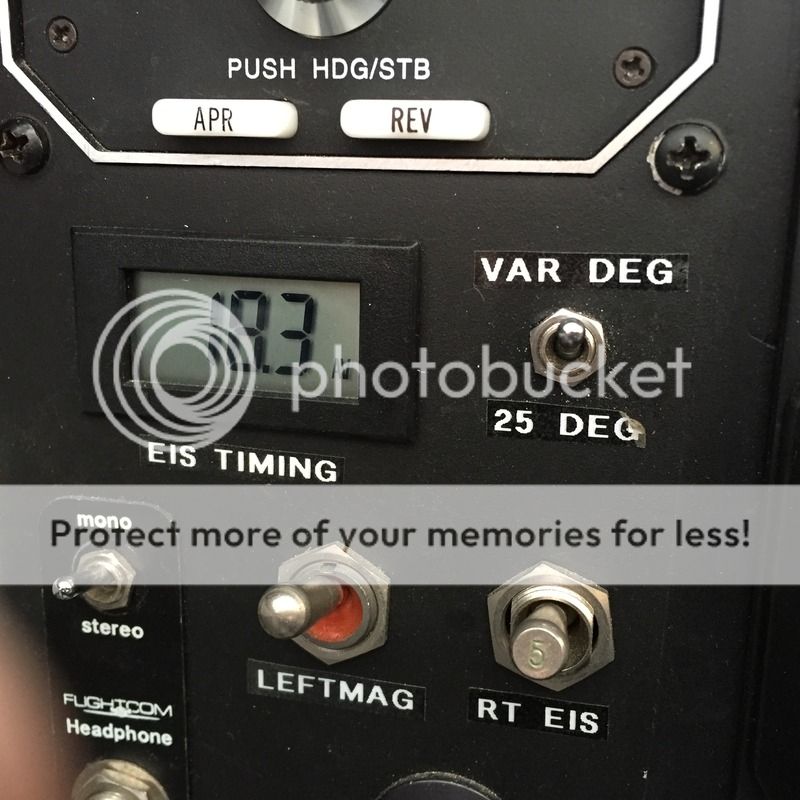
Hi, I just bought an RV6A which has a Jeff Rose Electroair setup in place of the right mag. The builder installed the Advance Meter with a toggle switch so you can turn the unit off to the default 25 degrees.

it doesn't seem to be working the way I would expect. The manual says that the unit is set at zero advance when RPM's are below 500 (to aid starting). Given this, I would expect to see "0.0" on the meter with the engine stopped. I'm seeing about 18.7. With the engine running at idle, the value is about 21. If I turn the switch off, I see 18.9. I should see 25 with the switch off. Correct?

My RPM drop when switching to the EIS during runup is about 175, and the engine runs a bit rough. I'm going to check the lower plugs, but I'm still thinking these meter readings are not correct and that there's a problem with the unit. If so, would the problem be in the module? Can these older units be repaired?

Thanks for the help.

IMG_4979%202.jpg
 
Yes, it's working correctly. The engine starts at 0 degs and goes up to 18 degs at idle. This is set by one of the trim pots under the MAP box. The digital meter reads the mV from the advance pin on the main unit. It's showing the advance that it's set to when it starts. The Electro timing has nothing to do with the timing set at installation, you must install the timing pin and set the MTH to 0 degs (if you're using an MTH). You should see the advance go as high as 40 degs at high altitudes in cruise settings. Check your plugs and wires, make sure that are good. You can set the plug gaps to .036 or more with this system.

Don't forget that the magneto is set at 25 degs, so if the EI is under 25 degs it's less advanced than the mag and will the RPM drop will be larger. Watch the EI meter and see what it's showing you.
 
Last edited:
Hi, Thanks for the reply. I guess I'm still confused. The "18" reading is with the engine shut down. When I start, I'm seeing around 21 at idle.

Besides that, when I tun the switch off, I would expect to see the unit default to 25, but I'm seeing a little over 18.

One thing I'm questioning is the integrity of the MAP hose to the module. Would a leaky line explain what I'm seeing? Still though, I don't understand why turning the unit off doesn't cause the advance to default to 25.

Thanks for helping me understand this.
 
did you try calling ElectroAir?

I had excellent service from Michael at ElectroAir, even thought I bought a quite old 'gold' unit. Why not try them?
My 'kit' ( box full of stuff) came with 2 voltmeters that could be wired to show quite different things. Perhaps yours is showing voltage, not advance degrees, or some such thing; there are troubleshooting and install manuals you can download from their site, if that's helpful info?

Michael Kobylik <[email protected]> if this is still current.
 
You are not reading the advance, you are reading the millivolts coming from the advance pin on the EI. They are 2 different things, this is a preset advance. This is what the EI will advance to after the engine starts, but the advance is RPM based and then MAP based. If you go the ElectroAir web page you can see the programmed RPM advance curve. At the slowest idle the advance will start at the preset 18 degs (or whatever you set it to). To test the MAP sensor for leaks just remove the hose and blow or suck into it and see if it holds pressure. If you connect a timing light to the engine you can see the advance working with RPM or MAP. These are great high energy systems.

BTW, what the 25 deg / Var switch is doing is shorting out the MAP sensor wire to the EI. What this does is stop the MAP advance so the total advance will stop at the peak of the RPM advance.
 
Last edited:
I have a gold unit. At last condition inspection I noticed the MP hose was loose, it failed just inside the box. It was easy to replace. I have basic engine instruments, didn't really notice any change before or after.
 
I have a gold unit. At last condition inspection I noticed the MP hose was loose, it failed just inside the box. It was easy to replace. I have basic engine instruments, didn't really notice any change before or after.
Some good information here. My manifold pressure line is leaking, and I'm going to replace it today. You said that your MP hose failed just inside the box. Mine has a metal nipple where the hose attaches. My box seems to be riveted closed. Are you saying that there is a hose inside the box? If so, that's probably toast as well.
 
The rubber line going into the MAP box is swedged on a brass fitting. Here's how to change it. Cut the rubber hose at the end of the brass fitting and take some small tools and remove all the rubber out of the fitting, do not damage the brass fitting. Go to the auto parts store and get some 1/8" silicon hose and some RTV. Start to slide the new hose into the fitting, just a 1/4" or so, then apply a small amount of RTV around the hose and slide it all the way down, make sure there's some RTV all around the fitting. Let it dry and it will work like new and the silicon won't rot like the old rubber did.
 
The rubber line going into the MAP box is swedged on a brass fitting. Here's how to change it. . . .

Someone had already changed this line, butting the new hose to the nipple and holding it in place with a piece of heat shrink. No wonder it was leaking! I added some RTV and a hose clamp, and it seems to be tight. Now at idle I'm seeing 27.7 on the meter instead of 20.7, so there's that.

I pulled the lower plugs and found them in fine shape. The ignition leads are 18 years old, but with only 200 + hours on them. They look good, but because of their age, I'm thinking of replacing them.

1800 RPM run-up is still showing a 150 RPM drop (vs 50 on the mag), but from what FasGlas is saying the different advance values account for that. Next, I'm going to take it up to altitude and see how the advance is working.

Thanks!
 
Ignitions Leads

Remember those blue ignition leads have a fine carbon center wire. When you bend them over onto the outside of the blue insulation before crimping the plug connector, it is very possible to break the carbon center. Be very careful to make an easy loop when you bend it over (I use an awl to bend around). Then use a meter to make sure you have good connectivity end to end.
 
Remember those blue ignition leads have a fine carbon center wire. . .

This may be something to look into. I know that Electroair specifies 5000 ohms leads. Mine are orange Autolite which assume are the correct type. When I pulled the leads yesterday, I was kind of surprised to see that the connection was simply a coil spring stuck into the core of the lead. Seemed kind of sketchy to me, but I guess they work. I am using aircraft plugs, and the top leads are the aviation grade blue kind which I'm more familiar with.
 
The ignition wires used on the EI must be hi performance resistance wire. The ones that came with the Jeff Rose were Taylor racing wires. The spring at the end has a long pin that pushes up the center of the wire core. You must be very careful that you get the pin pushed straight up the center. I've seen the pin pushed at a slight angle and get pushed into the insulation and arc to the plug ground. When you put the wire down the center of the aviation plug make sure the spring is pushing against the base of the plug inside, don't over tighten clamp nut, no need to. If you're using aviation plugs use ones that can be gapped to .036 ~ .040, like BY's.
 
Use MSD IGNITON caps

Like Stu says, it is very easy to break that wire if you wrap it around. I use the MSD ignition ends. The center wire is clamped straight out of the center of the wire between two ears, much like a molex connector.

Vic
 
I let this topic creep into another thread in the engine section (sorry about that).

The Electroair manual says it is essential to use a spark plug wire with not less than 5000 ohms per foot. Yesterday, I measured the resistance and length of each lead. I found the following:

#1 - 3.75' measured 21k ohms. Should be 18.75
#2 - 3.25' measured 10.3k ohms. Should be 16.25
#3 - 2.7' measured 7.95k ohms. Should be 13.5
#4 - 3.1' measured 10.8k ohms. Should be 15.5

So, it looks like my problem may be in the wires. I'll be ordering a new set from Electroair and hope that solves my problem.
 
Just to update my progress on solving my ignition issue. . . I replaced the plug wires, but unfortunately, it didn't make any difference in my run up RPM issue. I still show a drop of just over 150 RPM vs 50 when running on the mag (accompanied with a slight bit of roughness).

Next, I swapped out the upper/lower plugs to try and isolate a bad spark plug. Still no change.

Now, I'm suspecting either timing, or some problem with the module or coils themselves.

I'm trying to work out the safest way to view the timing marks with a timing light, while staying as far as possible from the propeller! Any ideas?

The manual talks about making this timing adjustment by turning a pot in the module. I can't see a way to open the module, as it is riveted shut. Here's a photo. Anyone know if the module is open on the bottom so I can access the pot by by unscrewing it from the mounting bracket?
FullSizeRender%204.jpg

I just did this for my EI setup. I put the engine at TDC, via the dot on the starter. I bent up a pointer device from -6 tubing and clamped it to the forward baffling lined up to the TDC mark on the back of the flywheel. Use a sharpie to make a the TDC line dark enough to see. If your timing light is bright enough, you should have no problem seeing it. This puts you behind the prop with good visibility. I did mine on a cloudy day; Not sure I would have been able to do it on a sunny day.

Larry
 
There's no adjustments in the MAP module. To do adjustments on the ignition you remove the MAP module with the two screws and the plate under the MAP module covers the adjustment pots. The manual has instructions on setting the 18 degs with a DVM. The coils are OEM GM coils, can be gotten at any autoparts store or fleebay. They just plug in, the two bolts hold them on the ignition.

For timing, you use the flywheel makes on the back of the flywheel. You can attach a pointer to your baffling, goes straight down the case seam, that's TDC. Use a little white paint on the 3 marks on the flywheel and you're in business.

Start it up, let it idle and see where you're timing sits. Should be around 18 degs at idle then will increase as the RPM's go up. The advance curve it on the Electroair site and in your manual. This curve is without the MAP sensor.
 
I just did this for my EI setup. I put the engine at TDC, via the dot on the starter. I bent up a pointer device from -6 tubing and clamped it to the forward baffling lined up to the TDC mark on the back of the flywheel. Use a sharpie to make a the TDC line dark enough to see. If your timing light is bright enough, you should have no problem seeing it. This puts you behind the prop with good visibility. I did mine on a cloudy day; Not sure I would have been able to do it on a sunny day.

Larry
Thanks Larry. Sounds like a good plan. Think I'll try it at dusk for better viz.
 
There's no adjustments in the MAP module. To do adjustments on the ignition you remove the MAP module with the two screws and the plate under the MAP module covers the adjustment pots. The manual has instructions on setting the 18 degs with a DVM. The coils are OEM GM coils, can be gotten at any autoparts store or fleebay. They just plug in, the two bolts hold them on the ignition.

For timing, you use the flywheel makes on the back of the flywheel. You can attach a pointer to your baffling, goes straight down the case seam, that's TDC. Use a little white paint on the 3 marks on the flywheel and you're in business.

Start it up, let it idle and see where you're timing sits. Should be around 18 degs at idle then will increase as the RPM's go up. The advance curve it on the Electroair site and in your manual. This curve is without the MAP sensor.
Ah, okay I get it now. Hopefully I'll get out to the airport this weekend and check it out. I'll report back.

Thanks!
 
Okay, I got out to the airport to day to troubleshoot further. I checked the EIS timing and found it to be right on the money.

So. . . What say you? Do you think the problem is likely the coil(s). FasGlas, I believe you said these coil towers are stock automotive parts. Do you happen to know what they came off of, or a part number? If they're Delco coils, do you recommend buying OEM, or is whatever Autozone sells okay.

To refresh your memory, the issue is a 150+ RPM drop when running on the EIS, coupled with some roughness. I've replaced leads, and swapped the plugs. Neither helped.

Thanks!
 
from the horse's mouth

....so, what does ElectroAir say about all this?
A pretty good resource one would think.
Mike Kobylik was the tech/sales support guy at the time, and answered my emails quickly and at length to help me with my 10-year old used purchase!

http://www.electroair.net/
 
I've been in touch with them. They seemed pretty sure the new leads were going to solve the problem. I'm going to put a call in to them tomorrow, but I'm interested to hear what the experts here think. Especially if I can obtain replacement coils locally.
 
I'm out of town for a few days but I can give you a quick answer on the coils. I replaced mine with MSD coils (Red) for a bit more kick. You can get those at any hot rod store or online. They are just GM coils, look in the MSD catalog and match them up. There's only one that fits so no worries. Or take your coil to any auto parts store and they will match it up with the OEM equivalent. They don't cost much.
 
http://https://www.msdperformance.com/products/coils/performance_street/parts/8224
I'm out of town for a few days but I can give you a quick answer on the coils. I replaced mine with MSD coils (Red) for a bit more kick. You can get those at any hot rod store or online. They are just GM coils, look in the MSD catalog and match them up. There's only one that fits so no worries. Or take your coil to any auto parts store and they will match it up with the OEM equivalent. They don't cost much.
Thanks. Is this the MSD coil I need?

https://www.msdperformance.com/products/coils/performance_street/parts/8224

It's the only 2 tower coil I see. Is this a direct replacement?
 
Well, I spoke to Electroair this morning. They don't think the problem is the coil. They think a lean carb mixture is the culprit. It's true that I've had an issue with lean mixture. . . not getting the prescribed 35-45 RPM drop at shutdown. I wouldn't have thought a lean mixture would manifest itself in a high RPM drop/roughness at run up, but apparently, because of the higher energy spark, and its longer duration, they have seen it cause exactly this problem.

though I believe my idle mixture is a bit lean, it shouldn't have an affect on things at run up RPM.
 
Last edited:
I can share a recent experience with such a mag drop:
I sent mags & harness in to Magneto services for the 500 hour inspection, and the harness was condemned and replaced. The new (Teledyne) harness had a flaw, it went to ground inside the lead to the top plug on #6. (replaced under warranty)
Here is the share part;
Start and run the engine on the EI only, then after a minute or so, shut it down and check the cylinder heads for heat (by hand). In my case, the #6 cylinder was ambient temperature, the other 5 were toasty warm.
You may have a single cylinder that is not firing. Once you identify which one, then the component search is easier.
 
Coil?

If it's a coil you will have 2 cold cylinders. If only one cylinder is cold, then it is the wire.

Vic
 
You can also put your timing light on each plug wire. The strobe only flashes if the plug fires. You can also see intermitency this way. If the strobe loses it's rhythmic flash (best to point at TDC mark to observe this) you are intermittently not firing the plug. Bad wires and plugs sometimes present this way before complete failure. When the resistance gets right to the edge of being too high to fire, they often fire intermittently.

Larry
 
The HPV-1 ignition. (Jeff Rose for Aircraft)

I haven't checked into the forums for a long while and just saw this.

But.... Everything you need to understand the Old Jeff Rose system is in this manual. It was an Electromotive HPV-1 system.

The voltages are reading from the unit, and you can get under the MAP sensor and check your settings on the ignition with a volt meter.

Checking spark you can spin the mag timing wheel and spark will jump between the posts. I would not recommend that you get near those because coil fired amperage is dangerous. (There, I said my safety piece.)


Check the link below for information.
http://electromotive.com/wp-content/uploads/2015/05/hpv1.pdf
 
Back
Top